Named Motor Positions
Motors in WinTopas4 application are controlled in steps, units, or discrete positions. Named positions (see Figure 37) are useful to quickly move a motor to a defined point. They are also used to make sure the motor stays in the correct position at specific wavelengths or interactions.
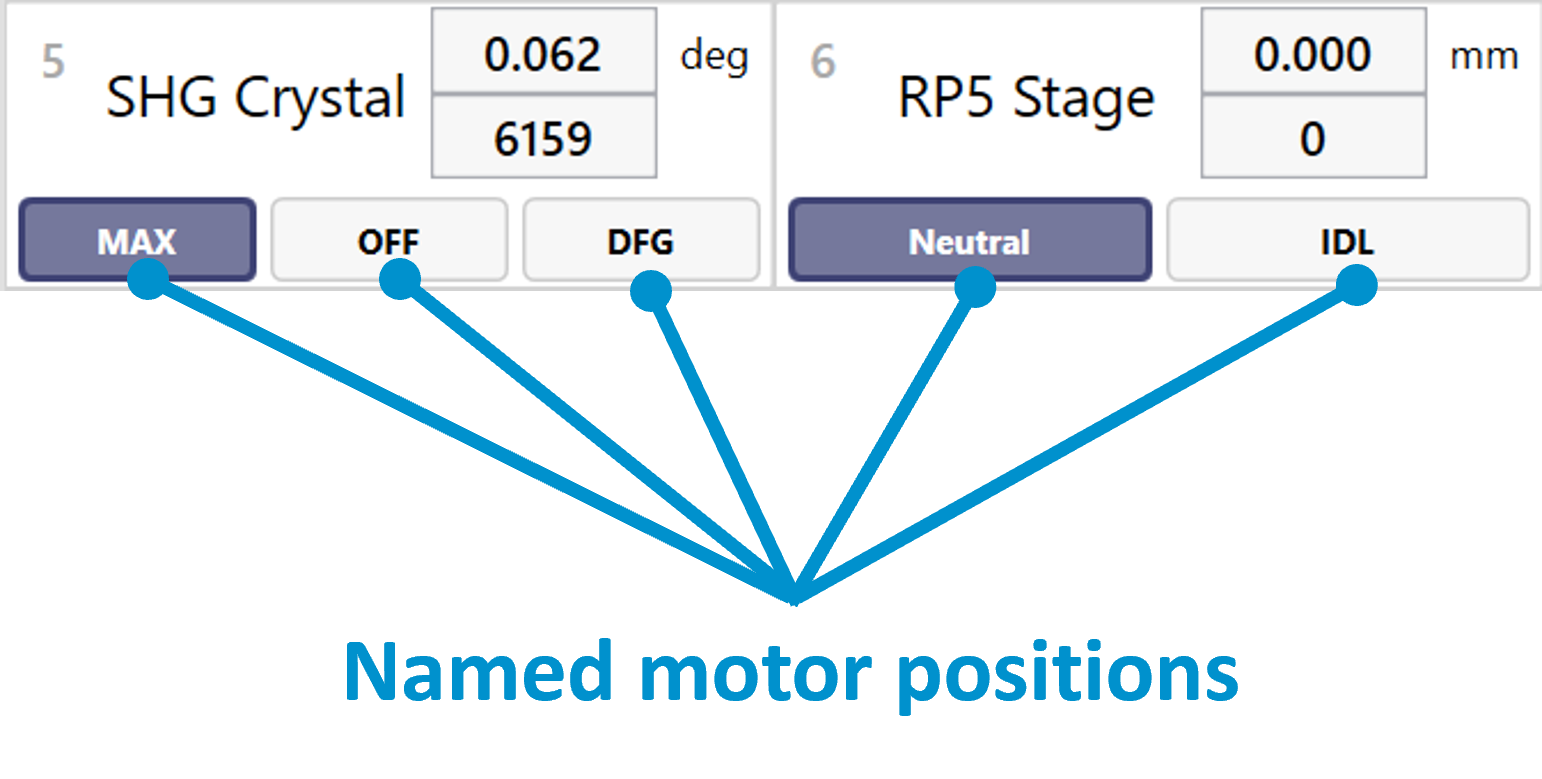
Figure 37. Named motor positions in WinTopas4
Modifying positions
To modify named positions advanced user password “1600” must be entered. A new view will appear with a list of motors and their positions. The existing positions can be easily modified by entering their name and value. The changes will take effect immediately after “Apply” button is clicked. Adding a new position works the same way and a new indicator will appear (see Figure 38).
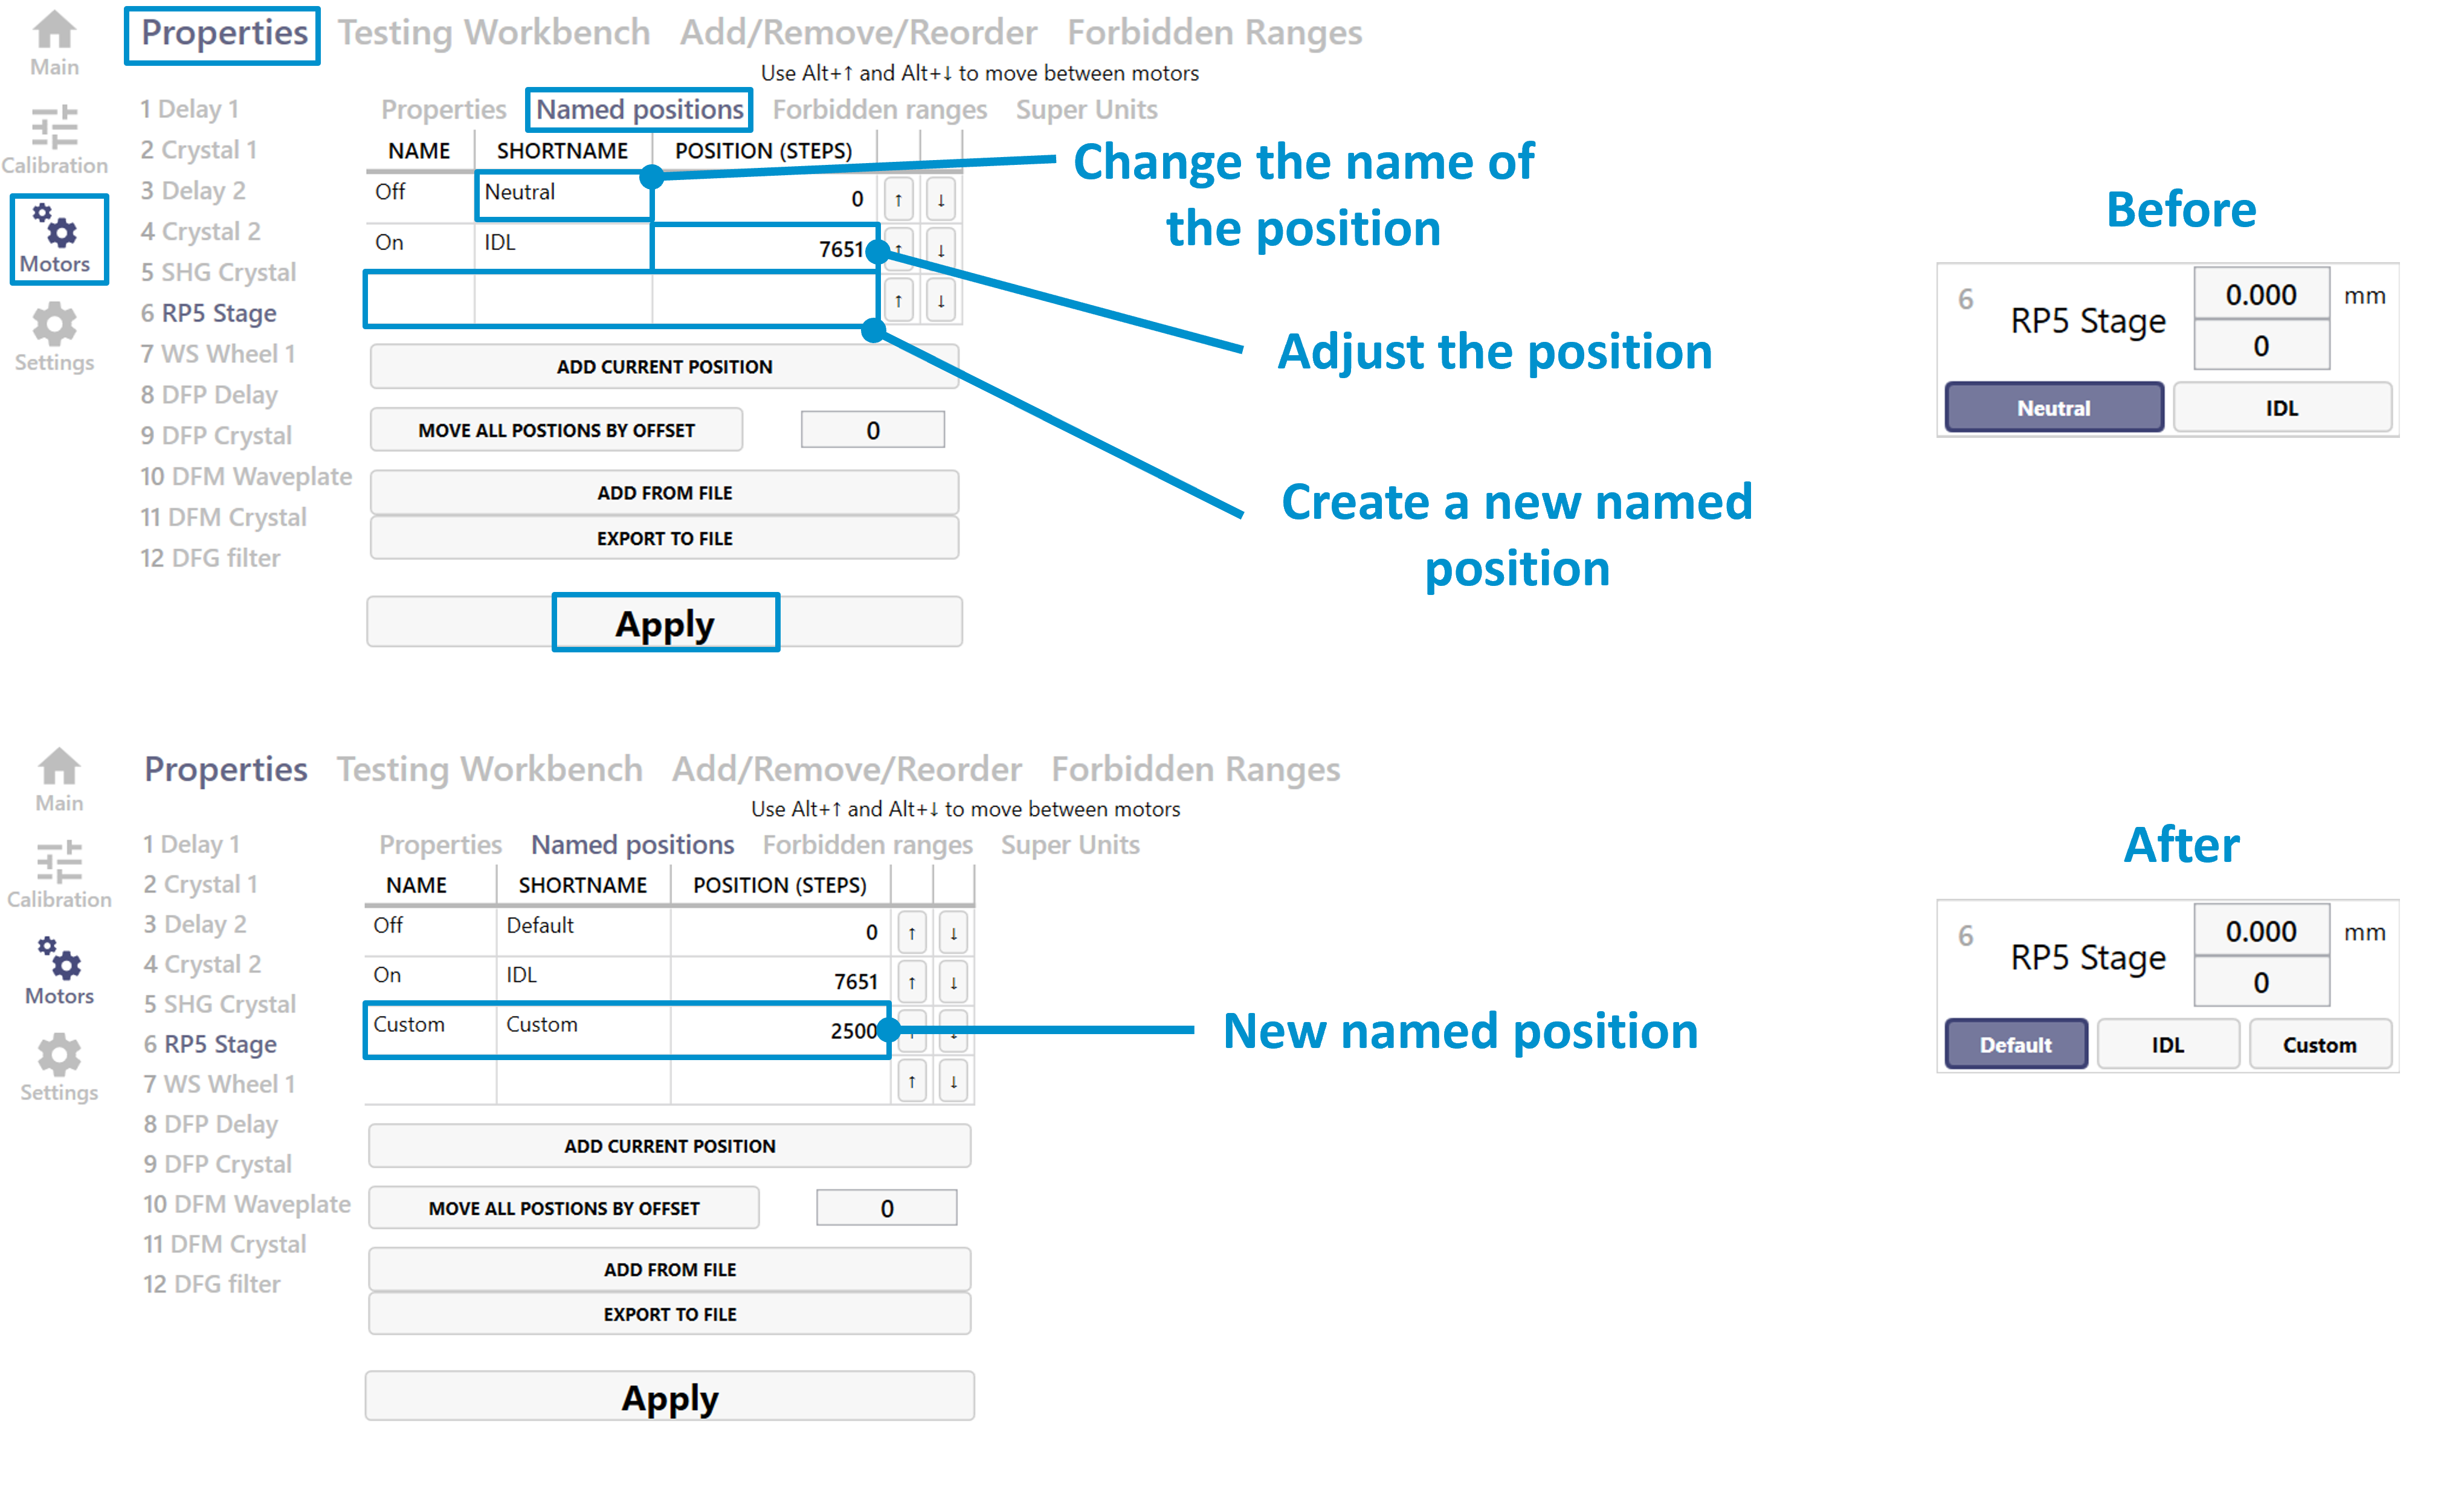
Figure 38. Modifying named motor positions in WinTopas4
You can also change the default position by right clicking the indicator as shown in Figure 39 and clicking “Save current position as this”.
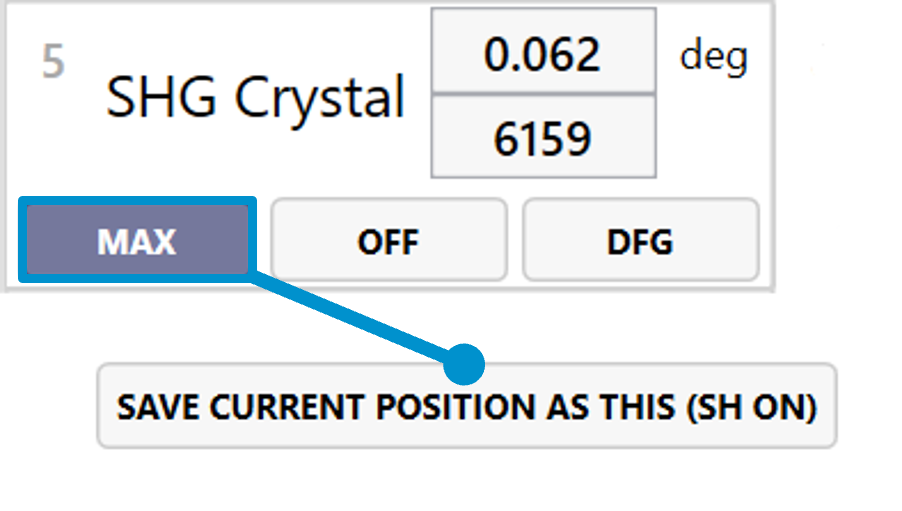
Figure 39. Changing the default position in WinTopas4
Assigning to calibration
Named positions are often used in the device calibration too. If the motor is not directly used in the tuning curves, it can be assigned a default position. These settings can be modified in “Default motor positions” table. Here we can edit, delete, or add new elements with specified motors and their named positions. “Interaction filter” function allows specifying interactions to be used with this position. The “asterisk” means that the position will be applied to all the interactions. In this example the signal will be using a custom position, while the default position is assigned to all the other interaction (see Figure 40).
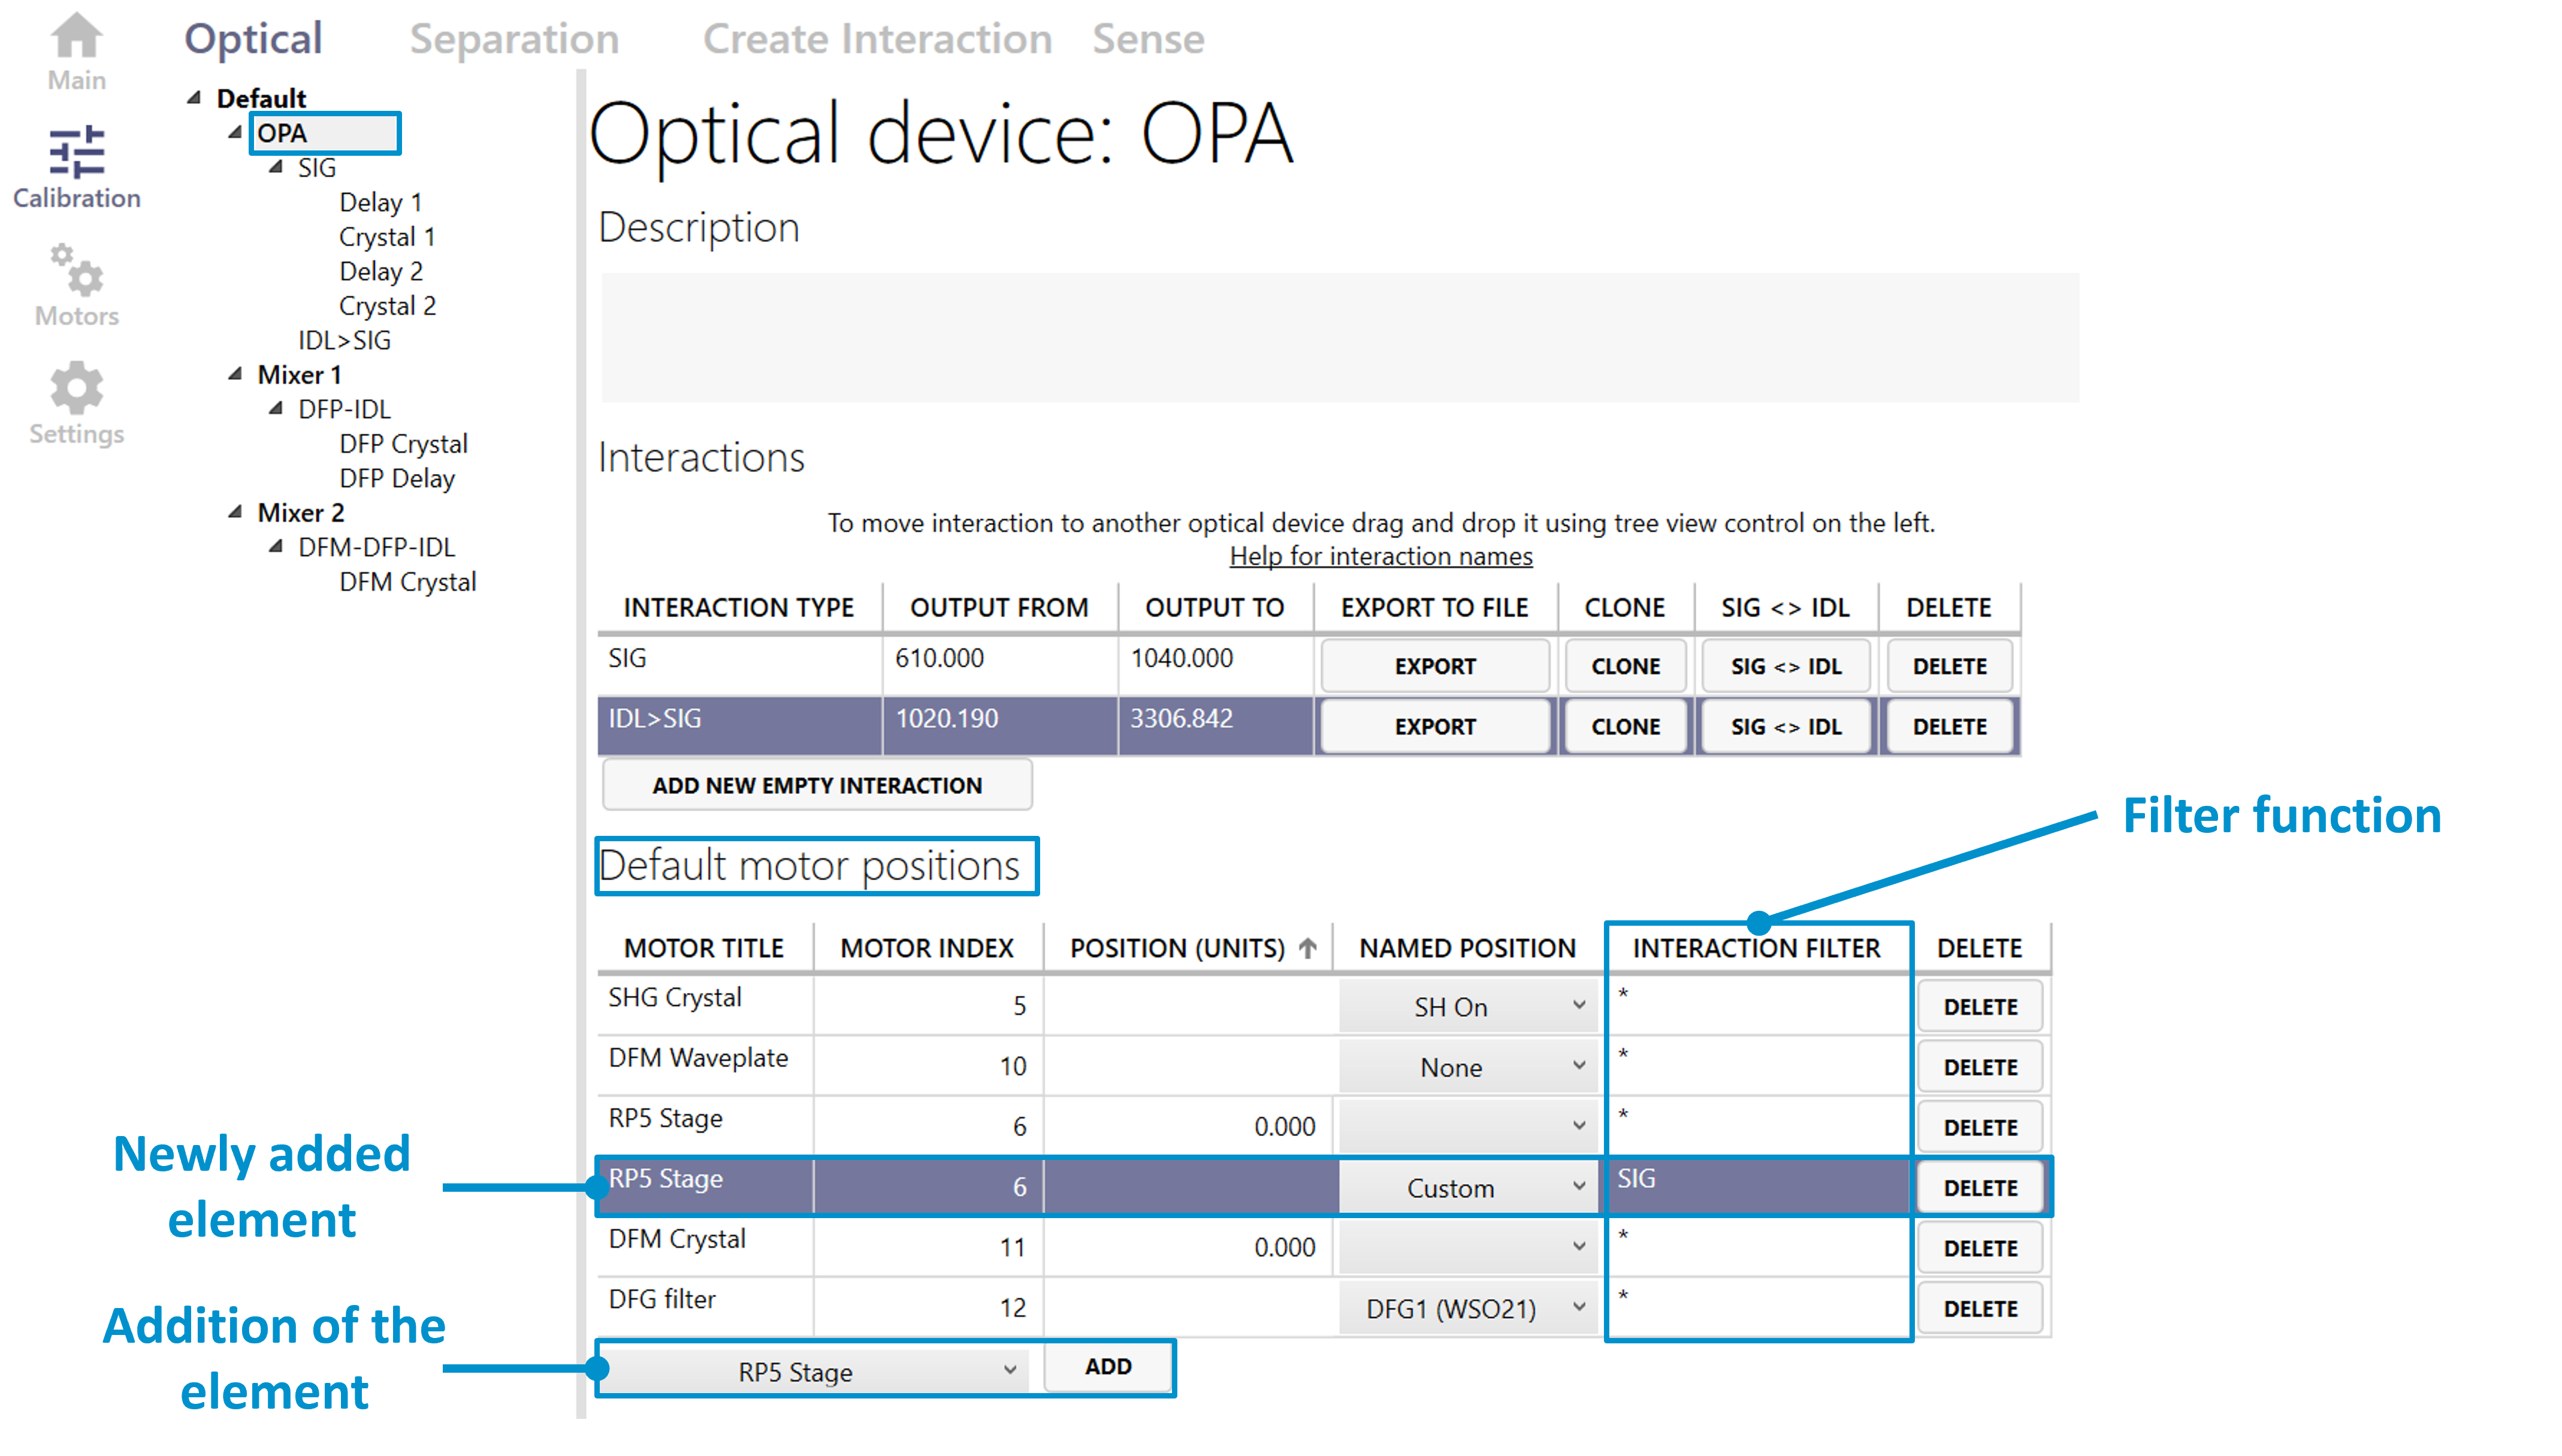
Figure 40. Assigning default positions in WinTopas4
Named positions in separation configuration
Named positions are also used in “Separation” configuration. Here they can be assigned not only to different interactions but also to wavelength regions (see Figure 41).
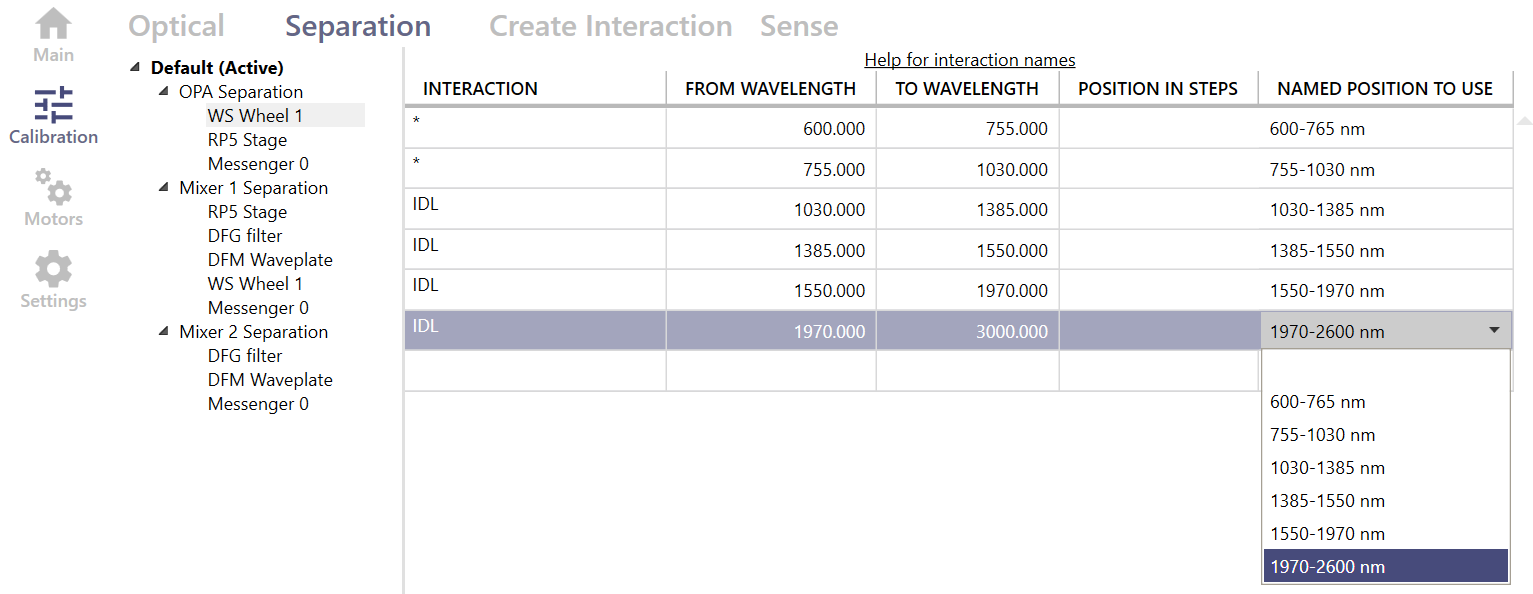
Figure 40. Assigning named positions to wavelength regions in WinTopas4