Calibration features
Besides curve tuning the calibration menu also offers other calibration features. It allows extending the wavelength range of the curve, respacing the points, correcting the wavelengths and more.
Wavelength correction
There can be cases when output wavelengths of the OPA differ slightly from the real measured values. Re-tuning all the curves can be a tedious task for small corrections. In such cases wavelength correction function can be used (see Figure 27). We can fix the mis match by measuring the real output wavelength of each point with the spectrometer and entering in the measured values. This task could also be automated with Light Conversion spectrum measurement tool called “spectraLight”. After this procedure the points in the curve will be respaced, interpolated and the output wavelength should correspond well with the software.
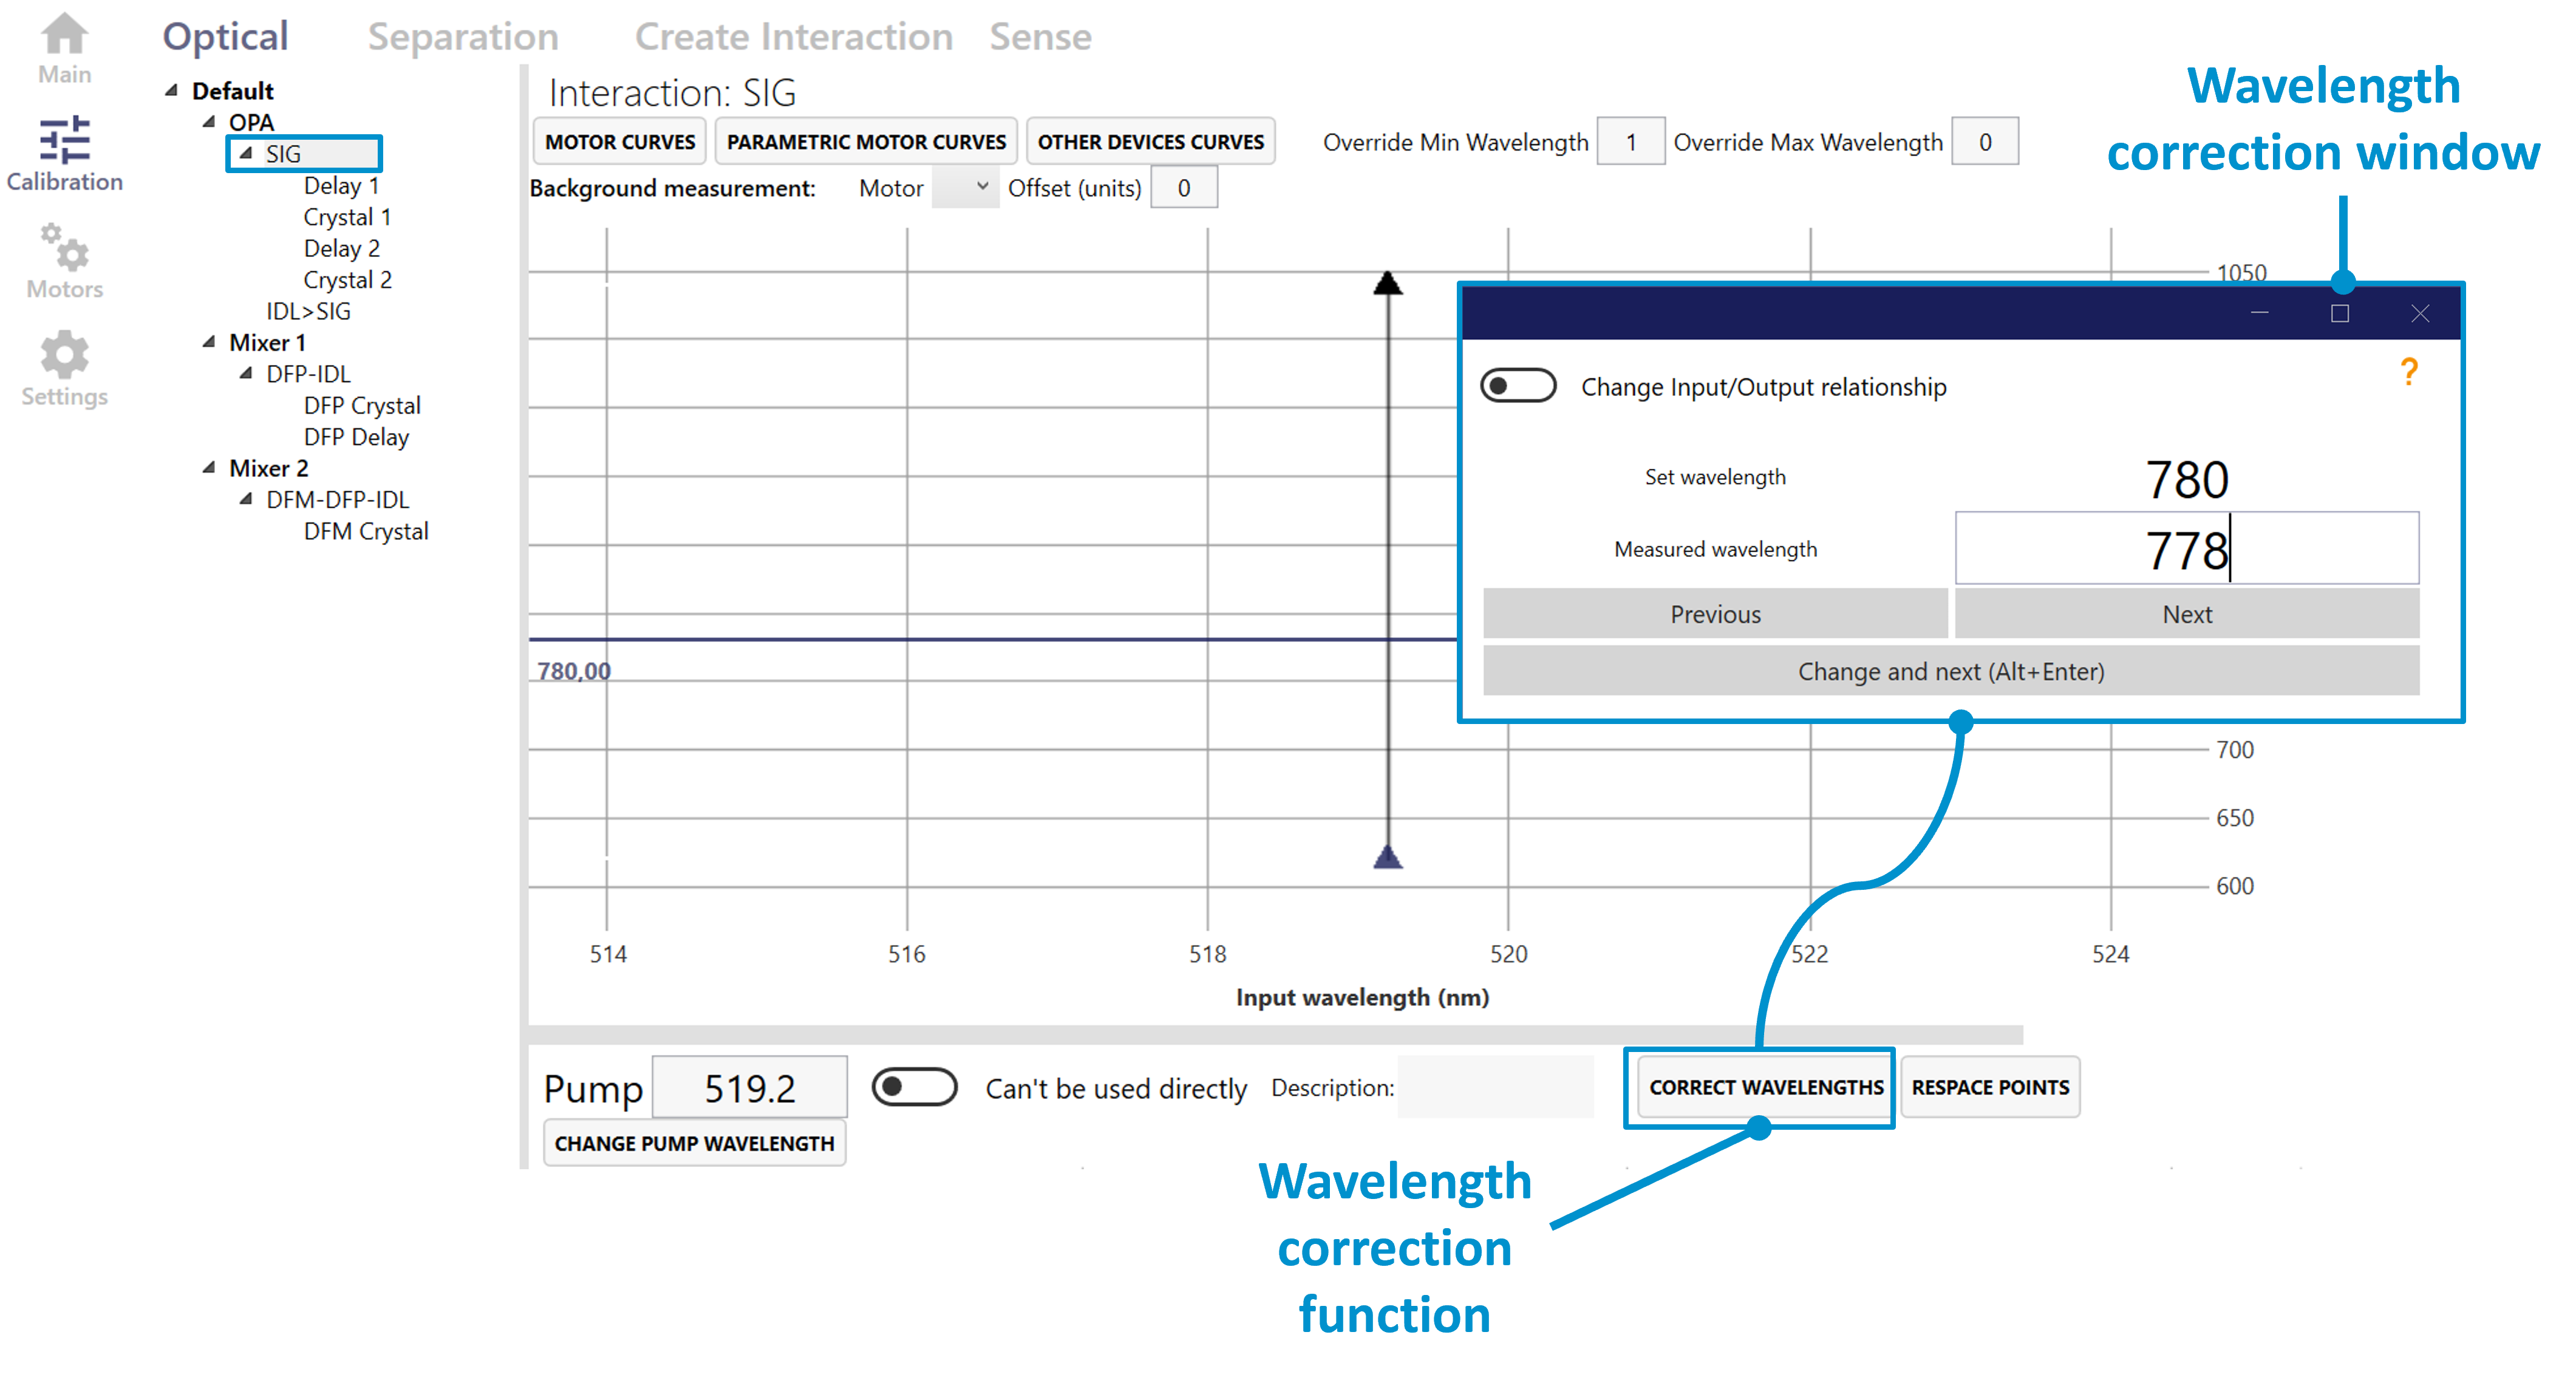
Figure 27. Wavelength correction function in WinTopas4.
Respacing the points
The spacing between the calibration points in the curve can be changed by clicking the “respace points” button (see Figure 28). This will create or delete the points in the curve to make the spacing equal to the set value. In this example we respace the calibration points at 10 nm intervals (see Figure 29).
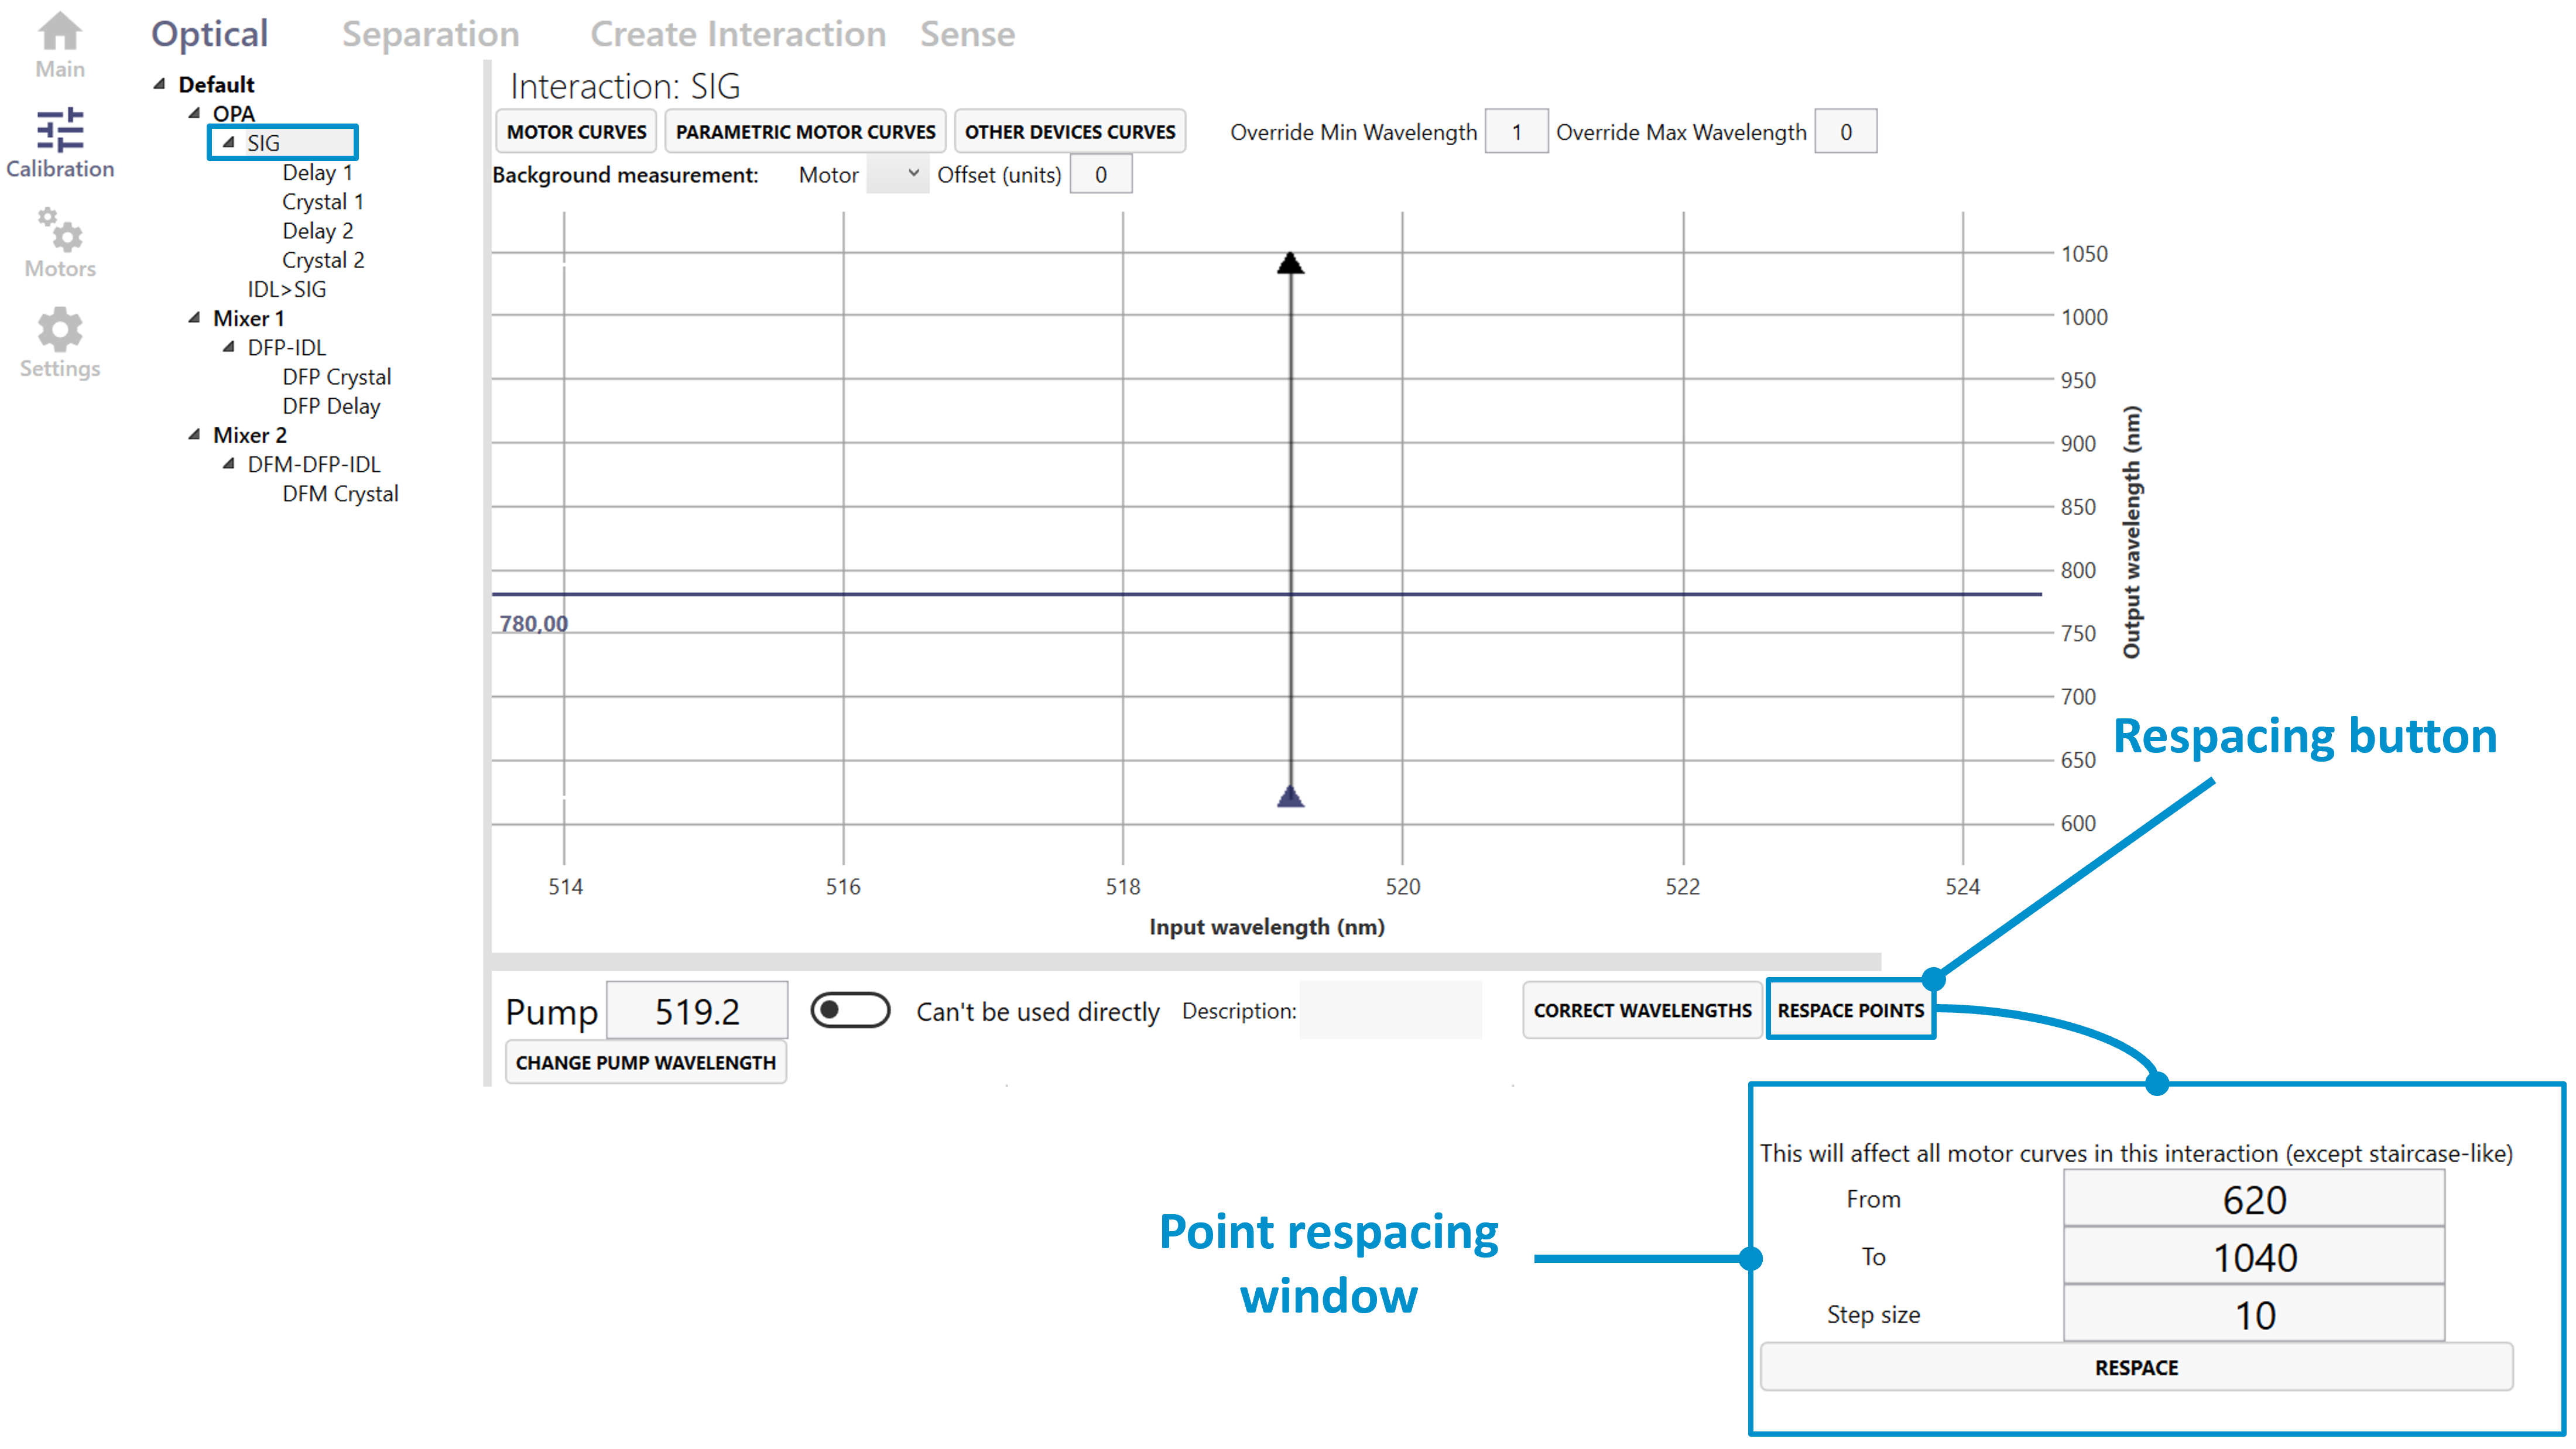
Figure 28. Respace points function in WinTopas4.
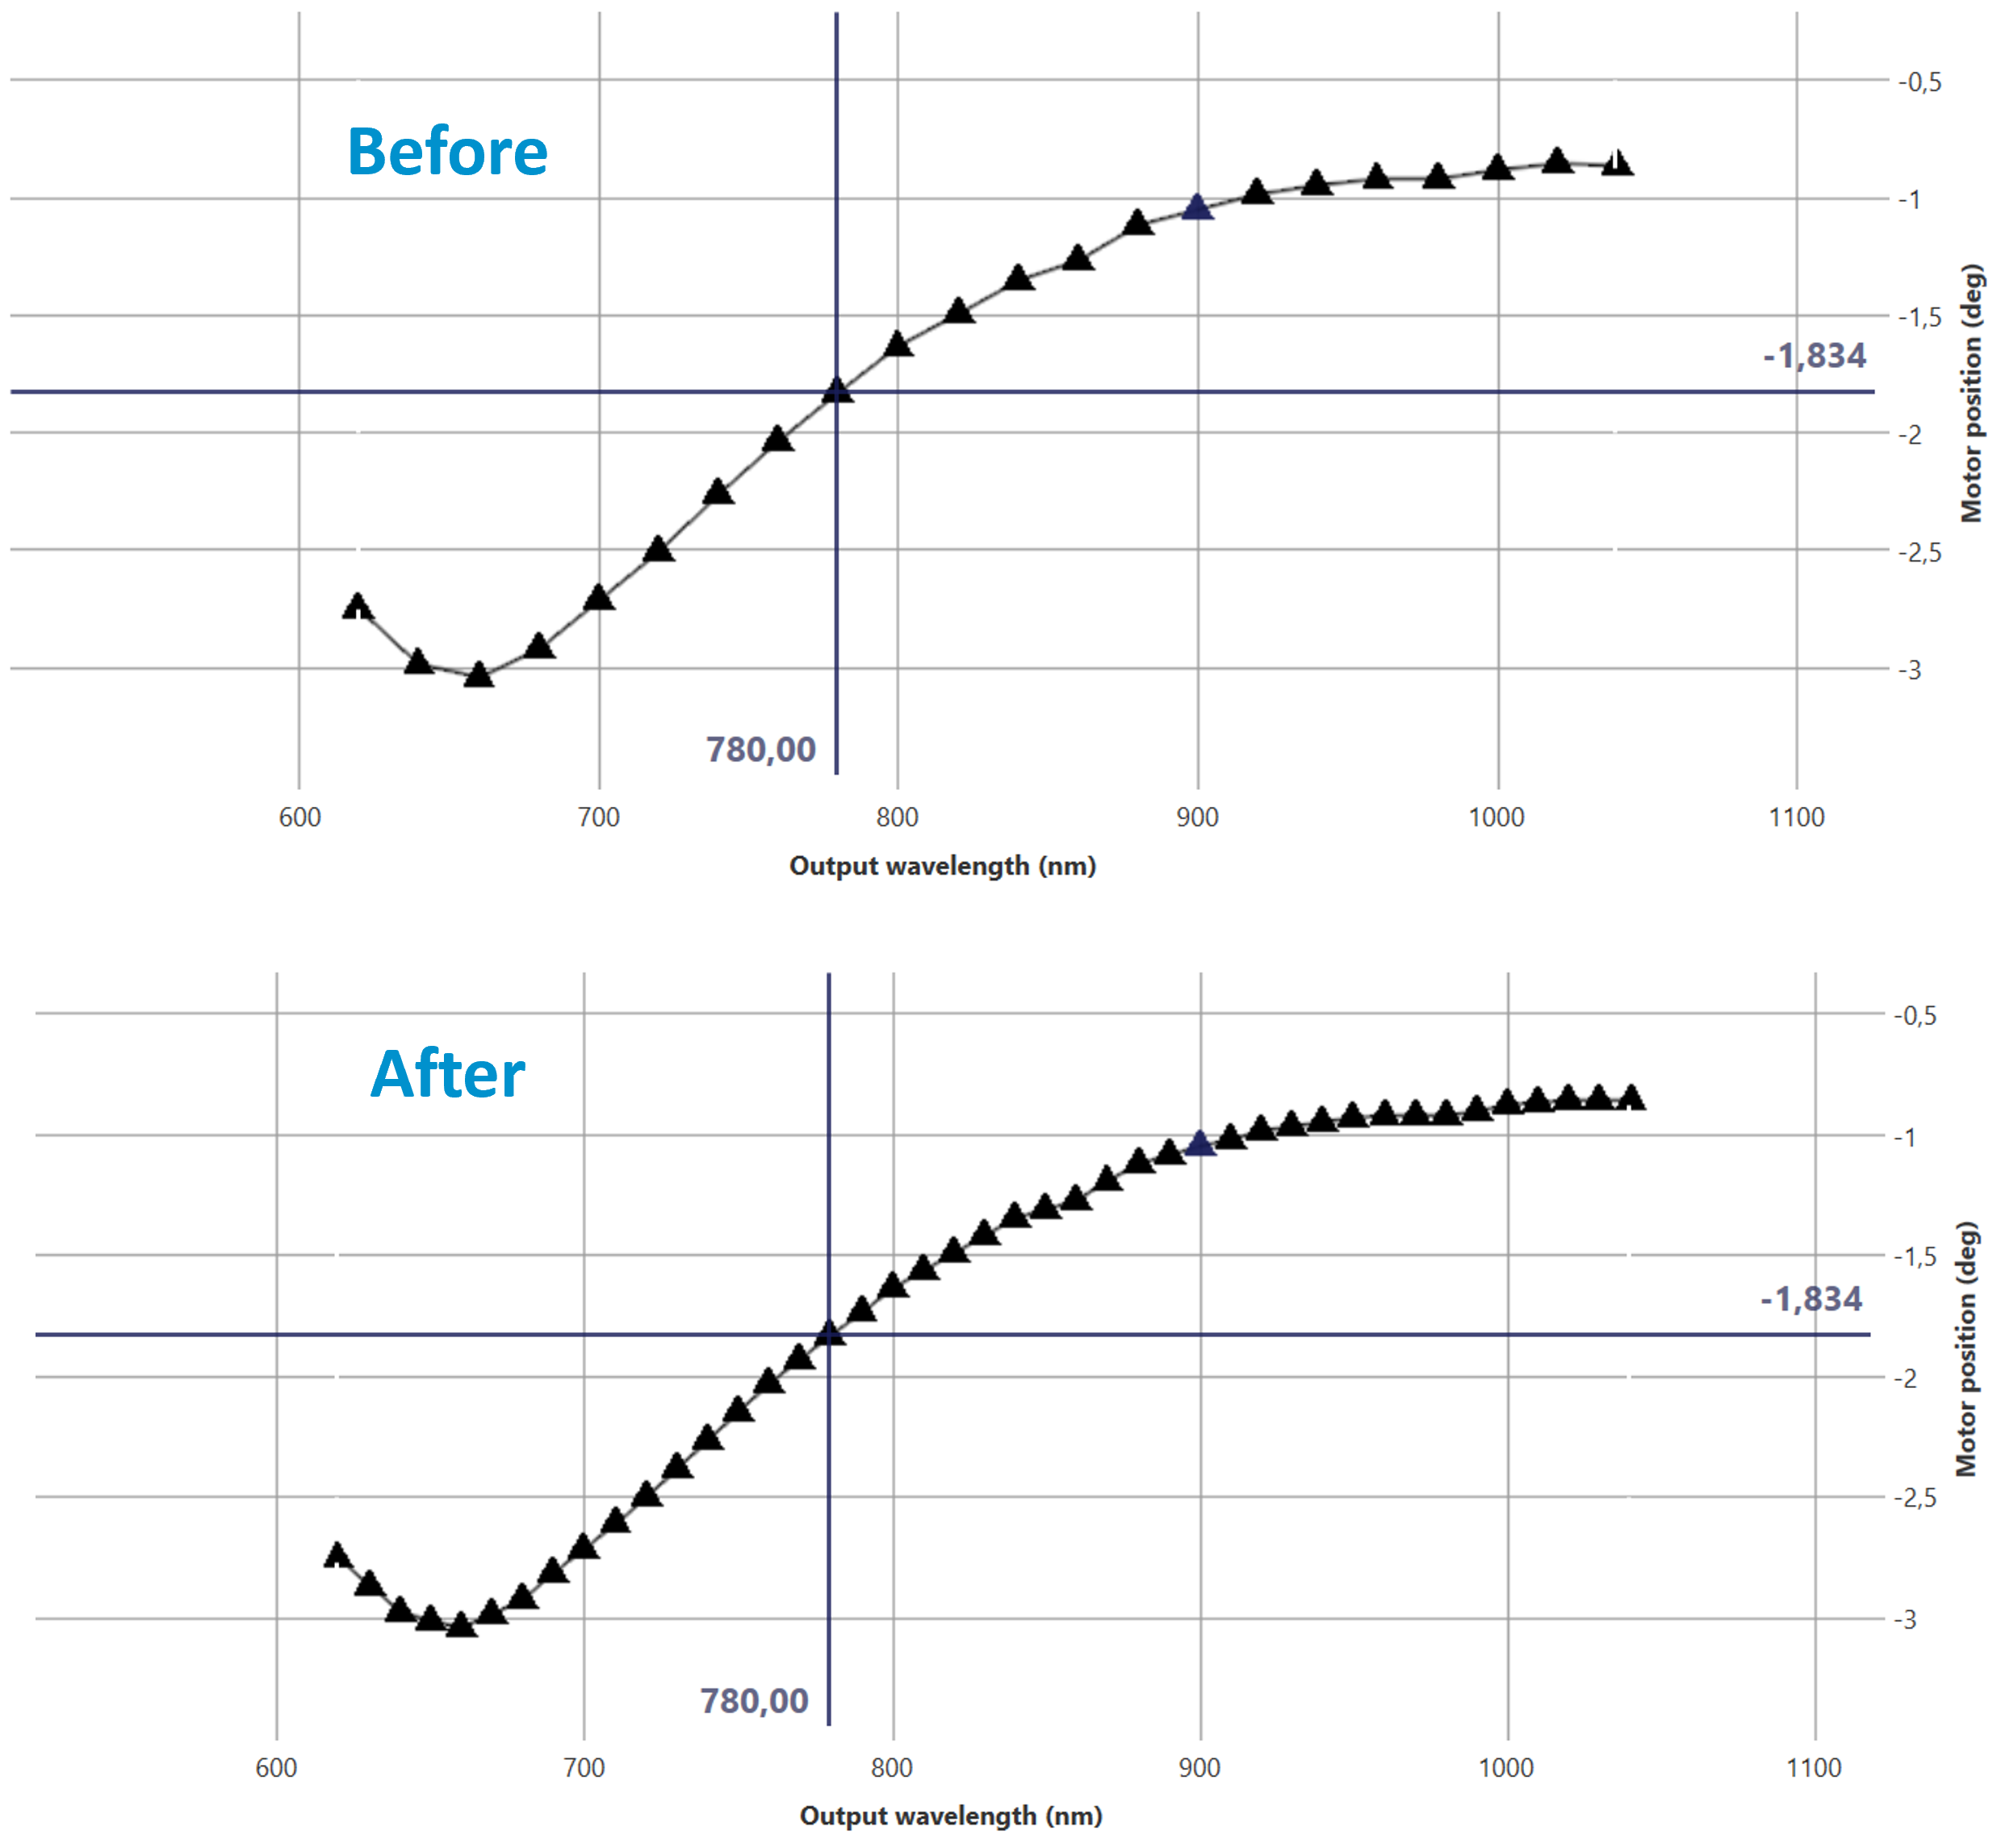
Figure 29. Calibration curve before and after respacing in WinTopas4.
Extending the calibration range
The range of the tuning curve can also be modified. In this example the lowest wavelength of this signal is restricted to 620 nm. To extend the range of the tuning curve open the interaction creation window select the signal interaction and overwrite it with the extended range as show in Figure 30.
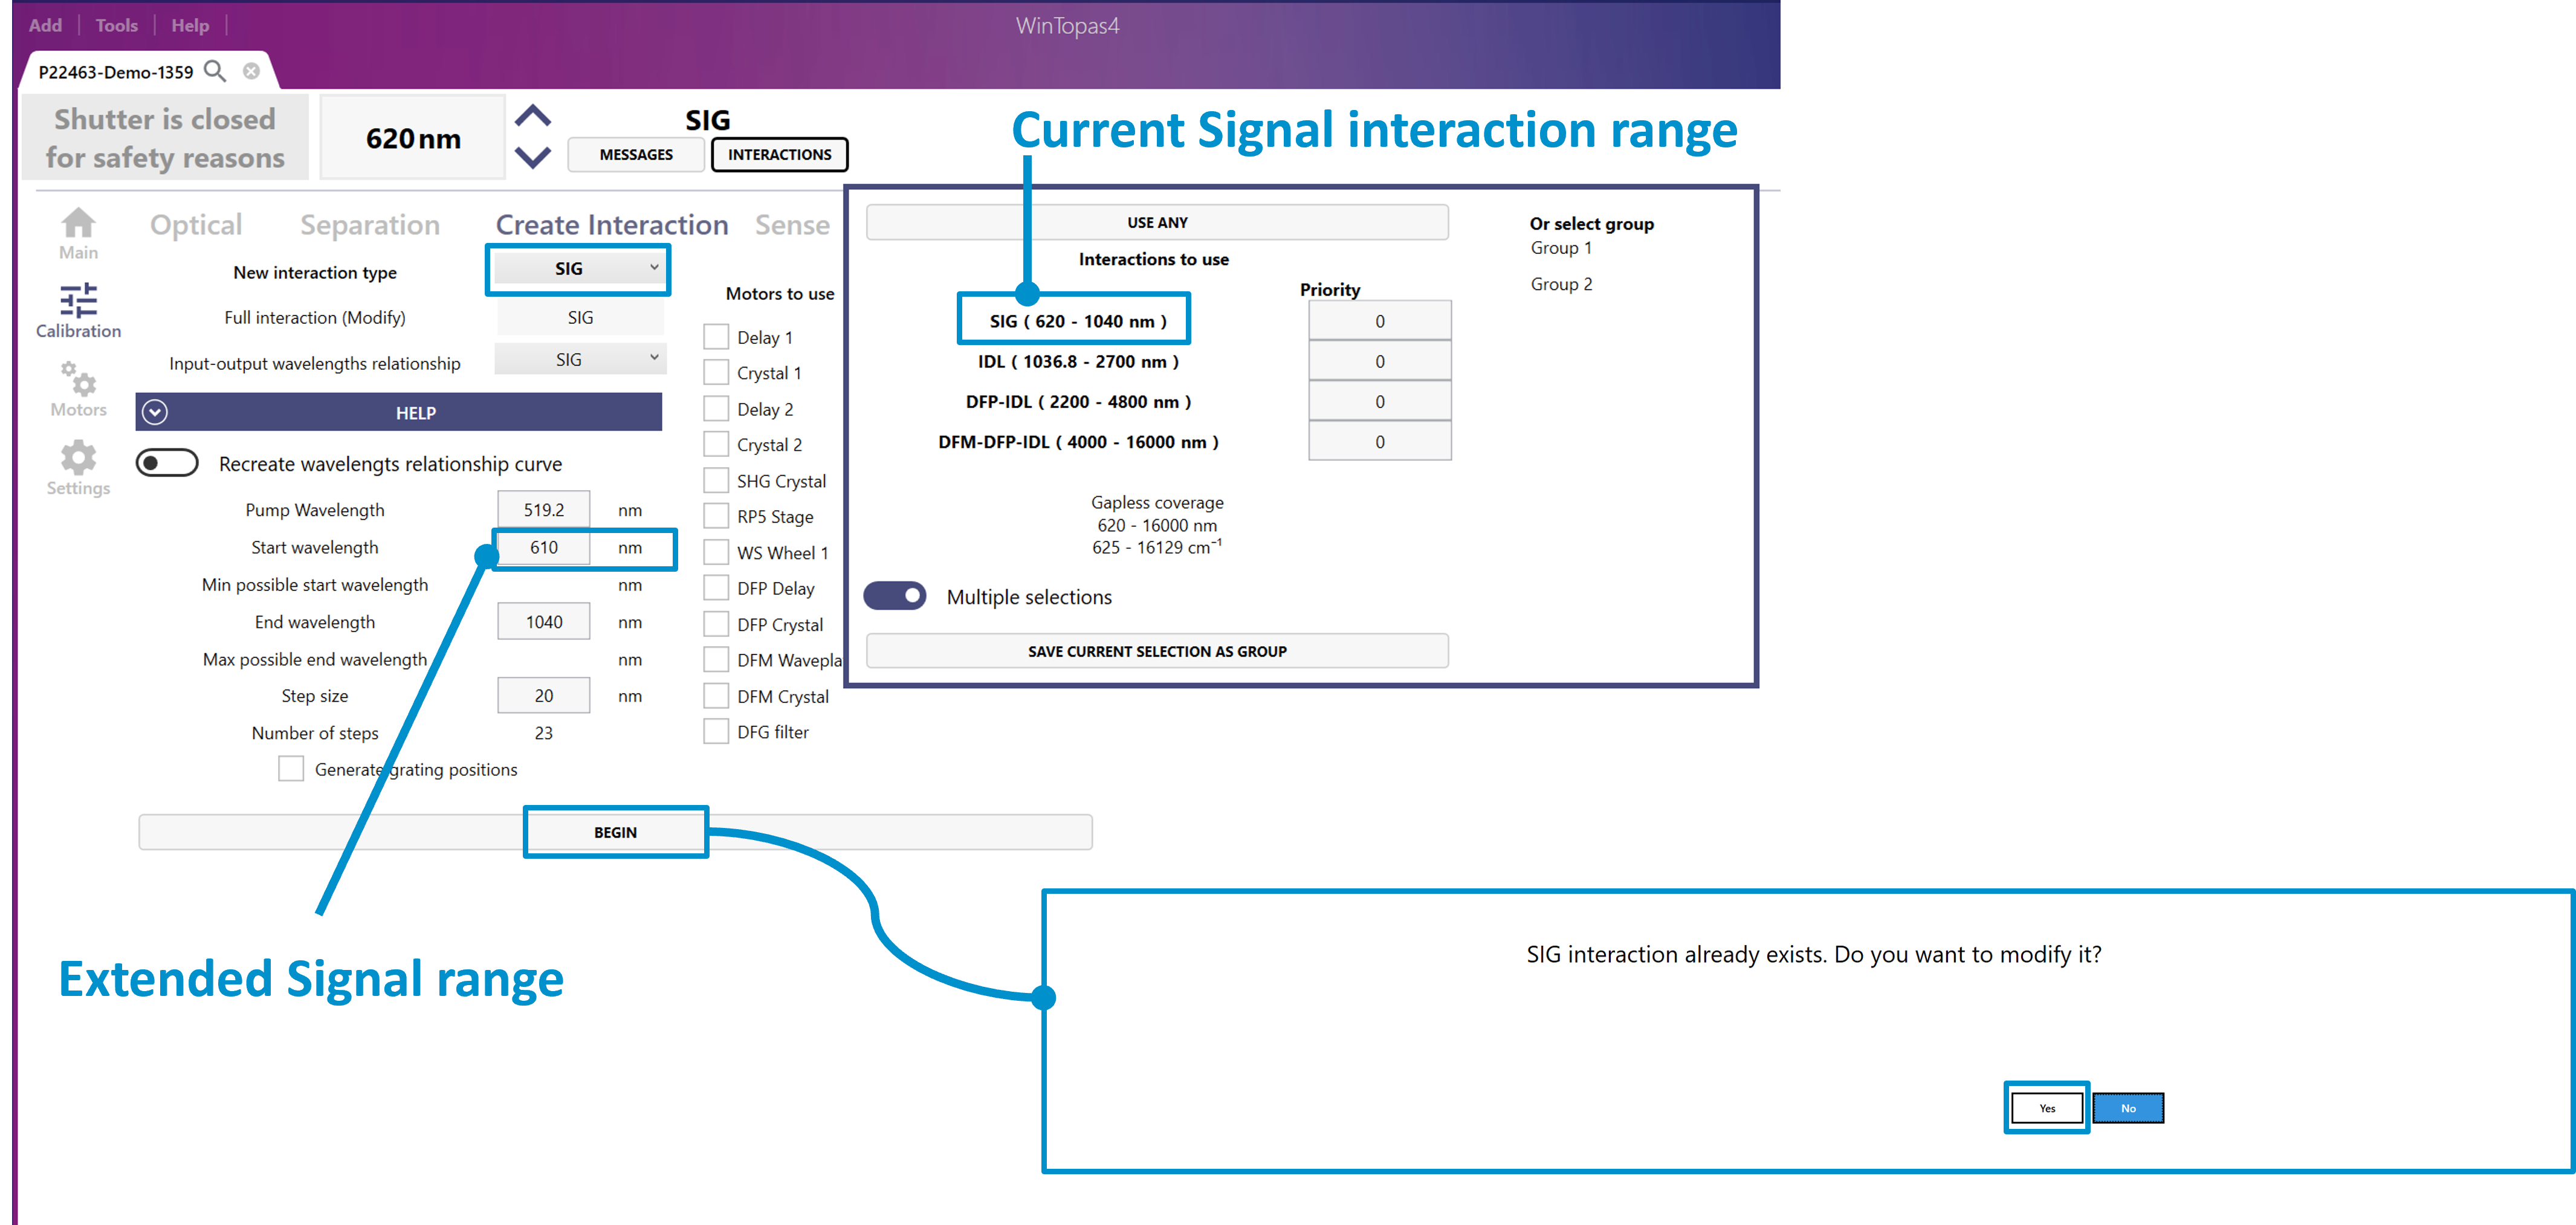
Figure 30. Extending Signal interaction range in WinTopas4.
Newly added points will have to be calibrated for all the required motors (see Figure 31). After it is done the calibration curve and the interaction range will be extended.
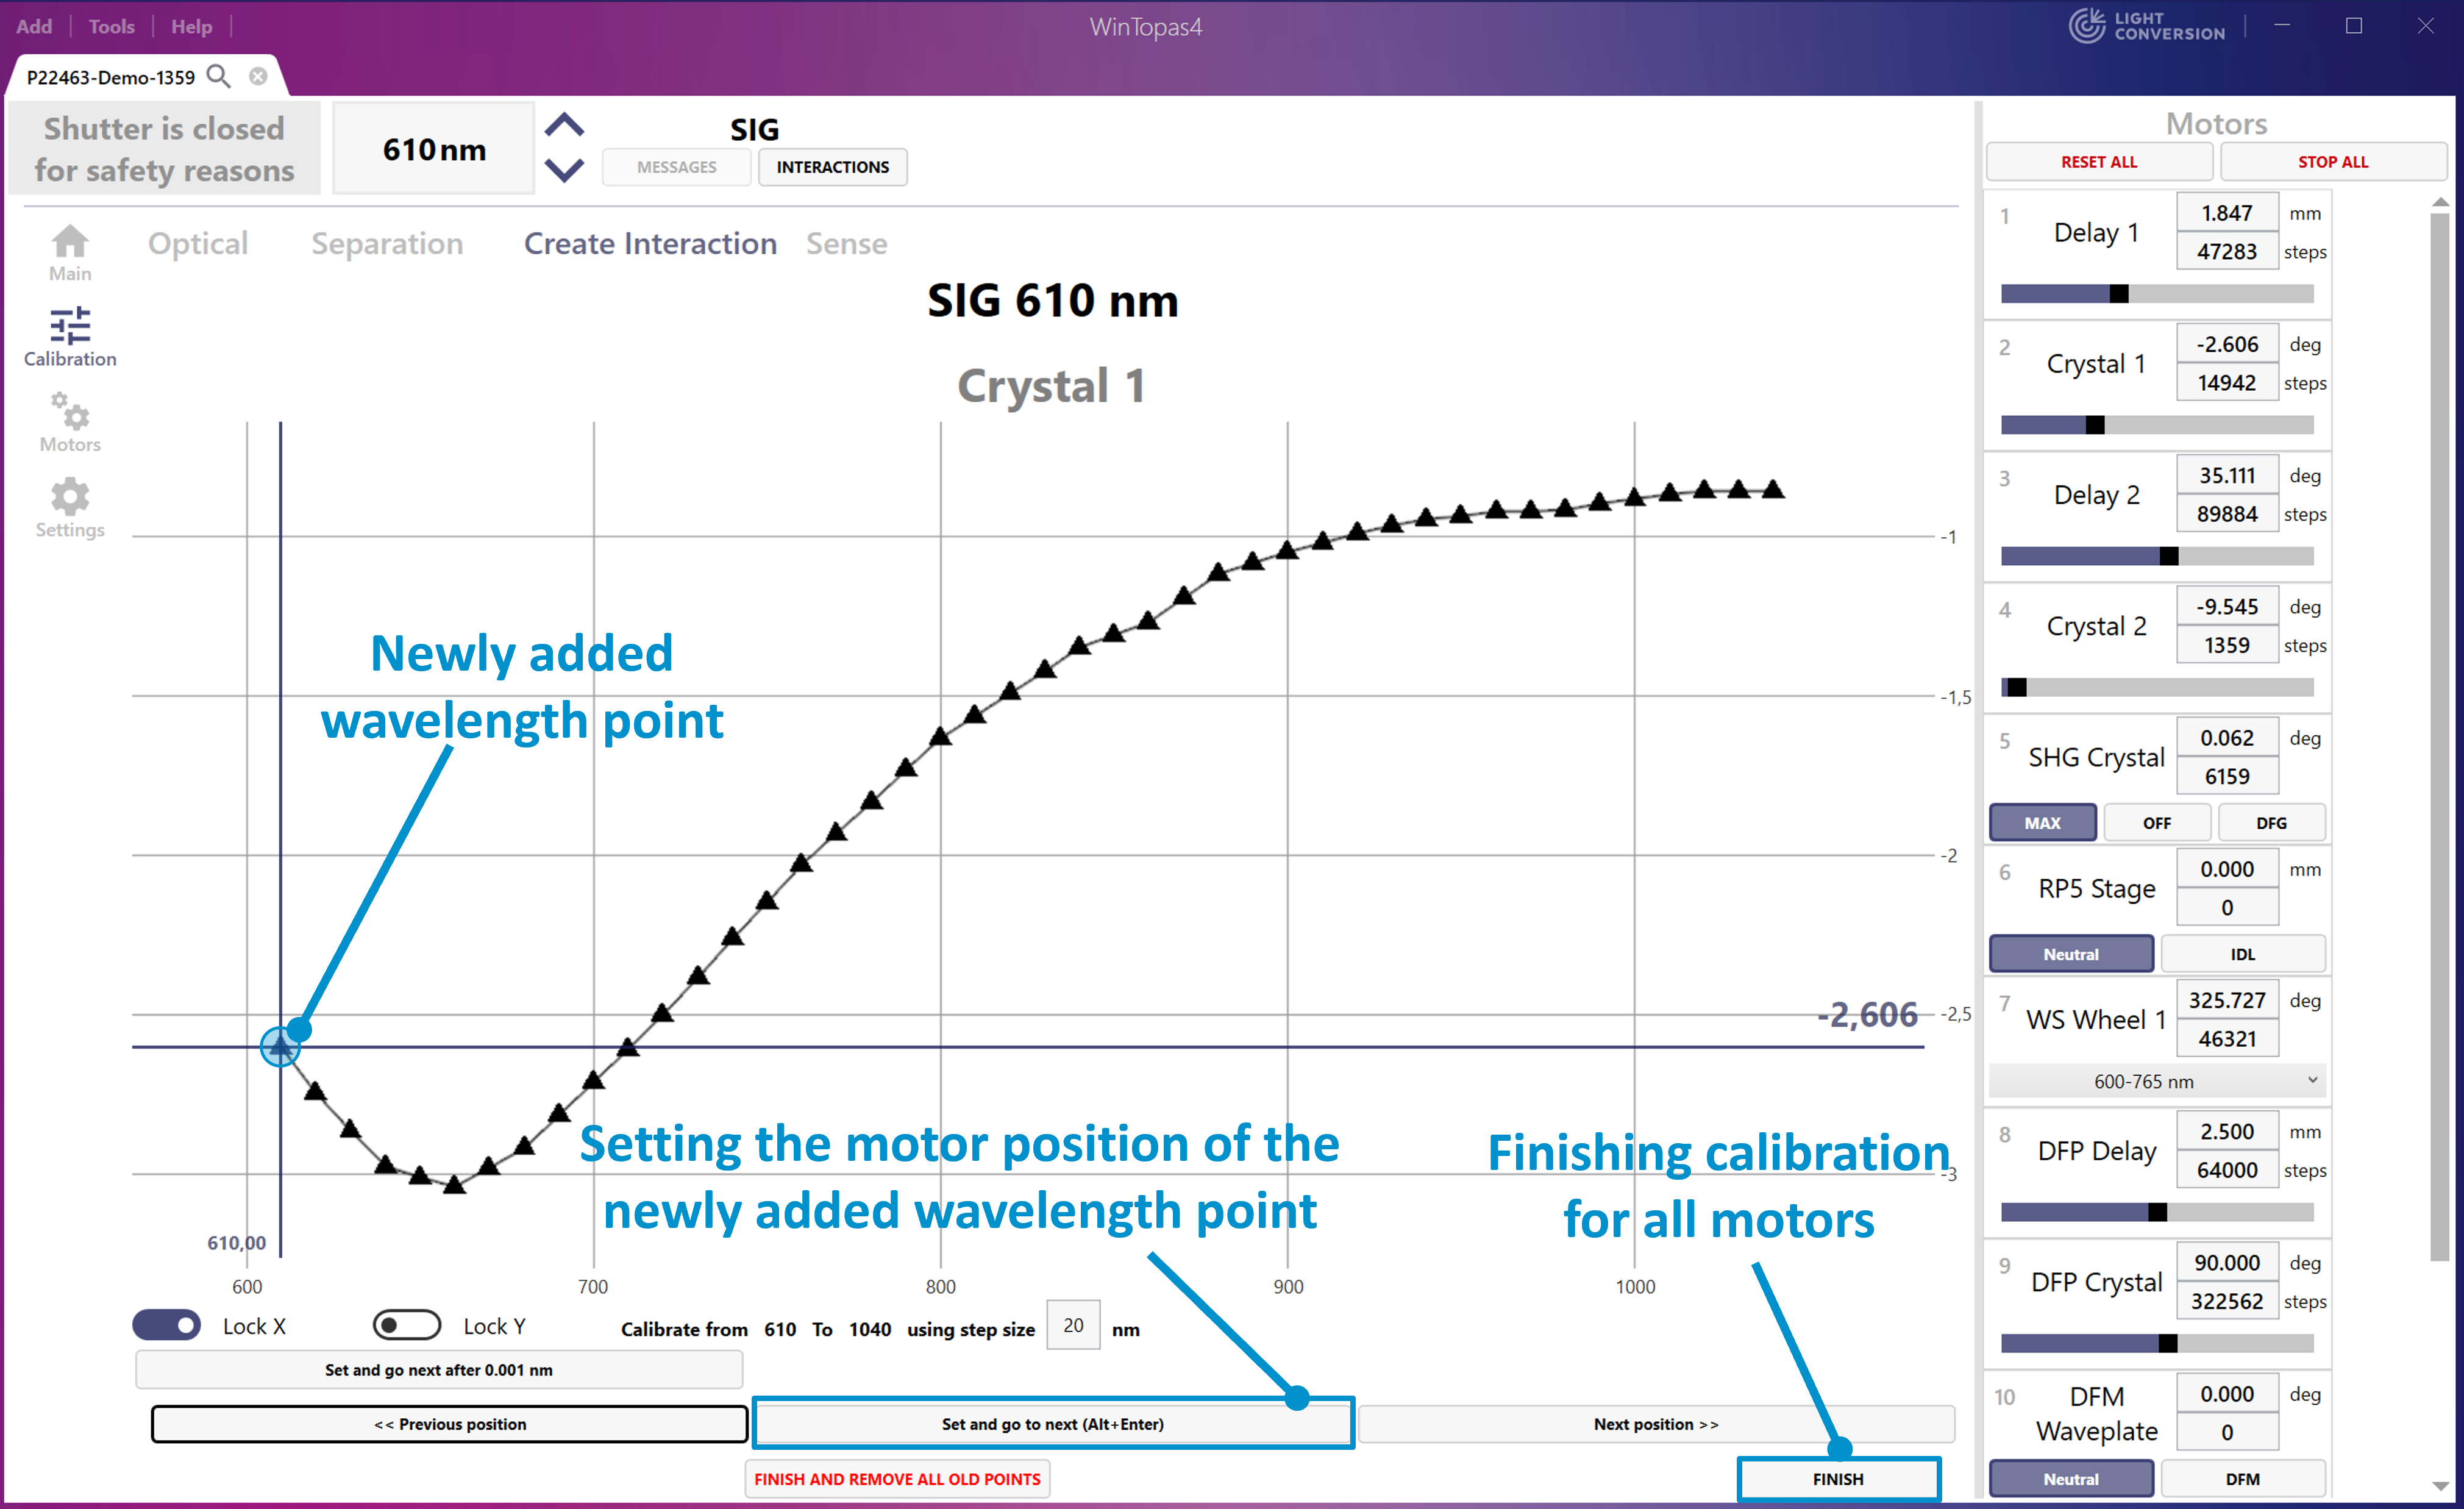
Figure 31. Motor calibration after extending interaction range in WinTopas4.
Another way to extend the tuning curve is by adding wavelength points in the “Output wavelength” table and setting the position below the calibration curve (see Figure 32). Figure 32.
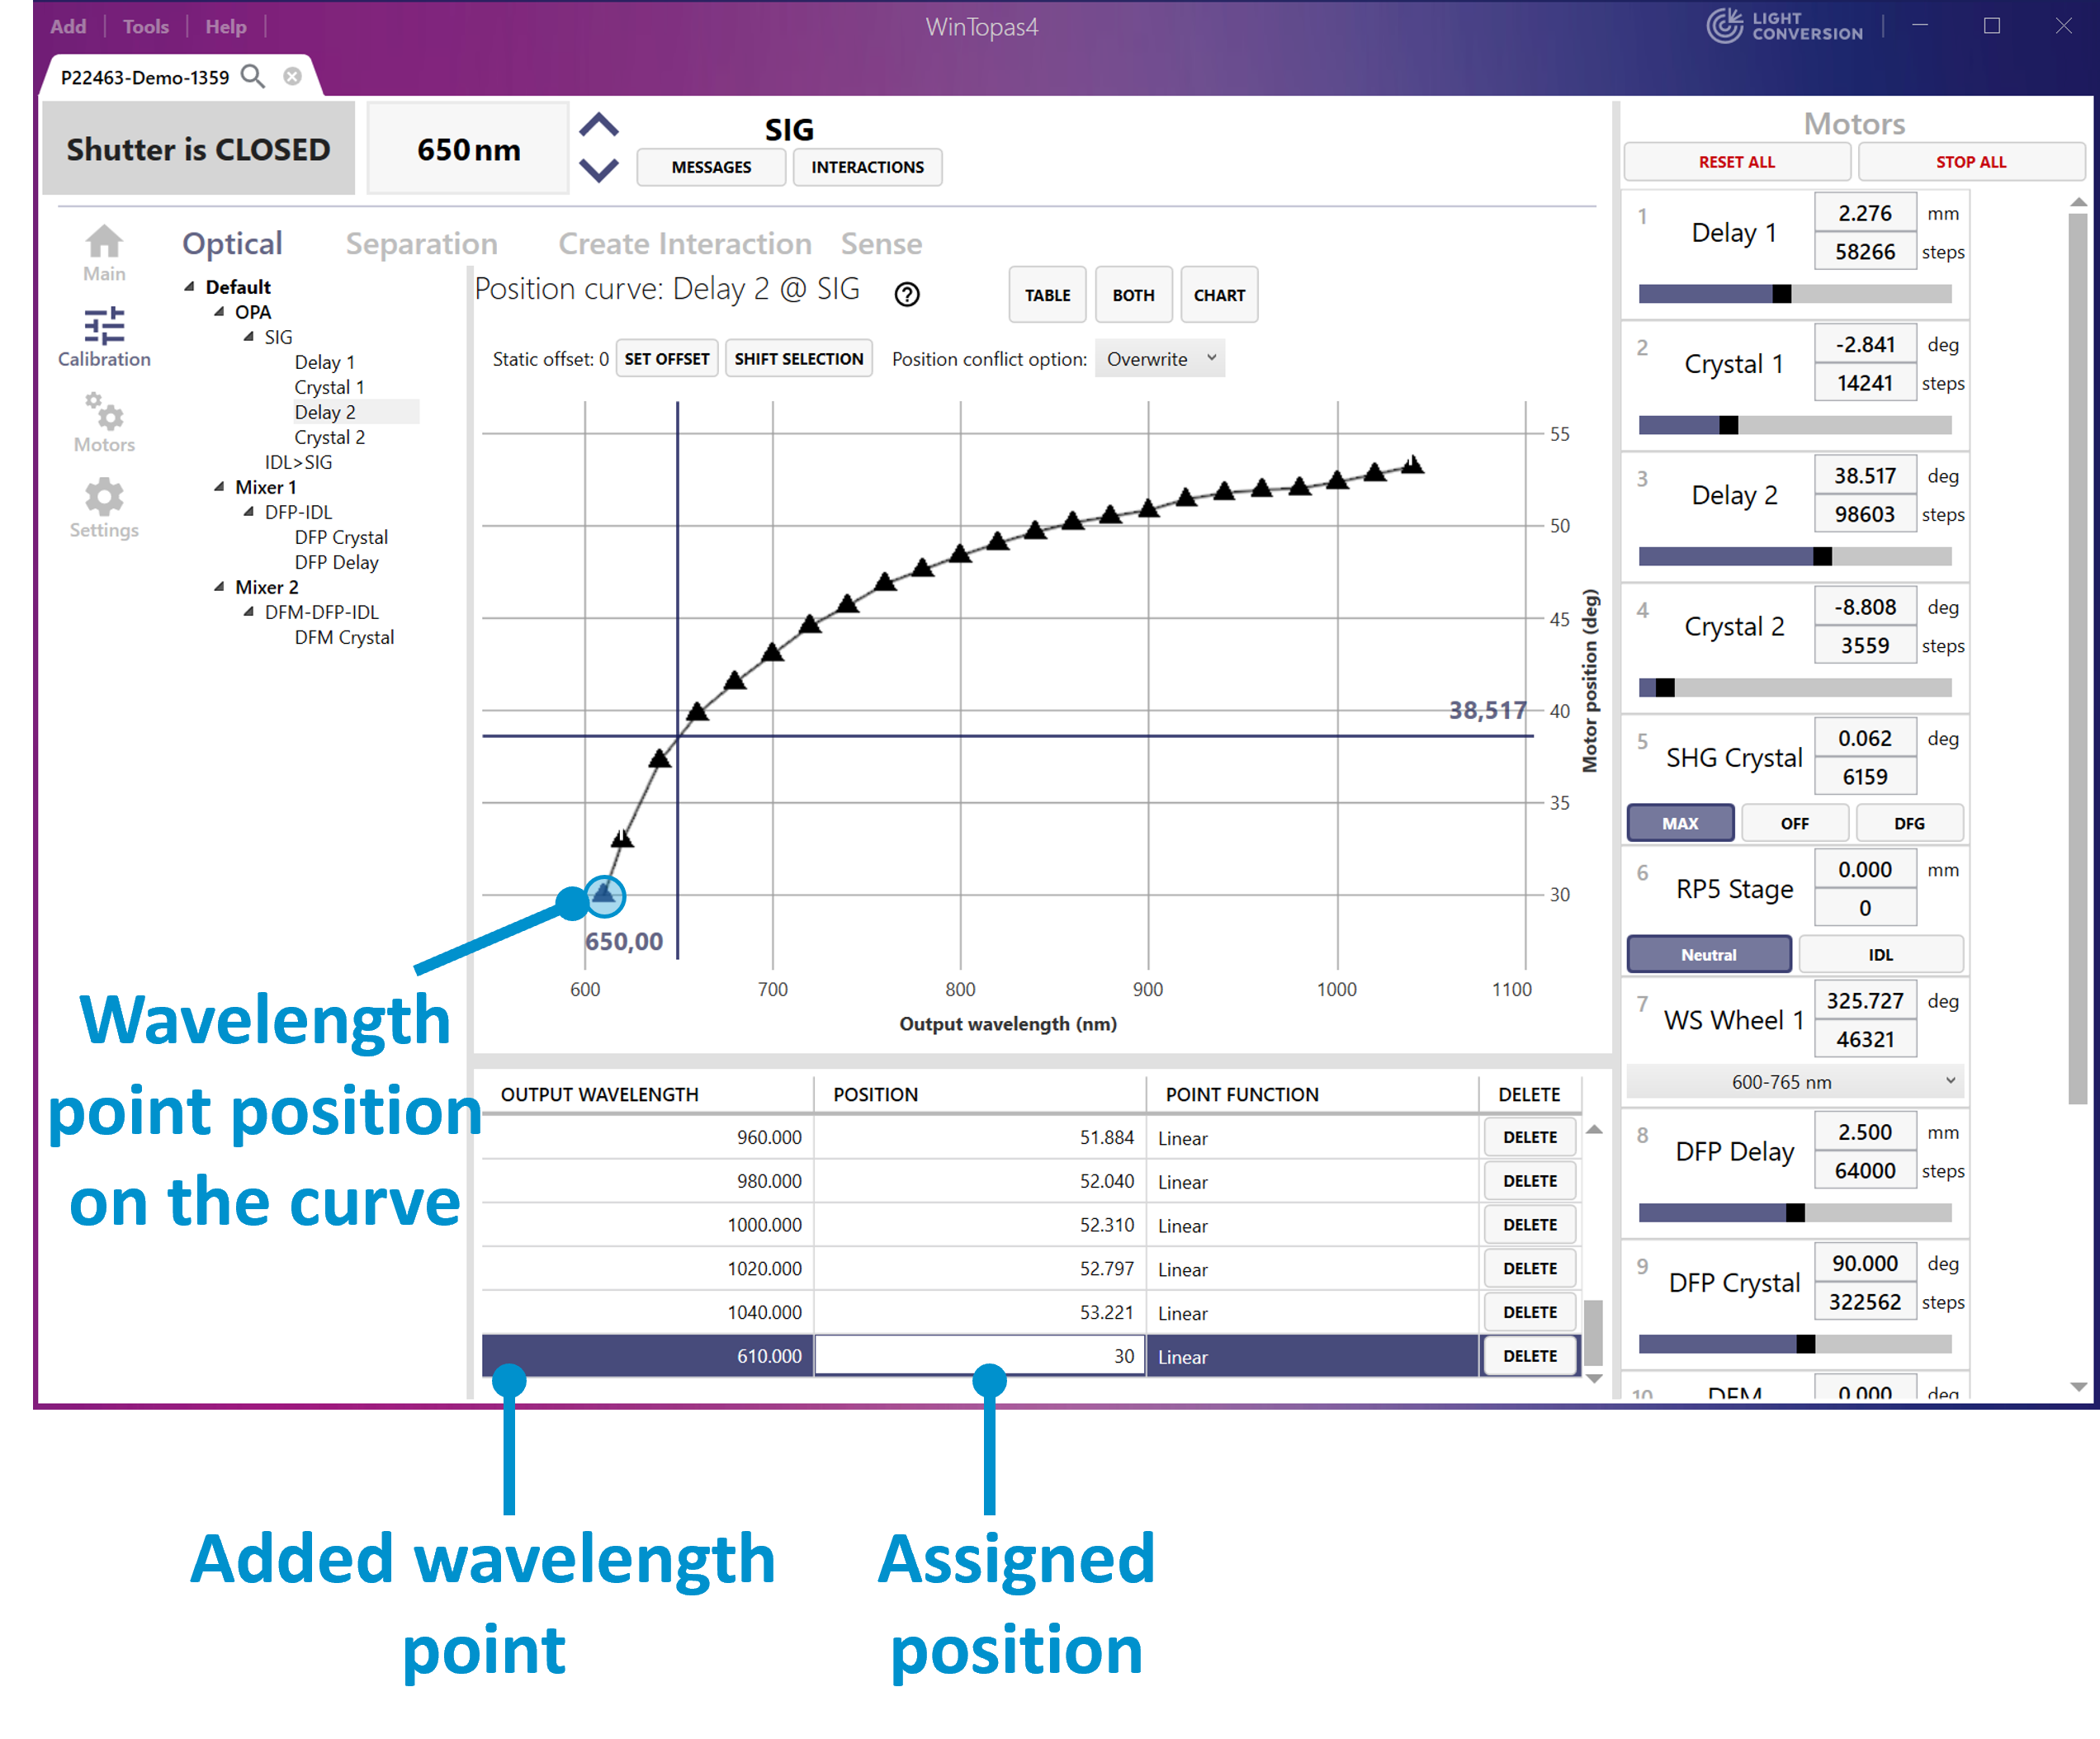
Figure 32. Addition of a wavelength point in WinTopas4.
Wavelength points must be added to all the motors of the signal interaction and the signal interaction’s output wavelength must be adjusted as shown in Figure 33.
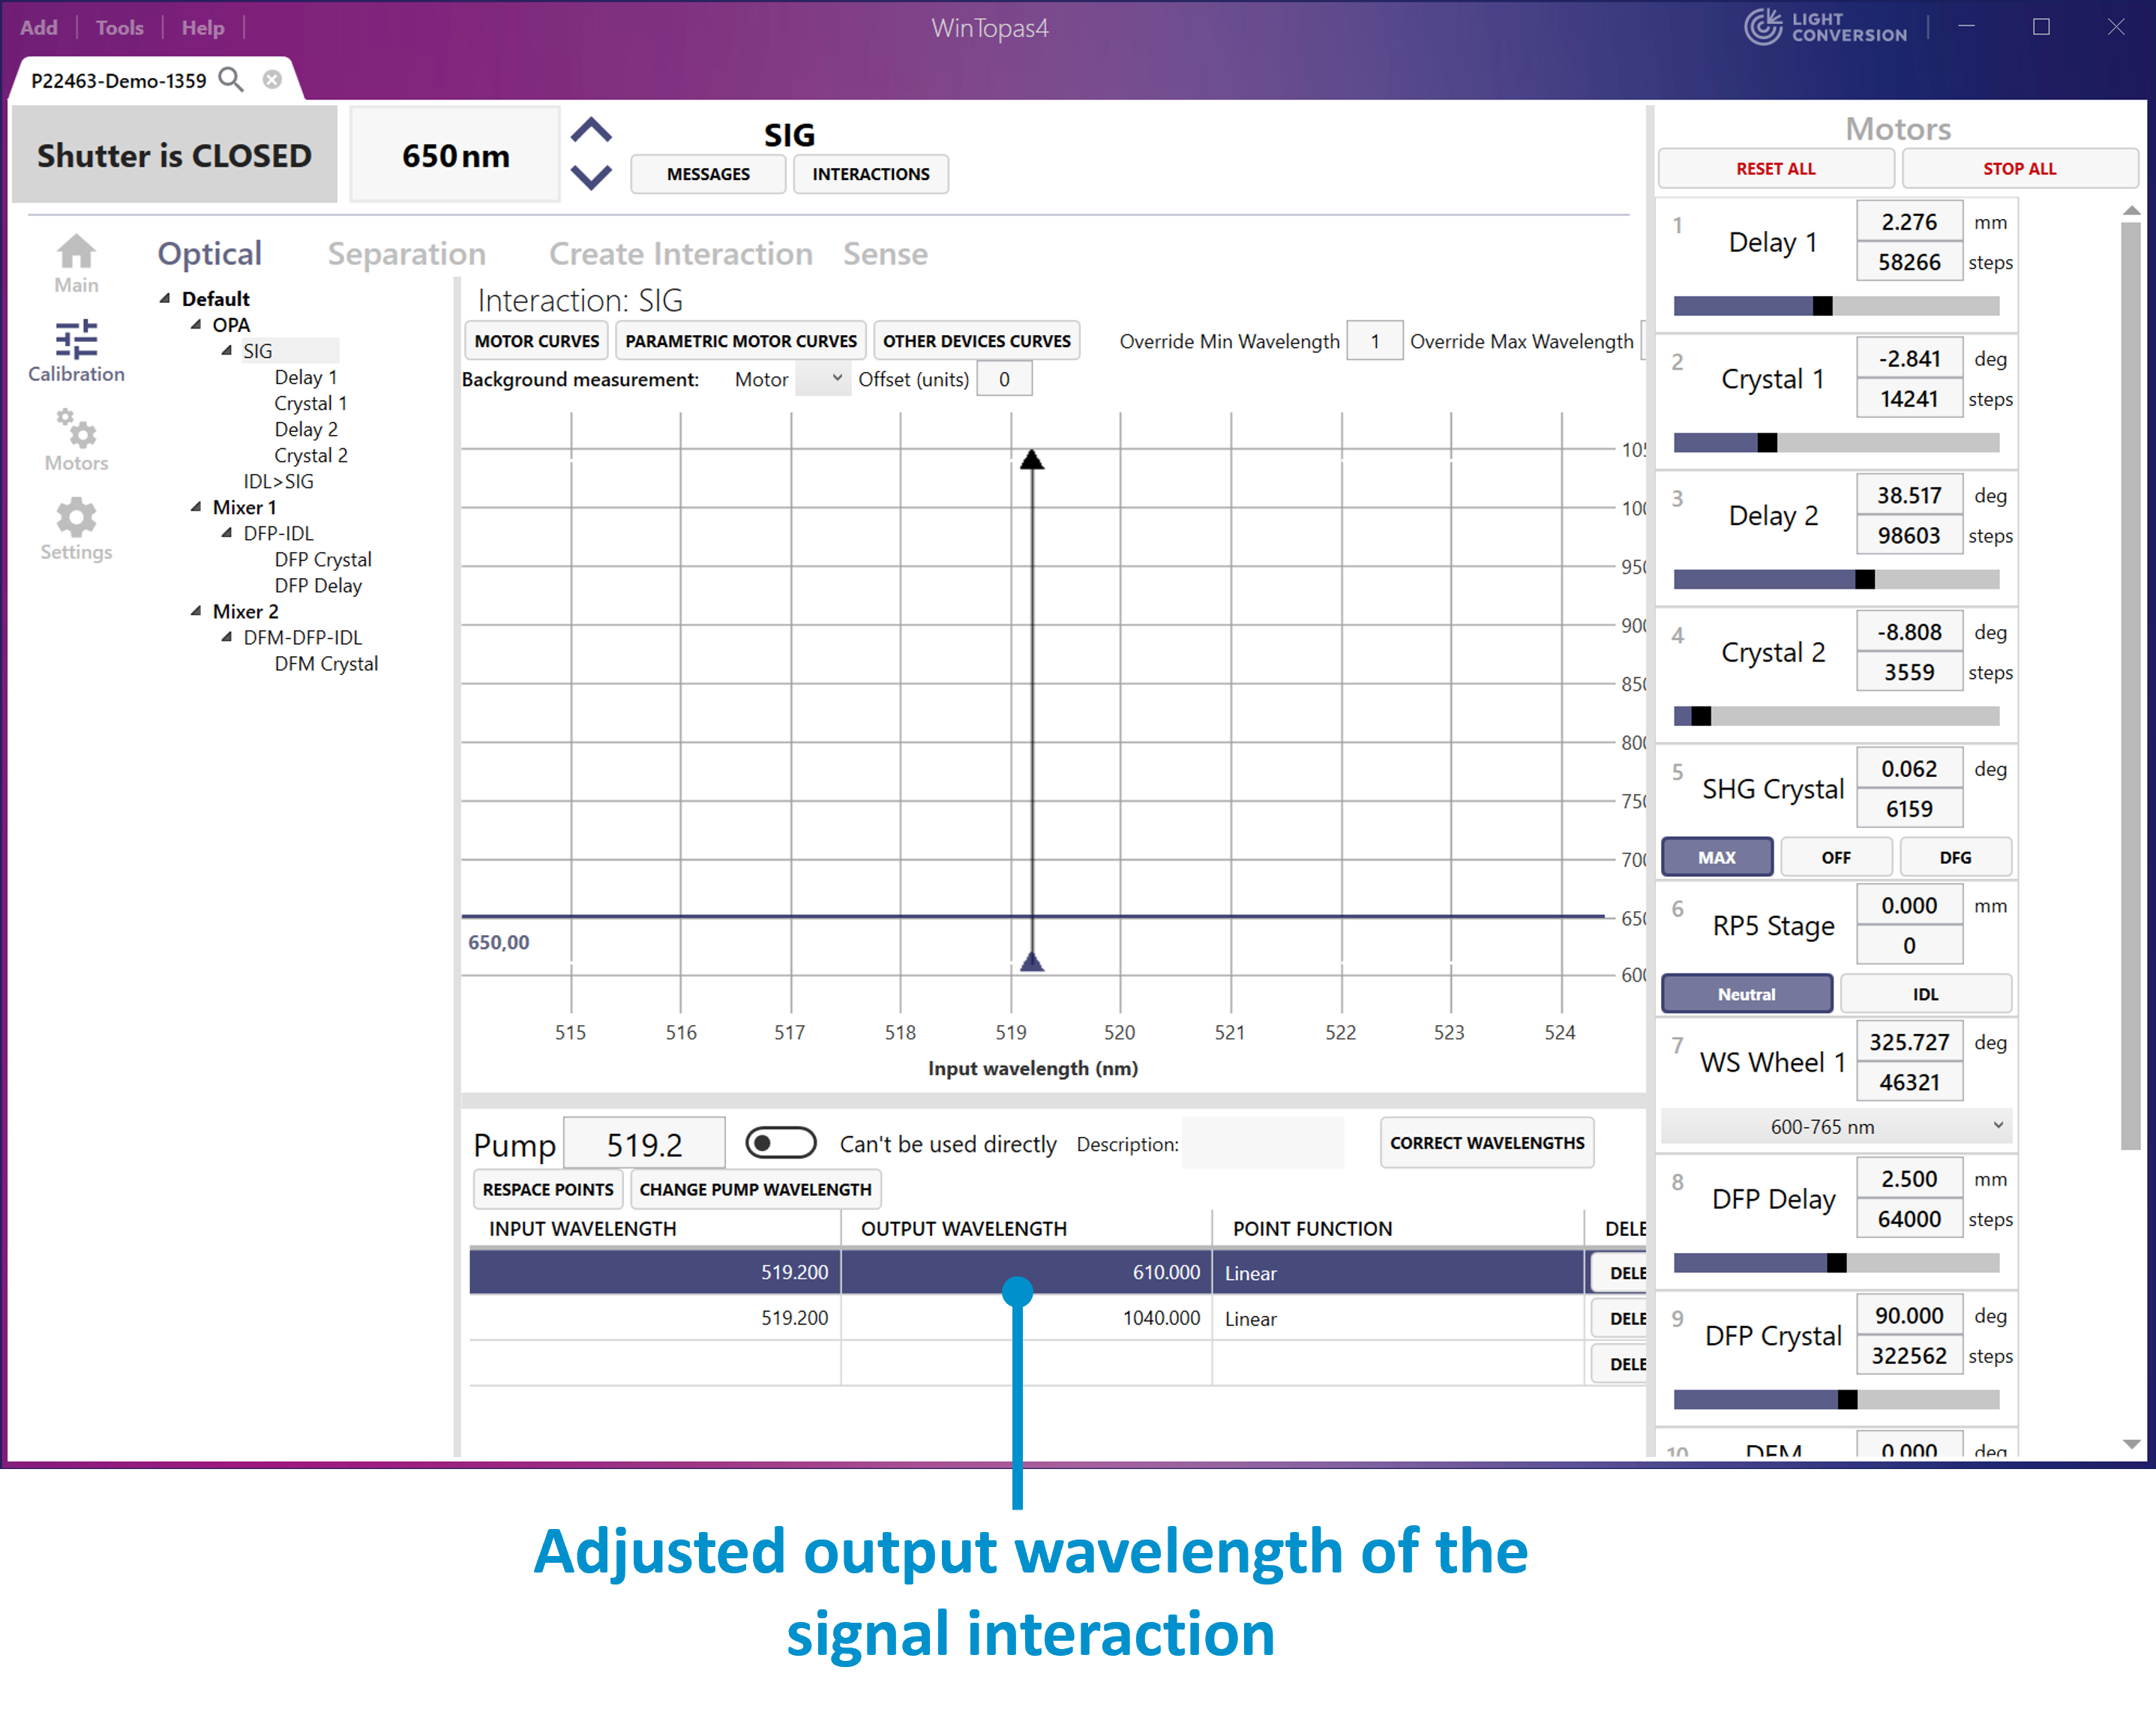
Figure 33. Adjusting output wavelength in WinTopas4.
Changing the pump wavelength and regenerating the idler
Some interactions cannot be directly tuned, instead they are derived from the parent interaction according to the optical parametric relationships. In this example the signal is the calibrated interaction, and the idler is derived from it (see Figure 34).
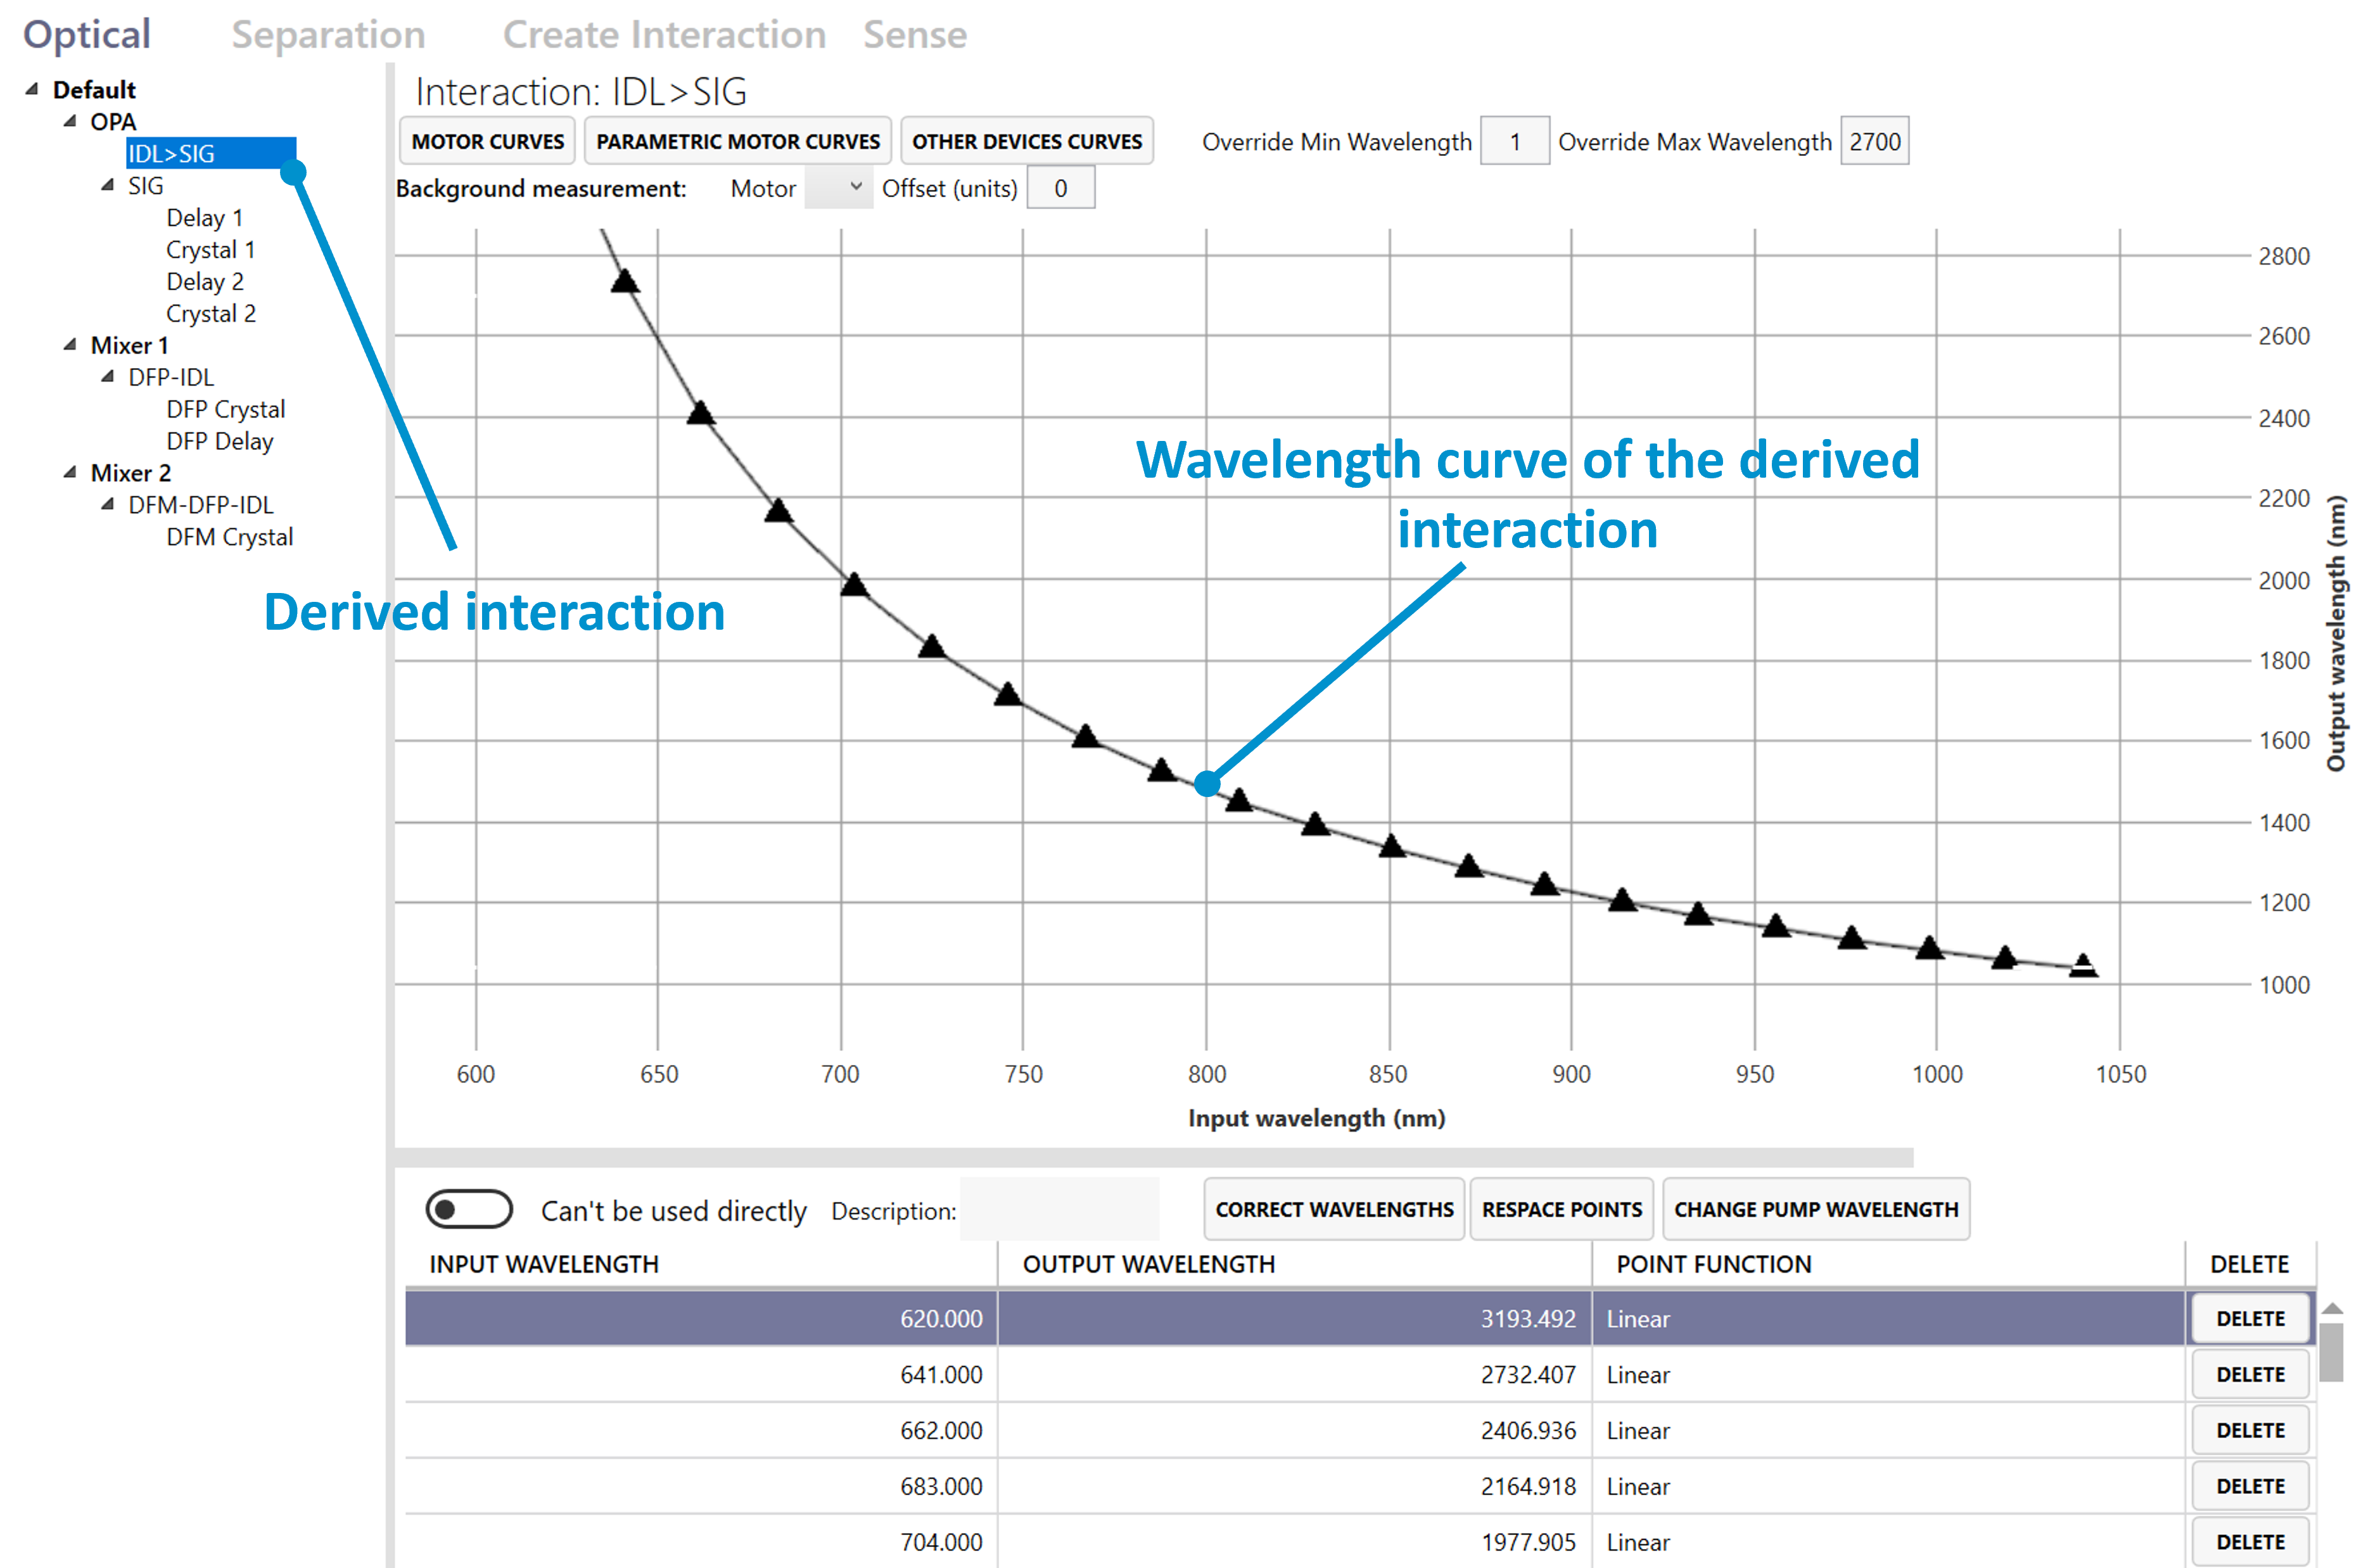
Figure 34. Derived interaction in WinTopas4.
The pump wavelength is assigned to the parent and is used to calculate the wavelength relationships of the derived interactions. It can be changed to increase the wavelength precision of the idler (see Figure 35). Changing it does not affect the signal in any way, but the idler will have to be recalculated. The easiest way to do that is to delete the old idler interaction and generate the new one as shown in Figure 36. The newly generated idler will appear with wavelength relationships that better match the actual output values.
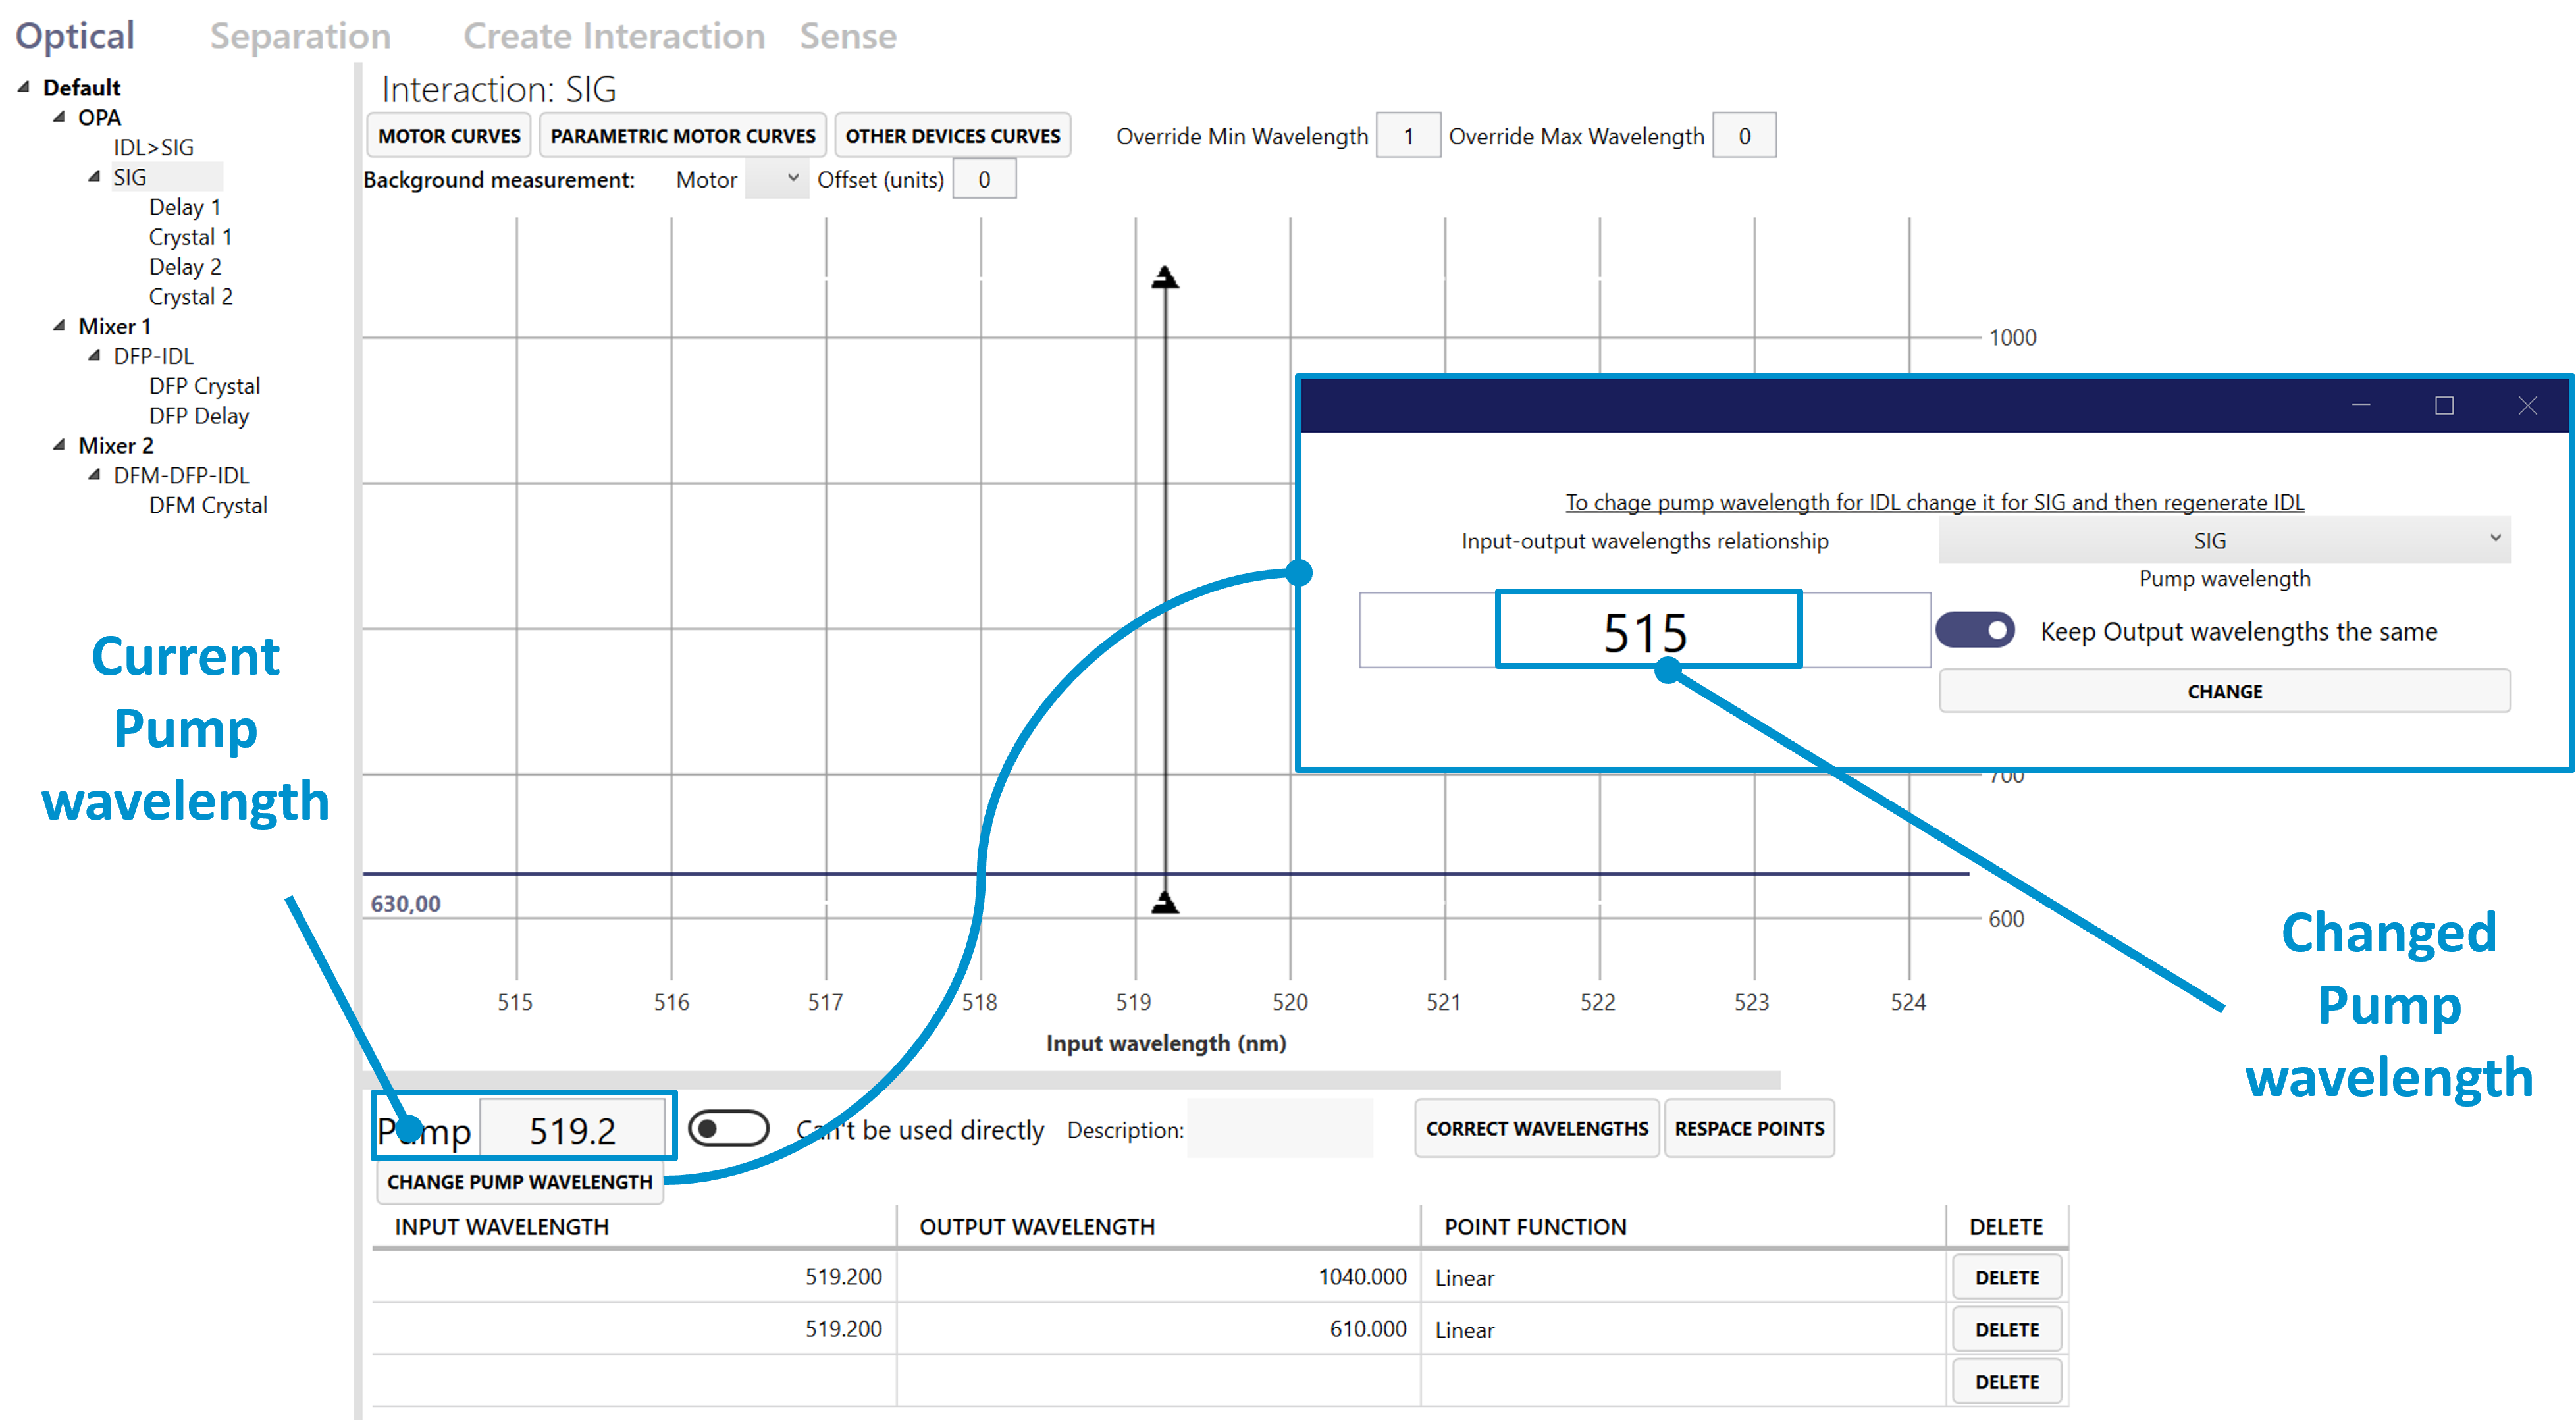
Figure 35. Changing Pump wavelength for idler wavelength precision in WinTopas4.
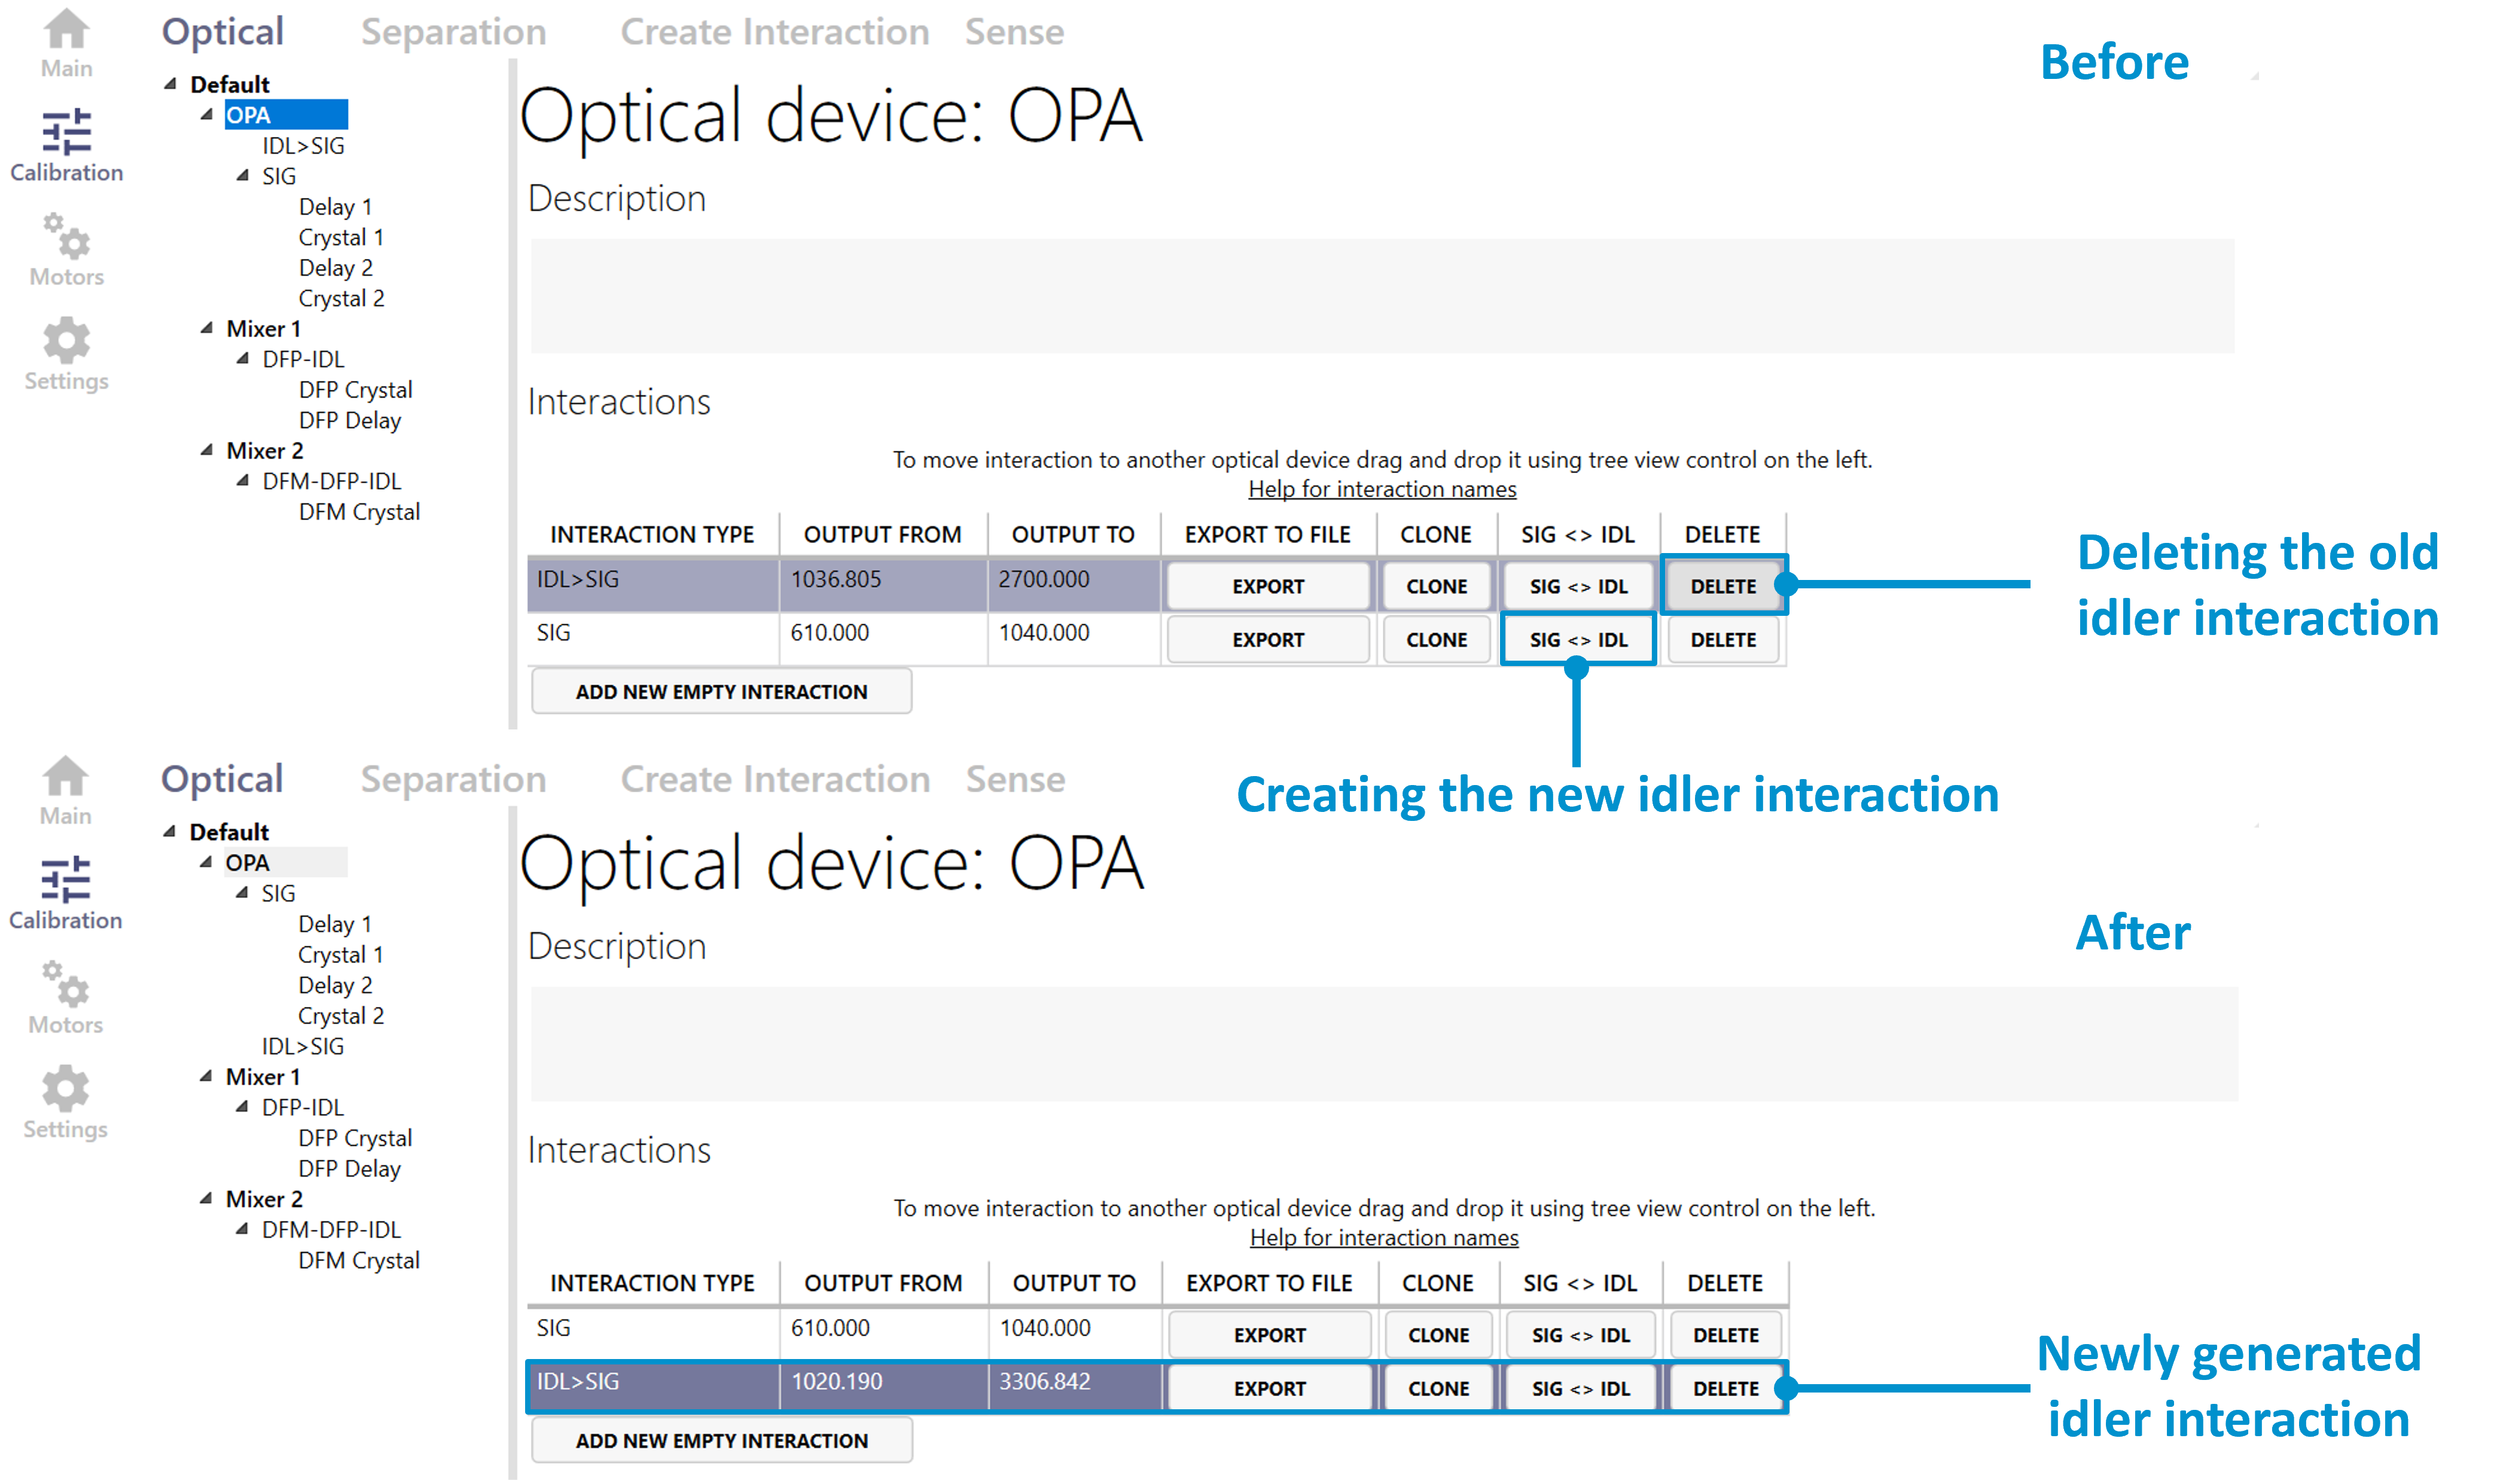
Figure 36. Regenerating the idler in WinTopas4.