Extras
Laser Control
If a Light Conversion laser is used as a pump source of the OPA a simplified control of the pump laser can be integrated into WinTopas4. This feature allows controlling the whole laser system with a single application. Laser control can be enabled by clicking “Show laser controls” switch button in the Settings menu. If the laser has been previously set up a new row of controls and indicators will appear (see Figure 56).
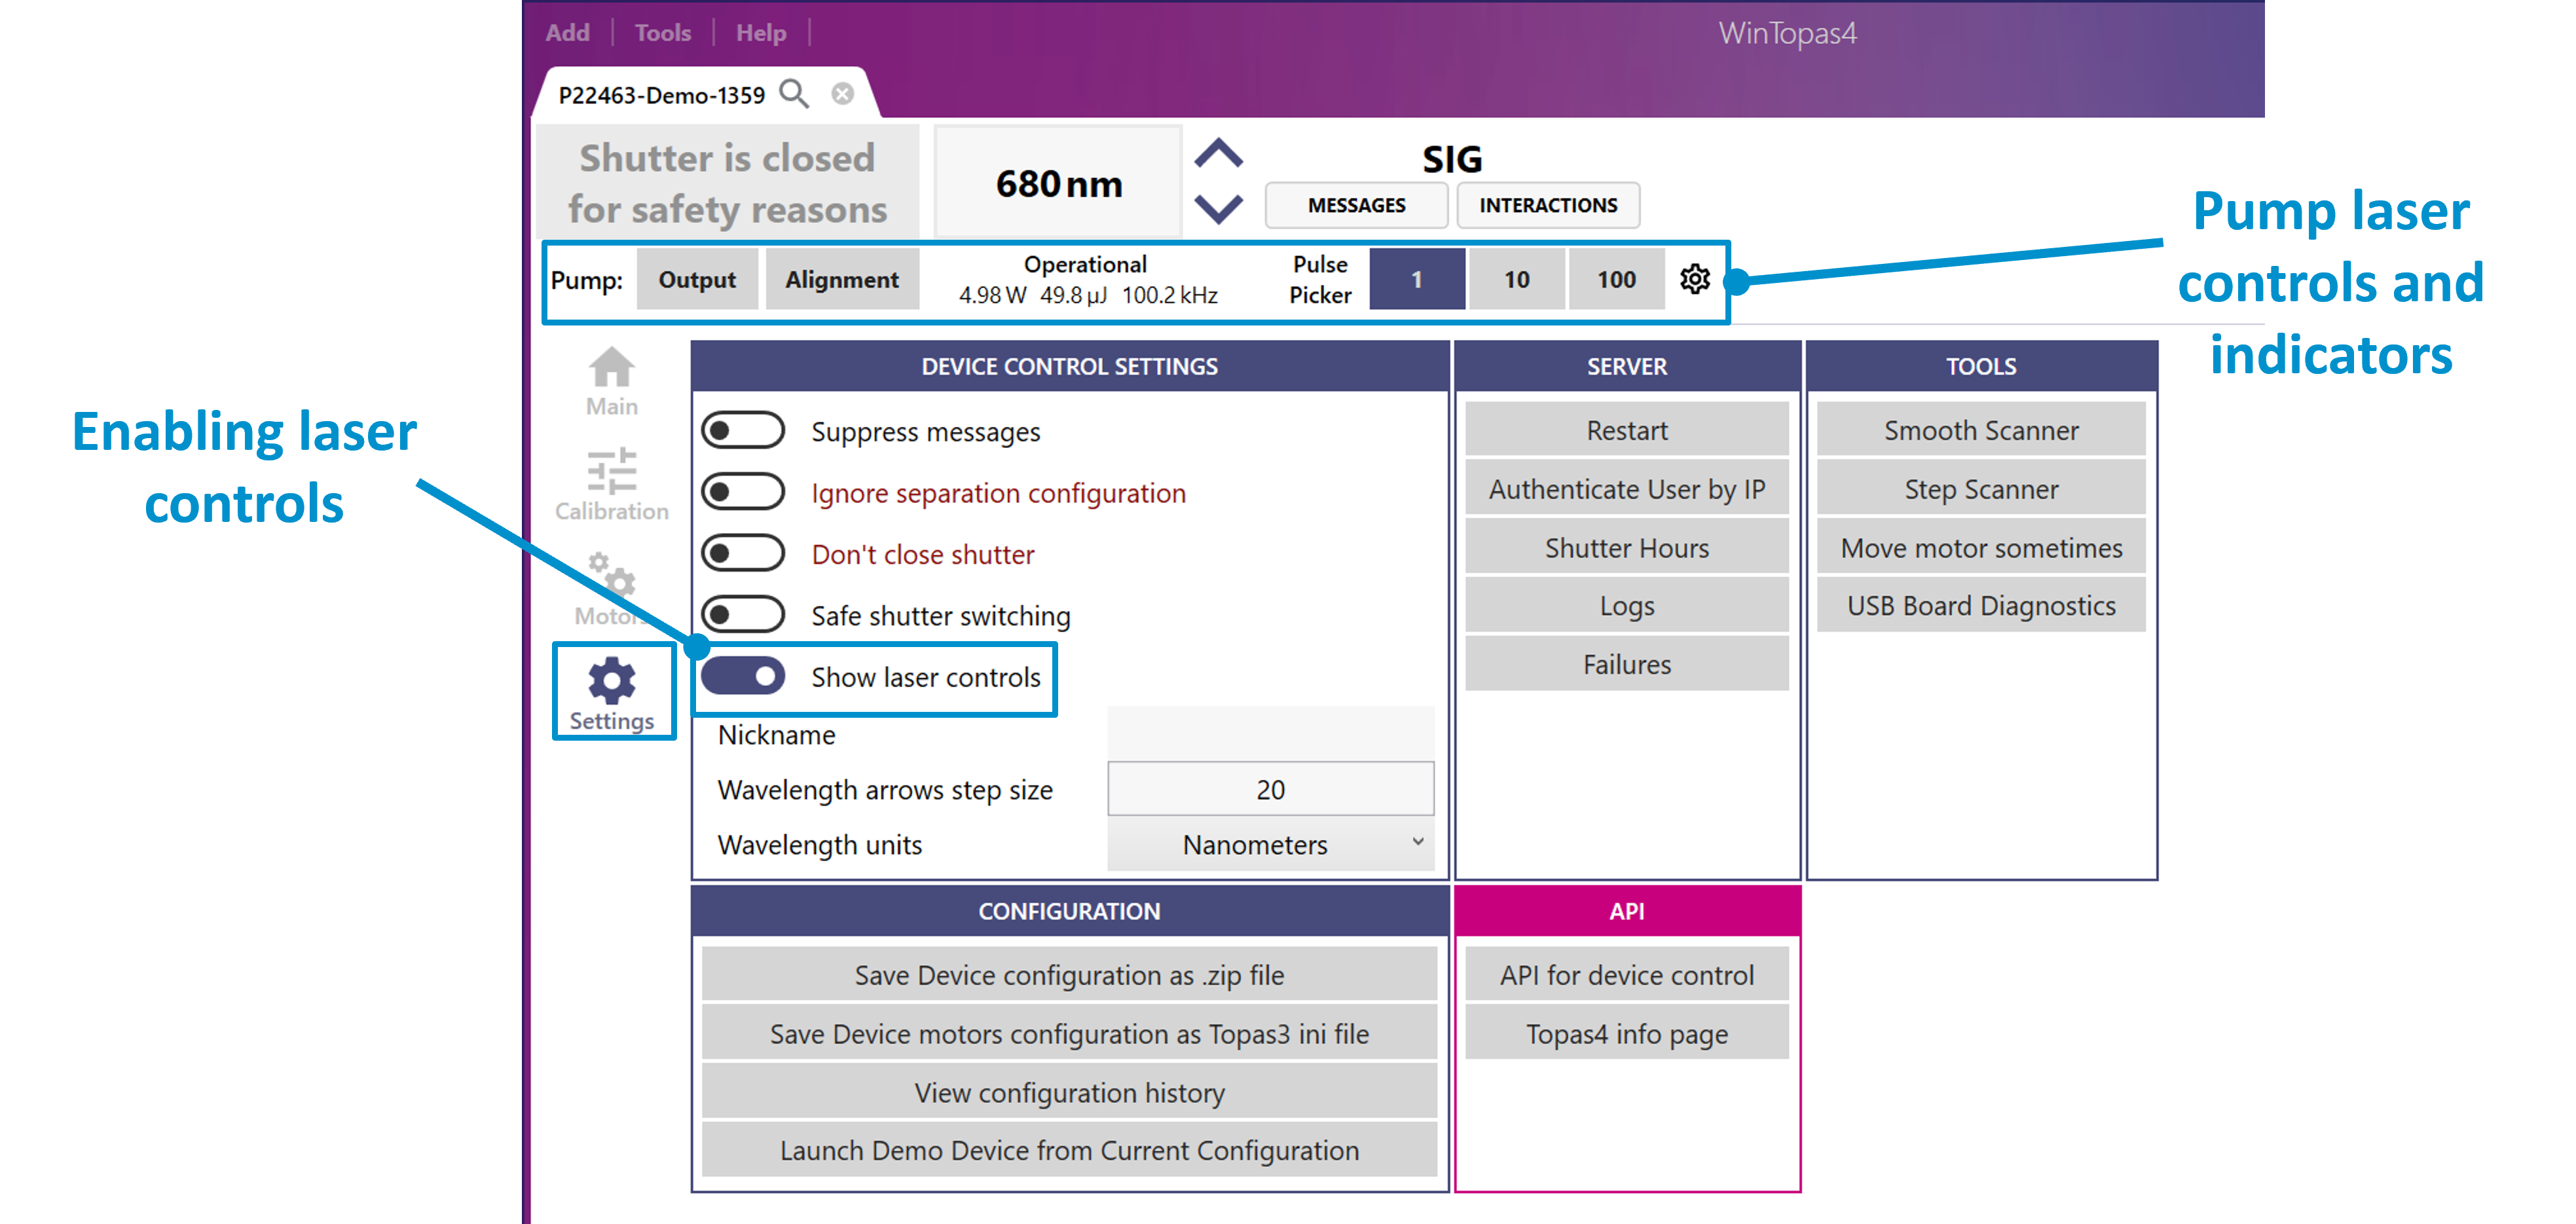
Figure 56. Enabling laser controls.
As shown in Figure 57, here we can toggle the output state of the connected laser. Alignment mode allows temporarily reducing the energy and power of the laser during the alignment procedures. The laser will go back to the previous state once the alignment mode is disabled. Dedicated pulse picker buttons allow quickly changing the repetition rate. Additional controls and options can be found under the setting menu.
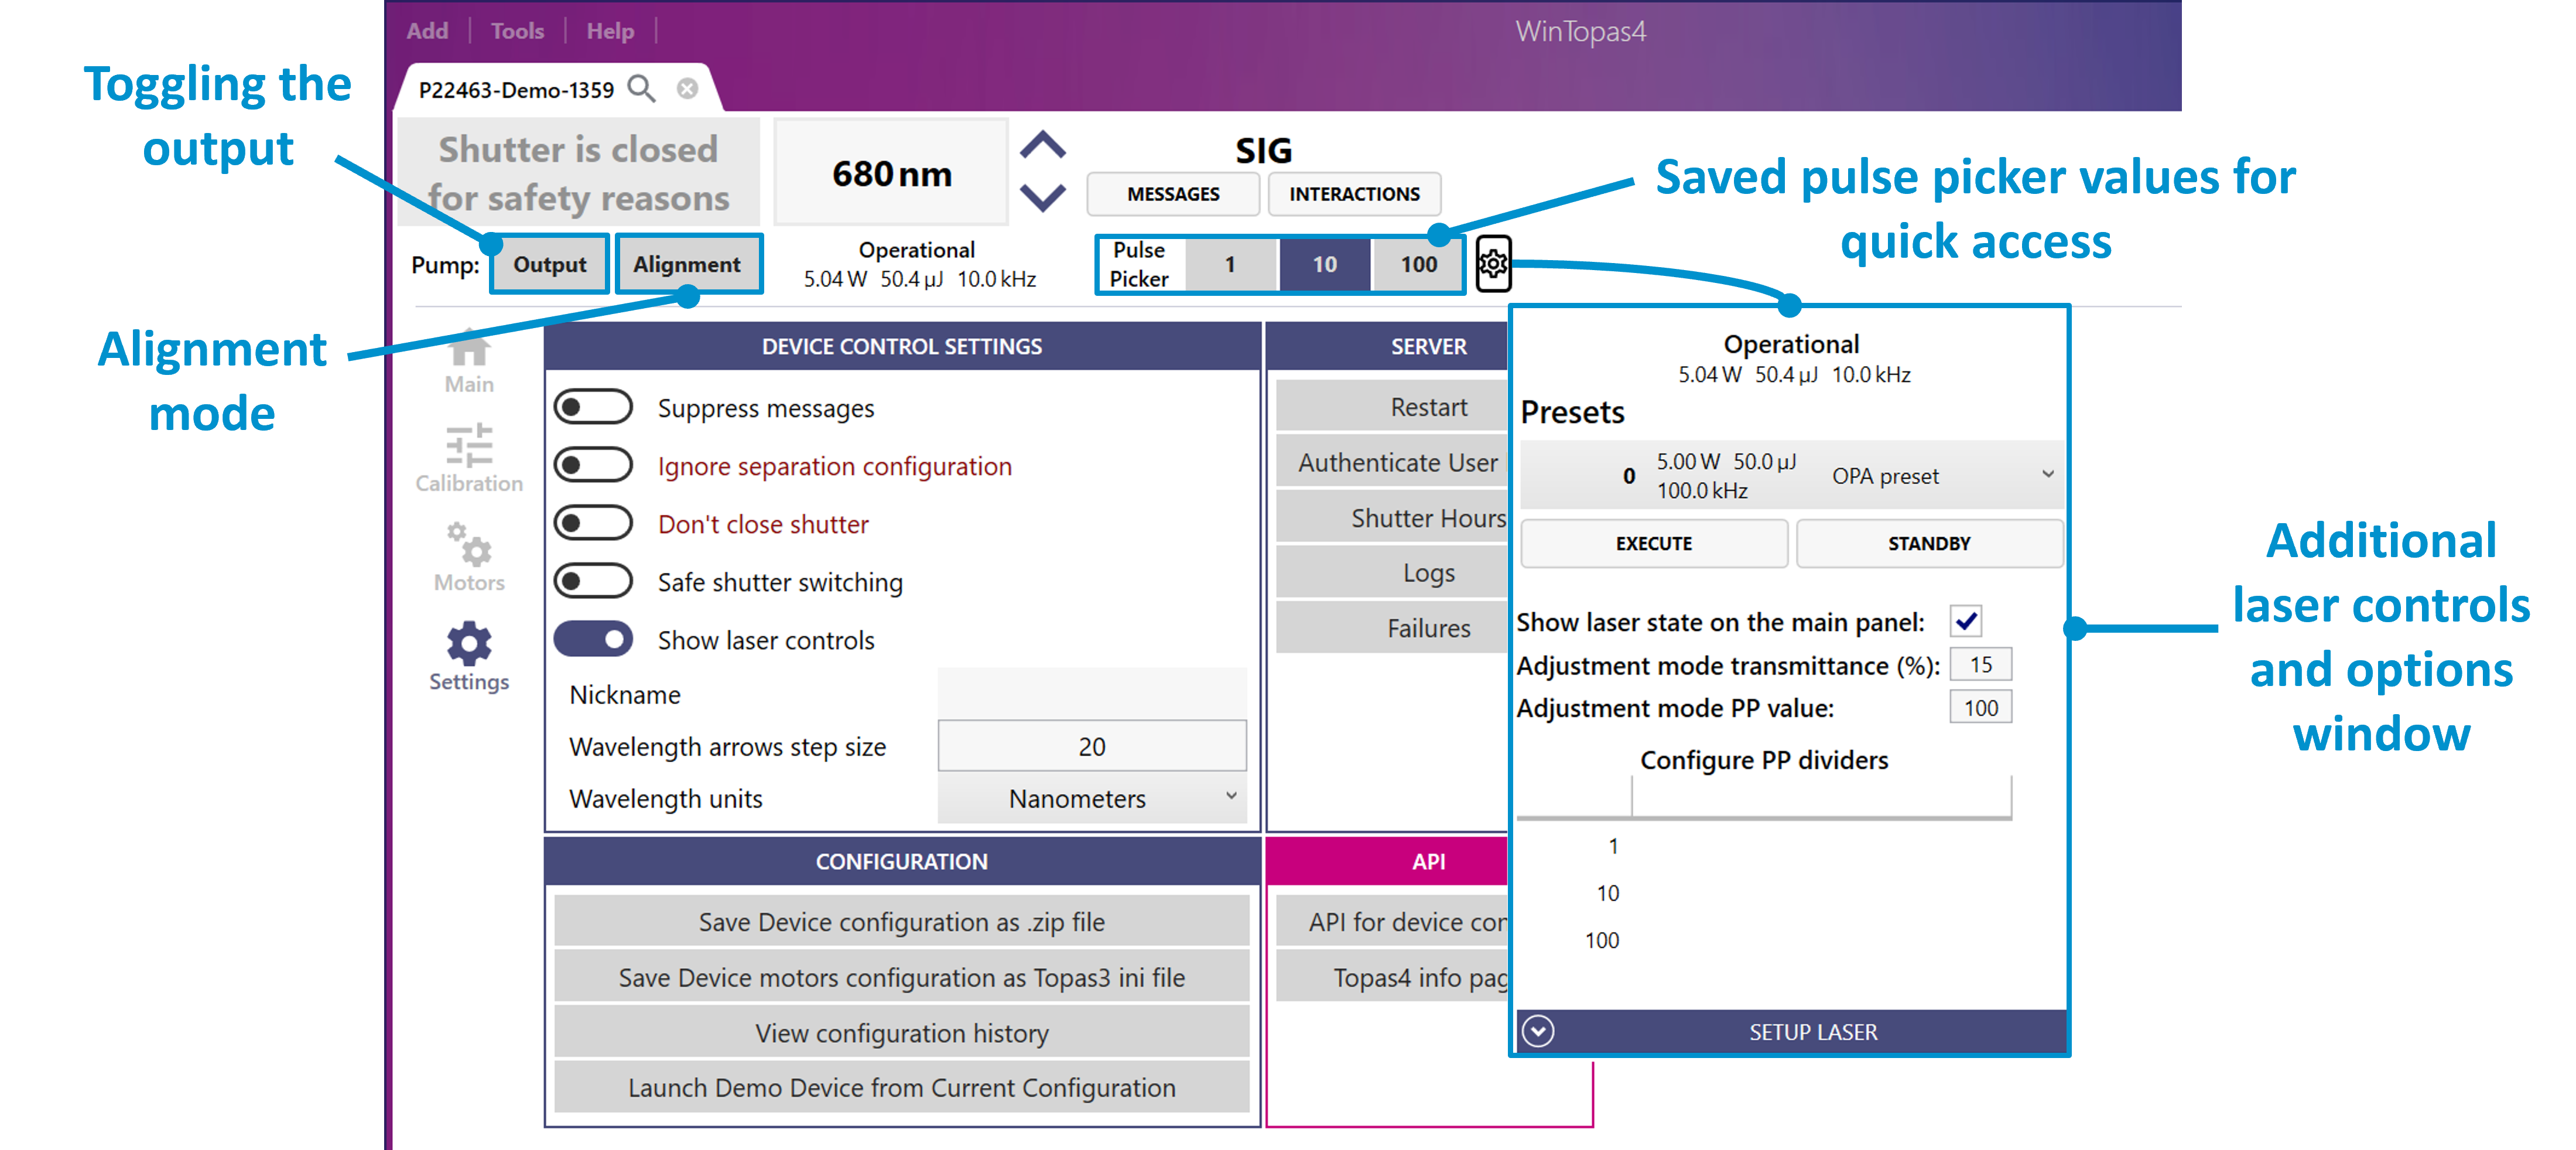
Figure 57. Controls, indicators and options of a pump laser.
The laser can be put into standby state, or a different preset can be executed as shown in Figure 58.
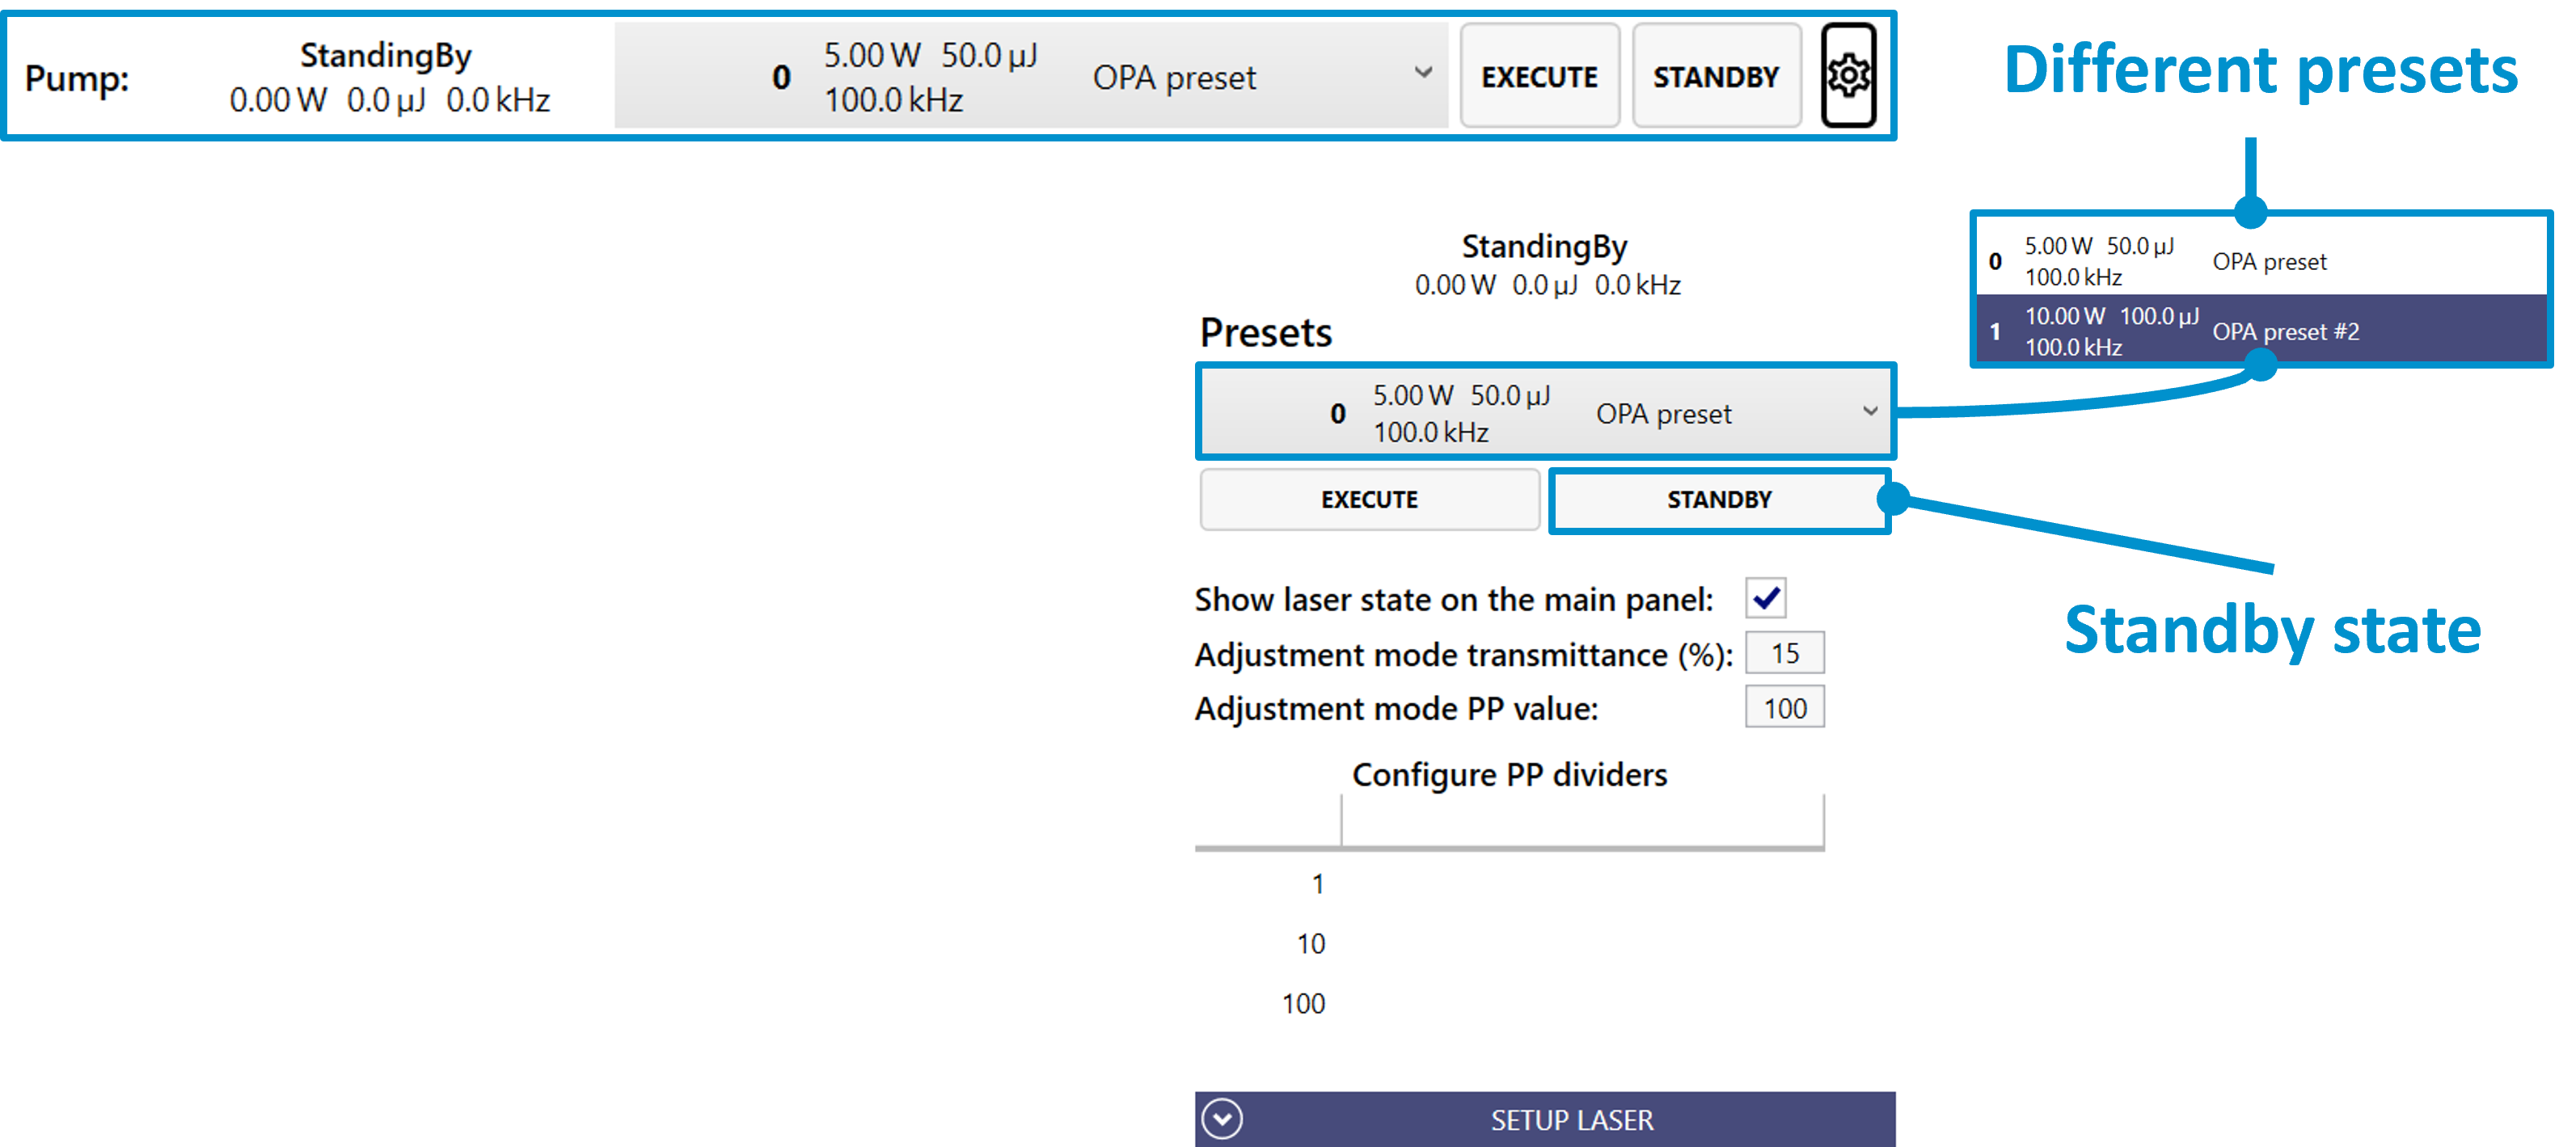
Figure 58. Standby state of the pump laser.
We can modify the attenuator and pulse picker values that are used in the alignment mode or customize the existing pulse picker controls and add new ones (see Figure 59). If the laser has not been set up yet, it can be set up in “Setup Laser” window as shown in Figure 60. Usually, it is enough to search for the default IP configurations to initialize your laser. However, if the laser’s IP address has been modified the laser can be found by entering a custom IP address.
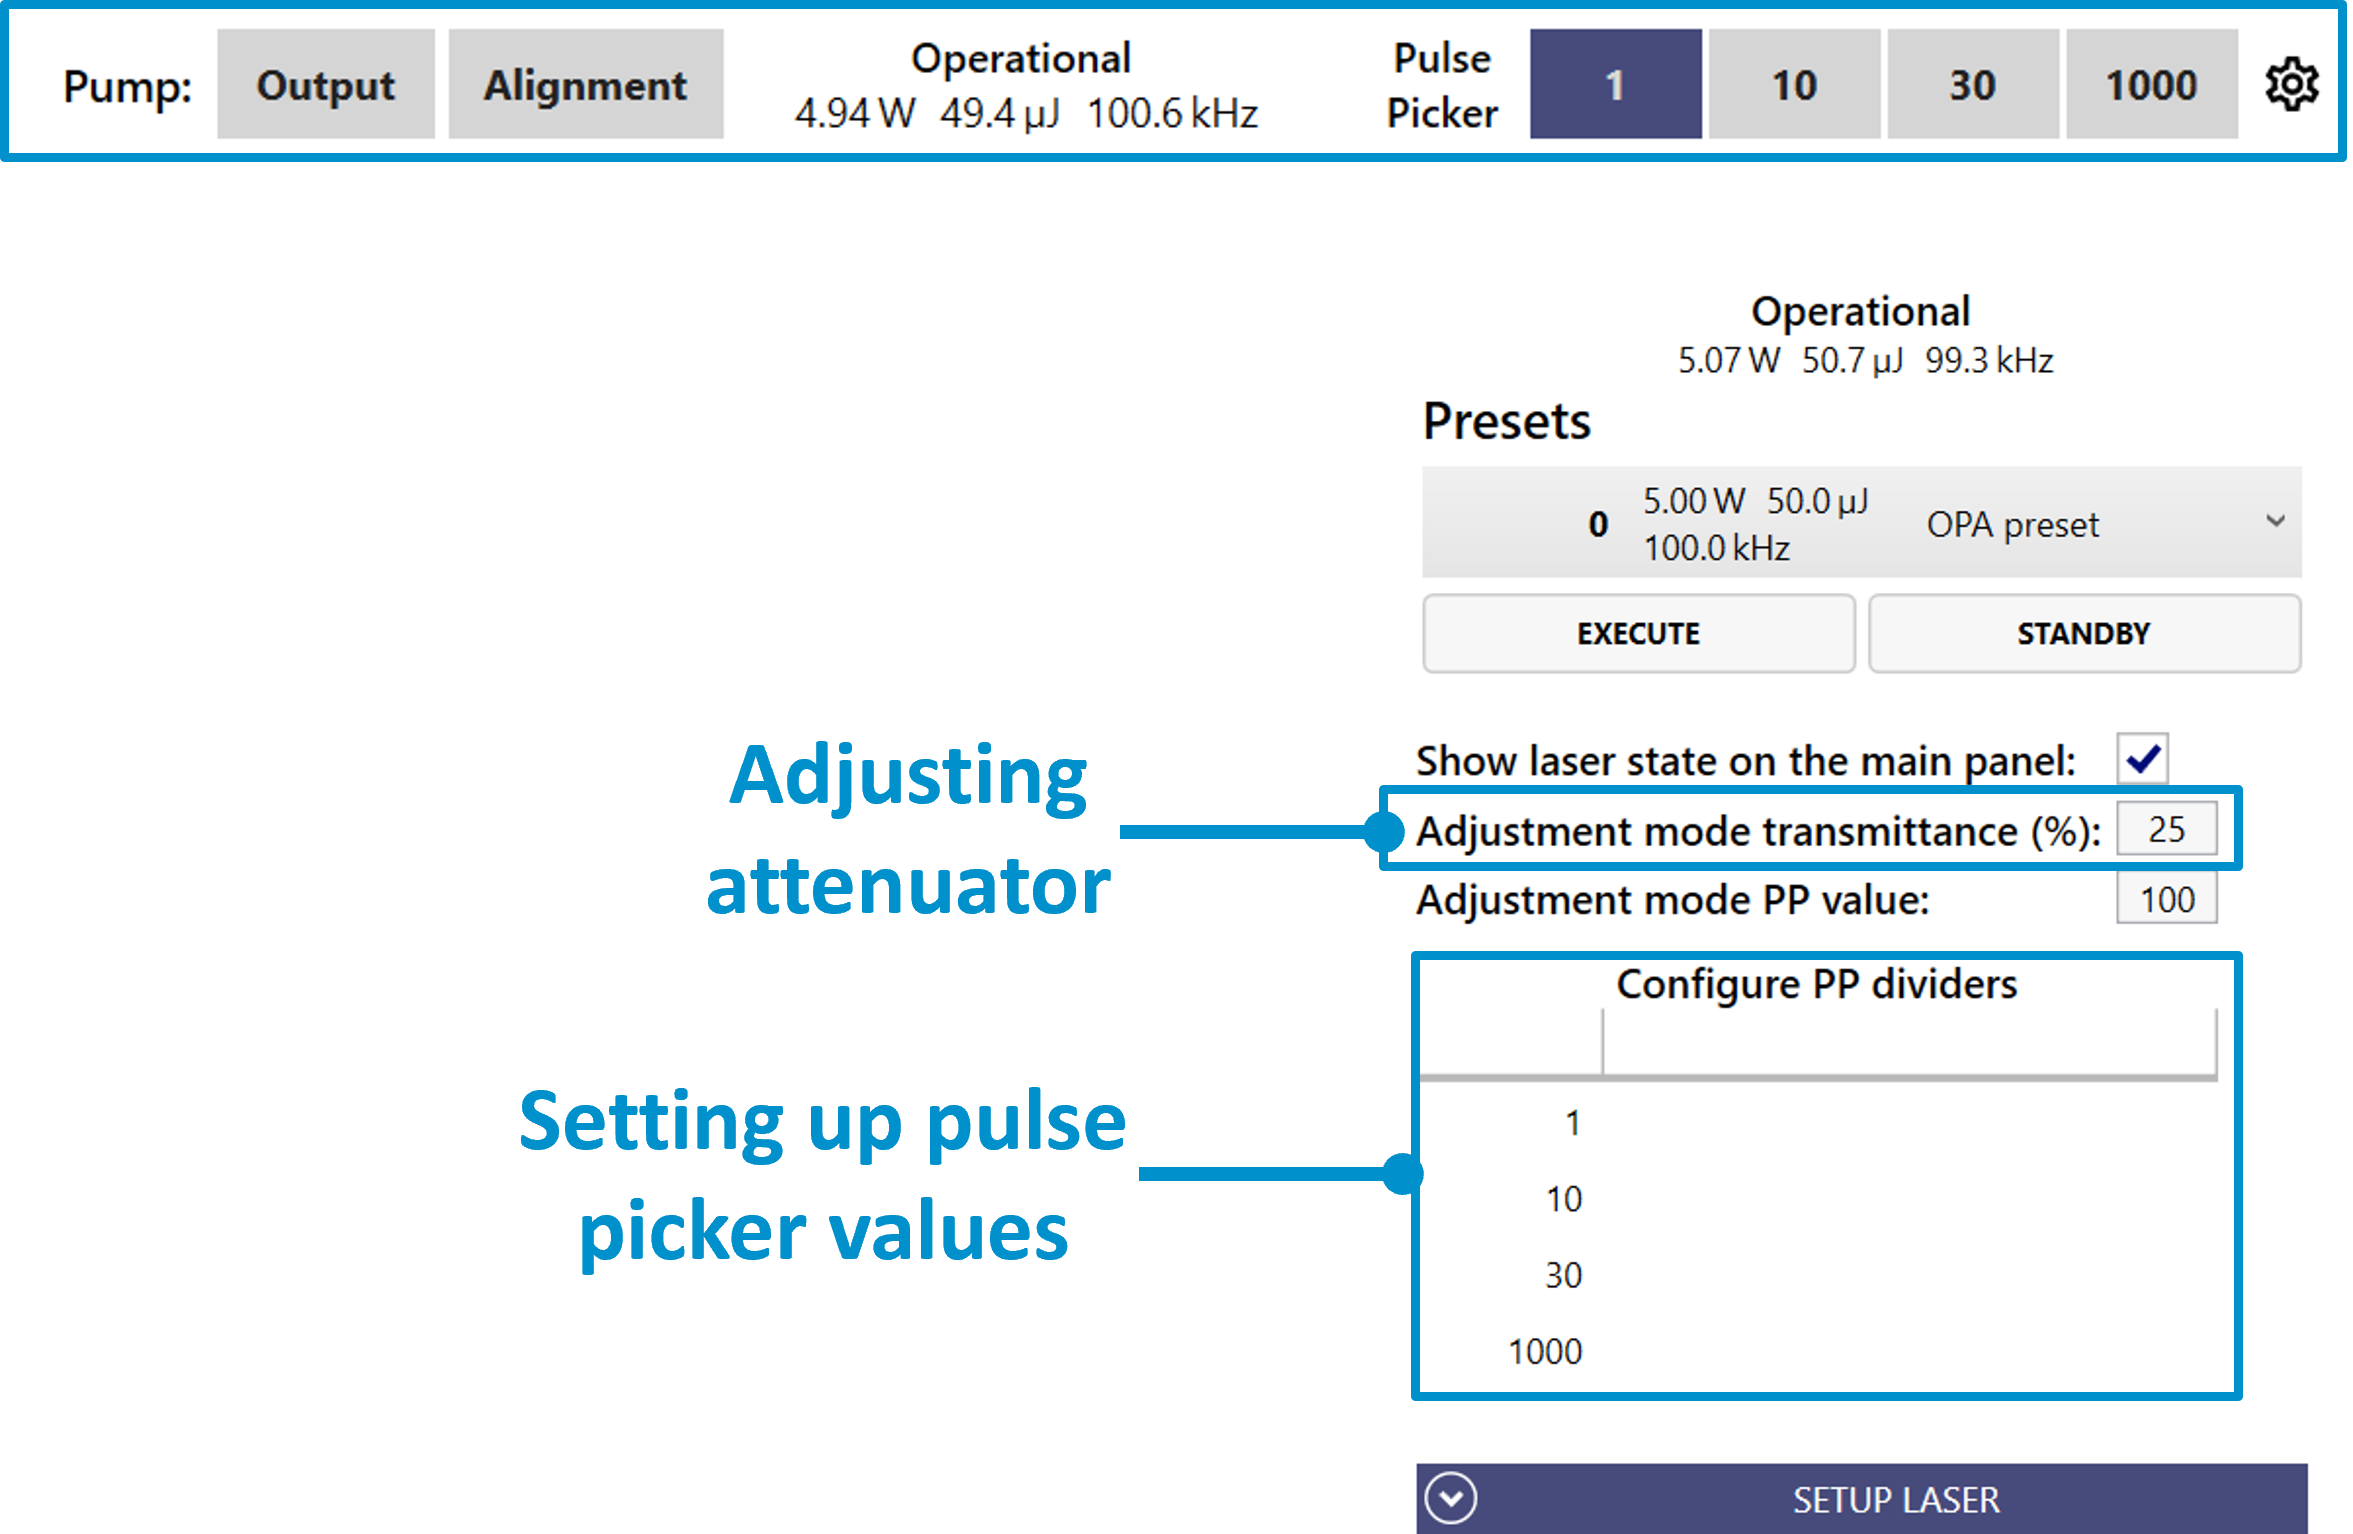
Figure 59. Adjusting attenuator and pulse picker values of the pump laser.
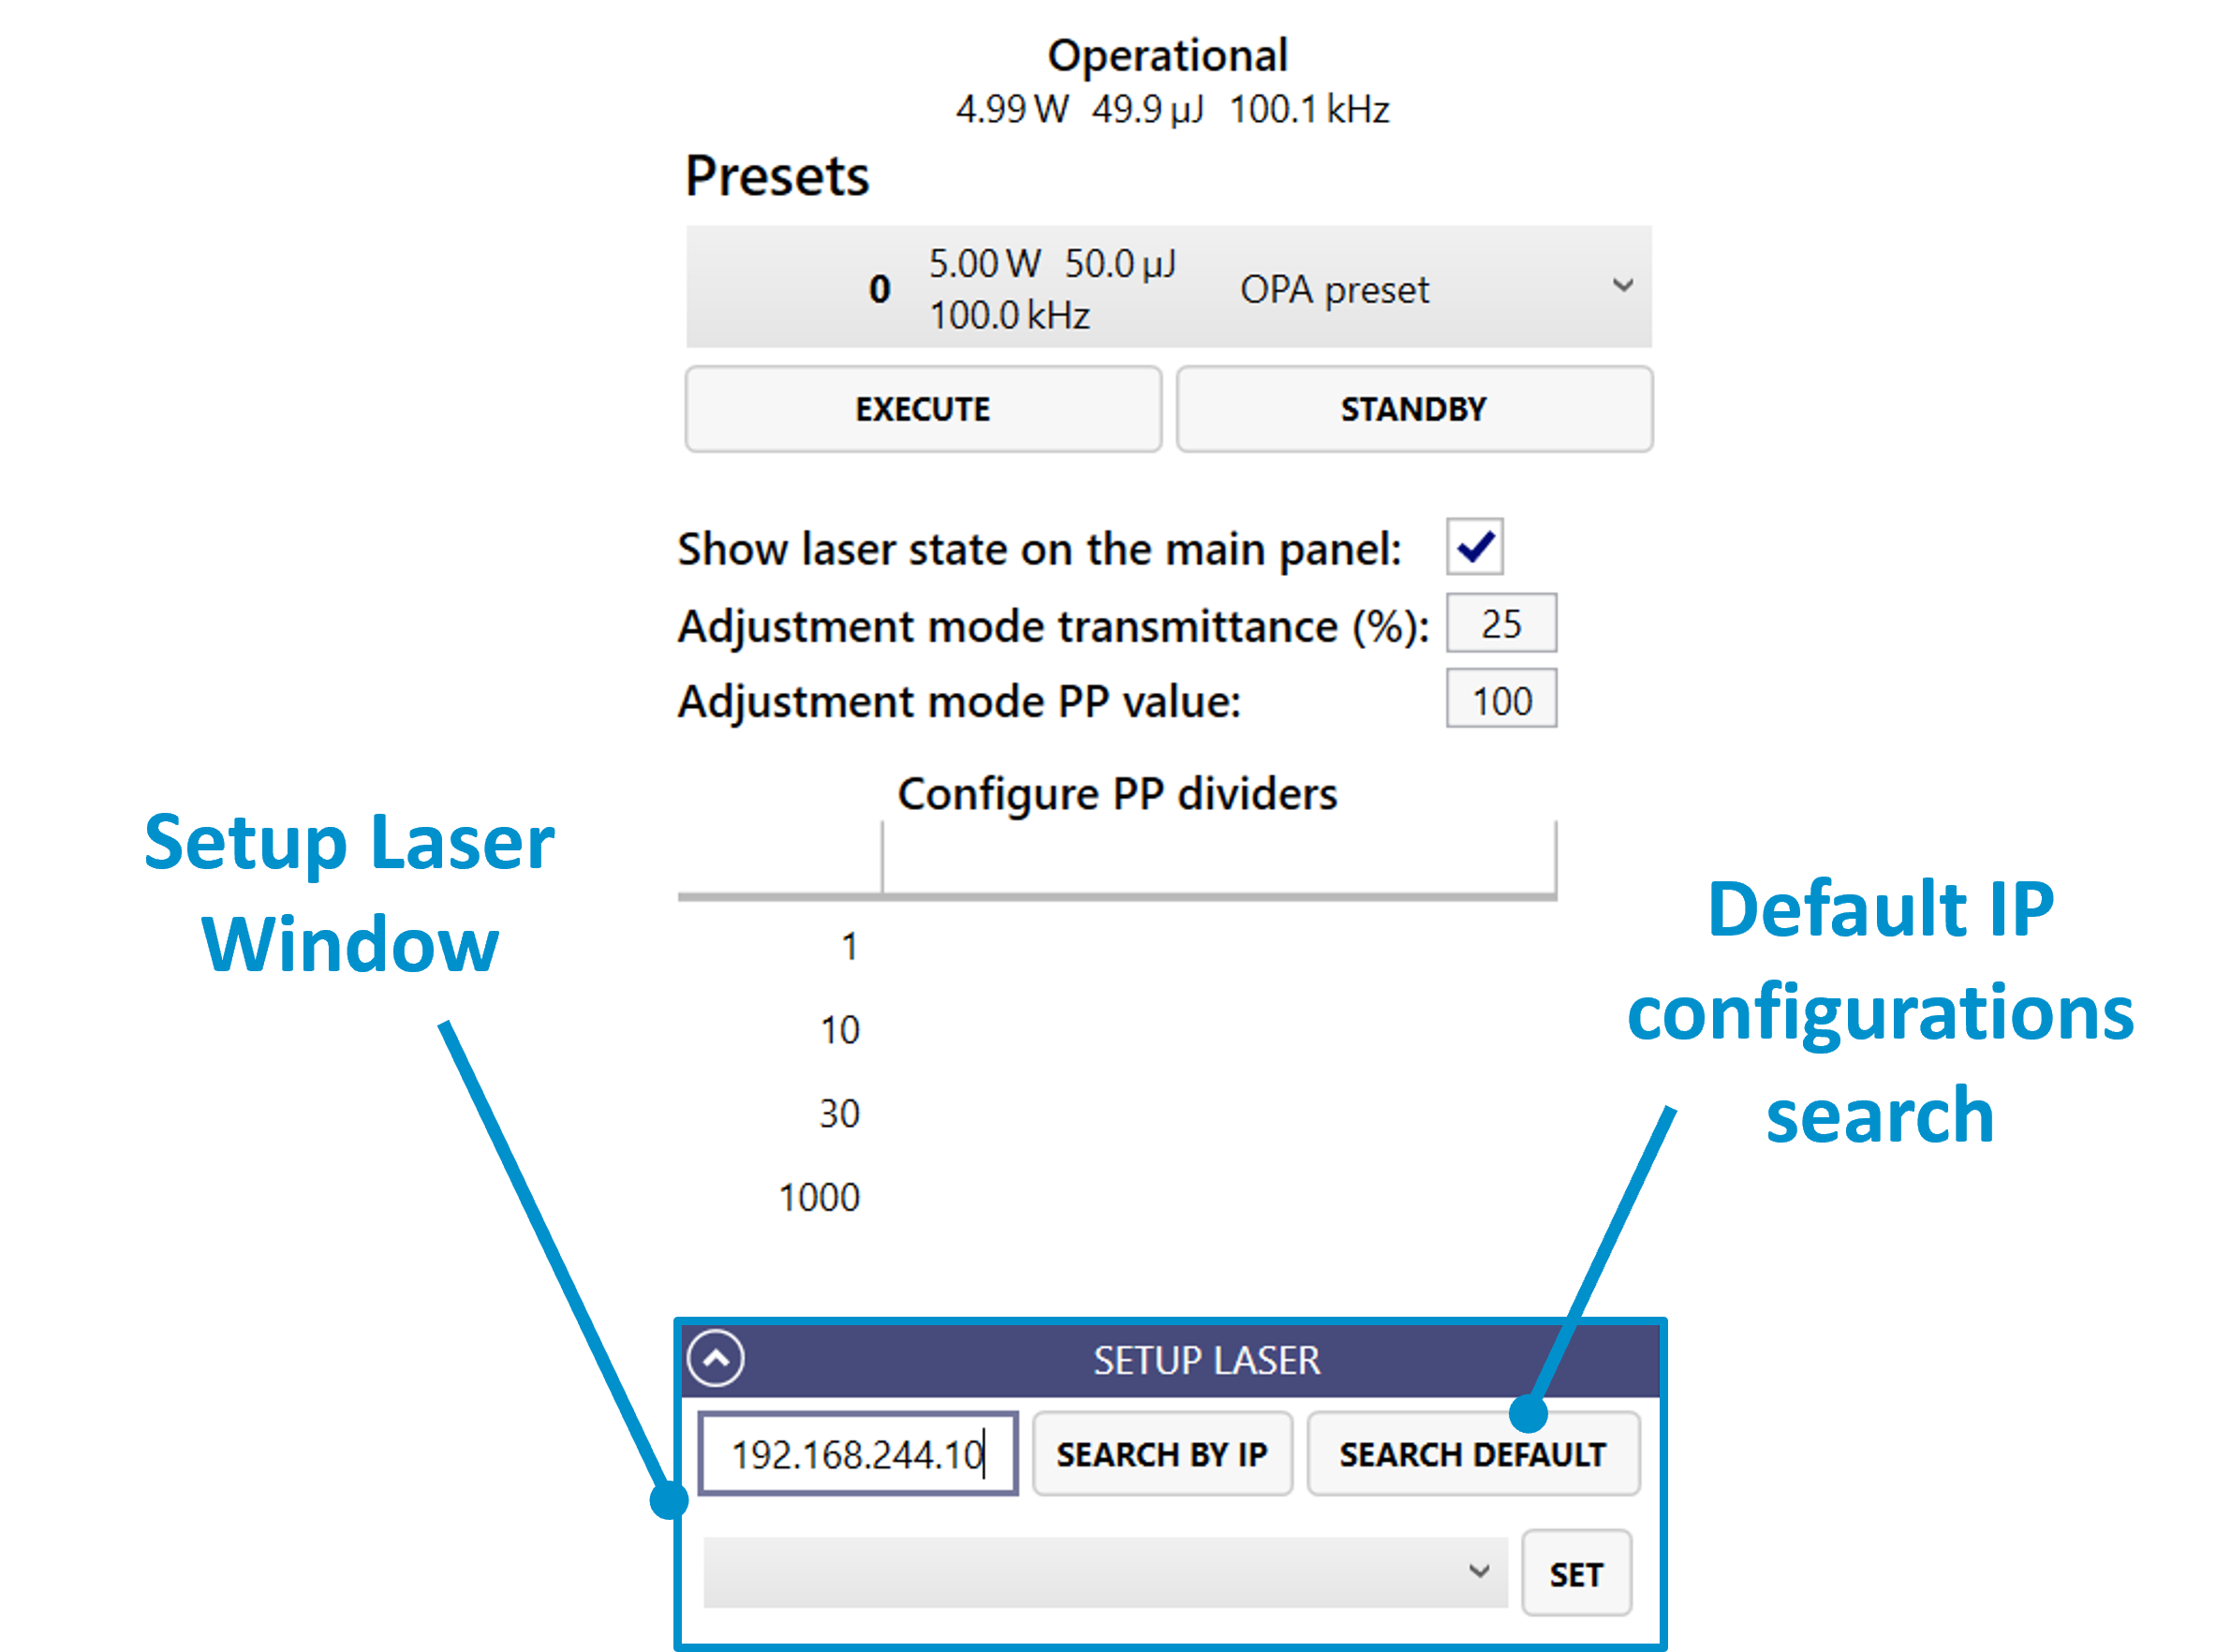
Figure 60. Pump laser setup.
OPA calibration can also benefit from laser integration. A specific laser preset can be assigned to the optical calibration. Under this condition the shutter will only open if the preset is active. As shown in Figure 61, a wrong preset is active, so the shutter control is disabled for safety reasons. It becomes available once the correct preset is launched (see Figure 62).
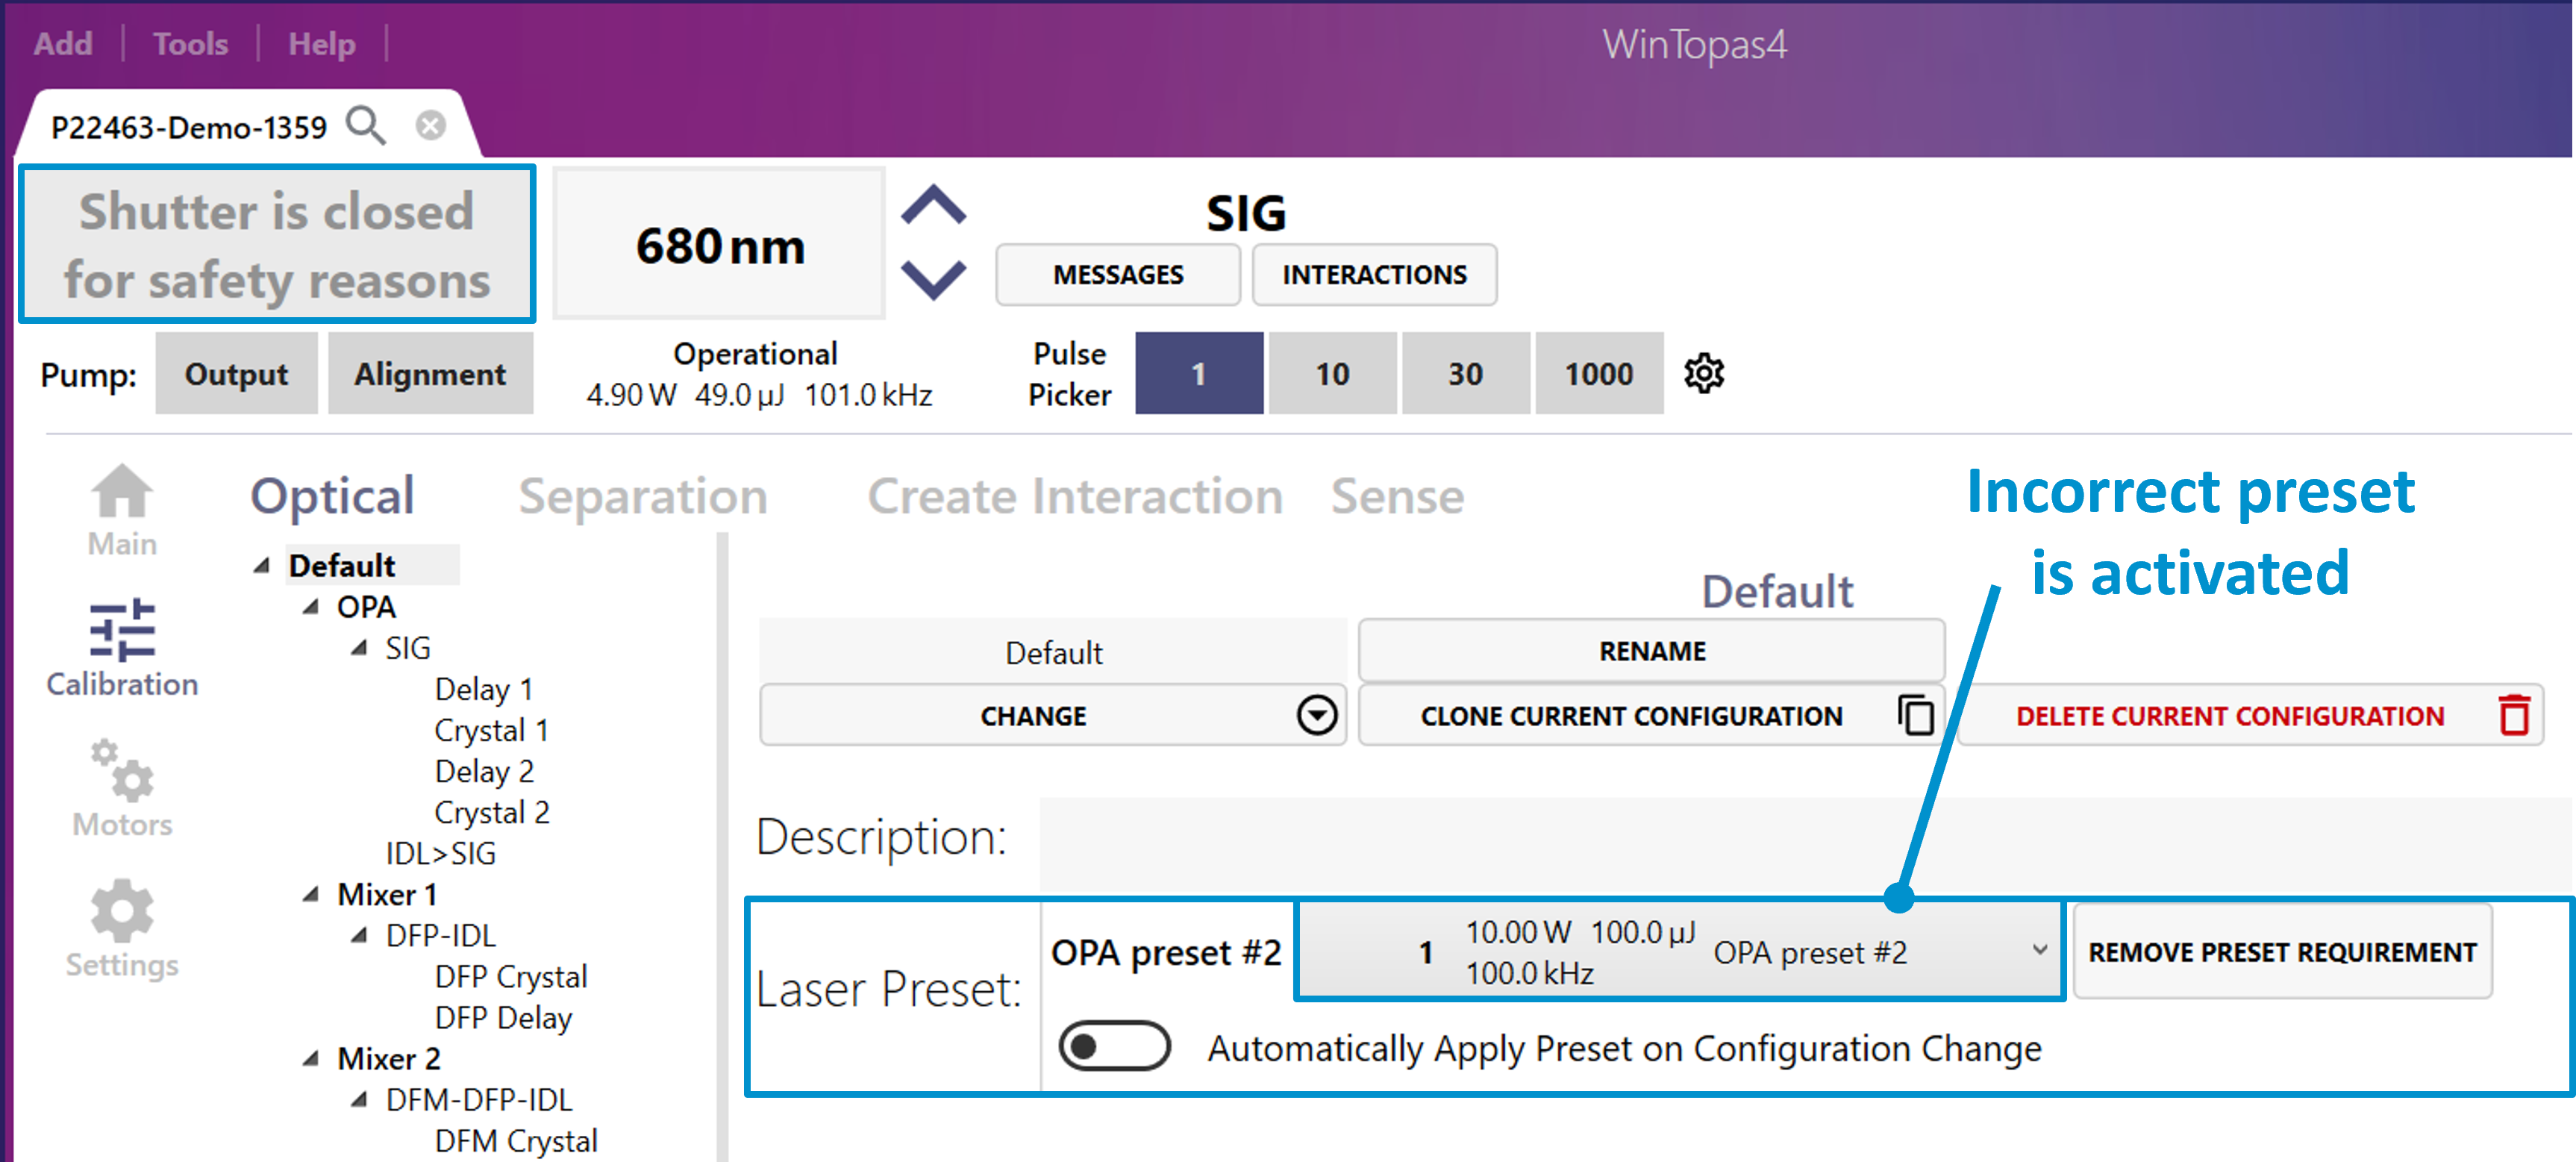
Figure 61. Closed shutter due to incorrect activated pump laser preset.
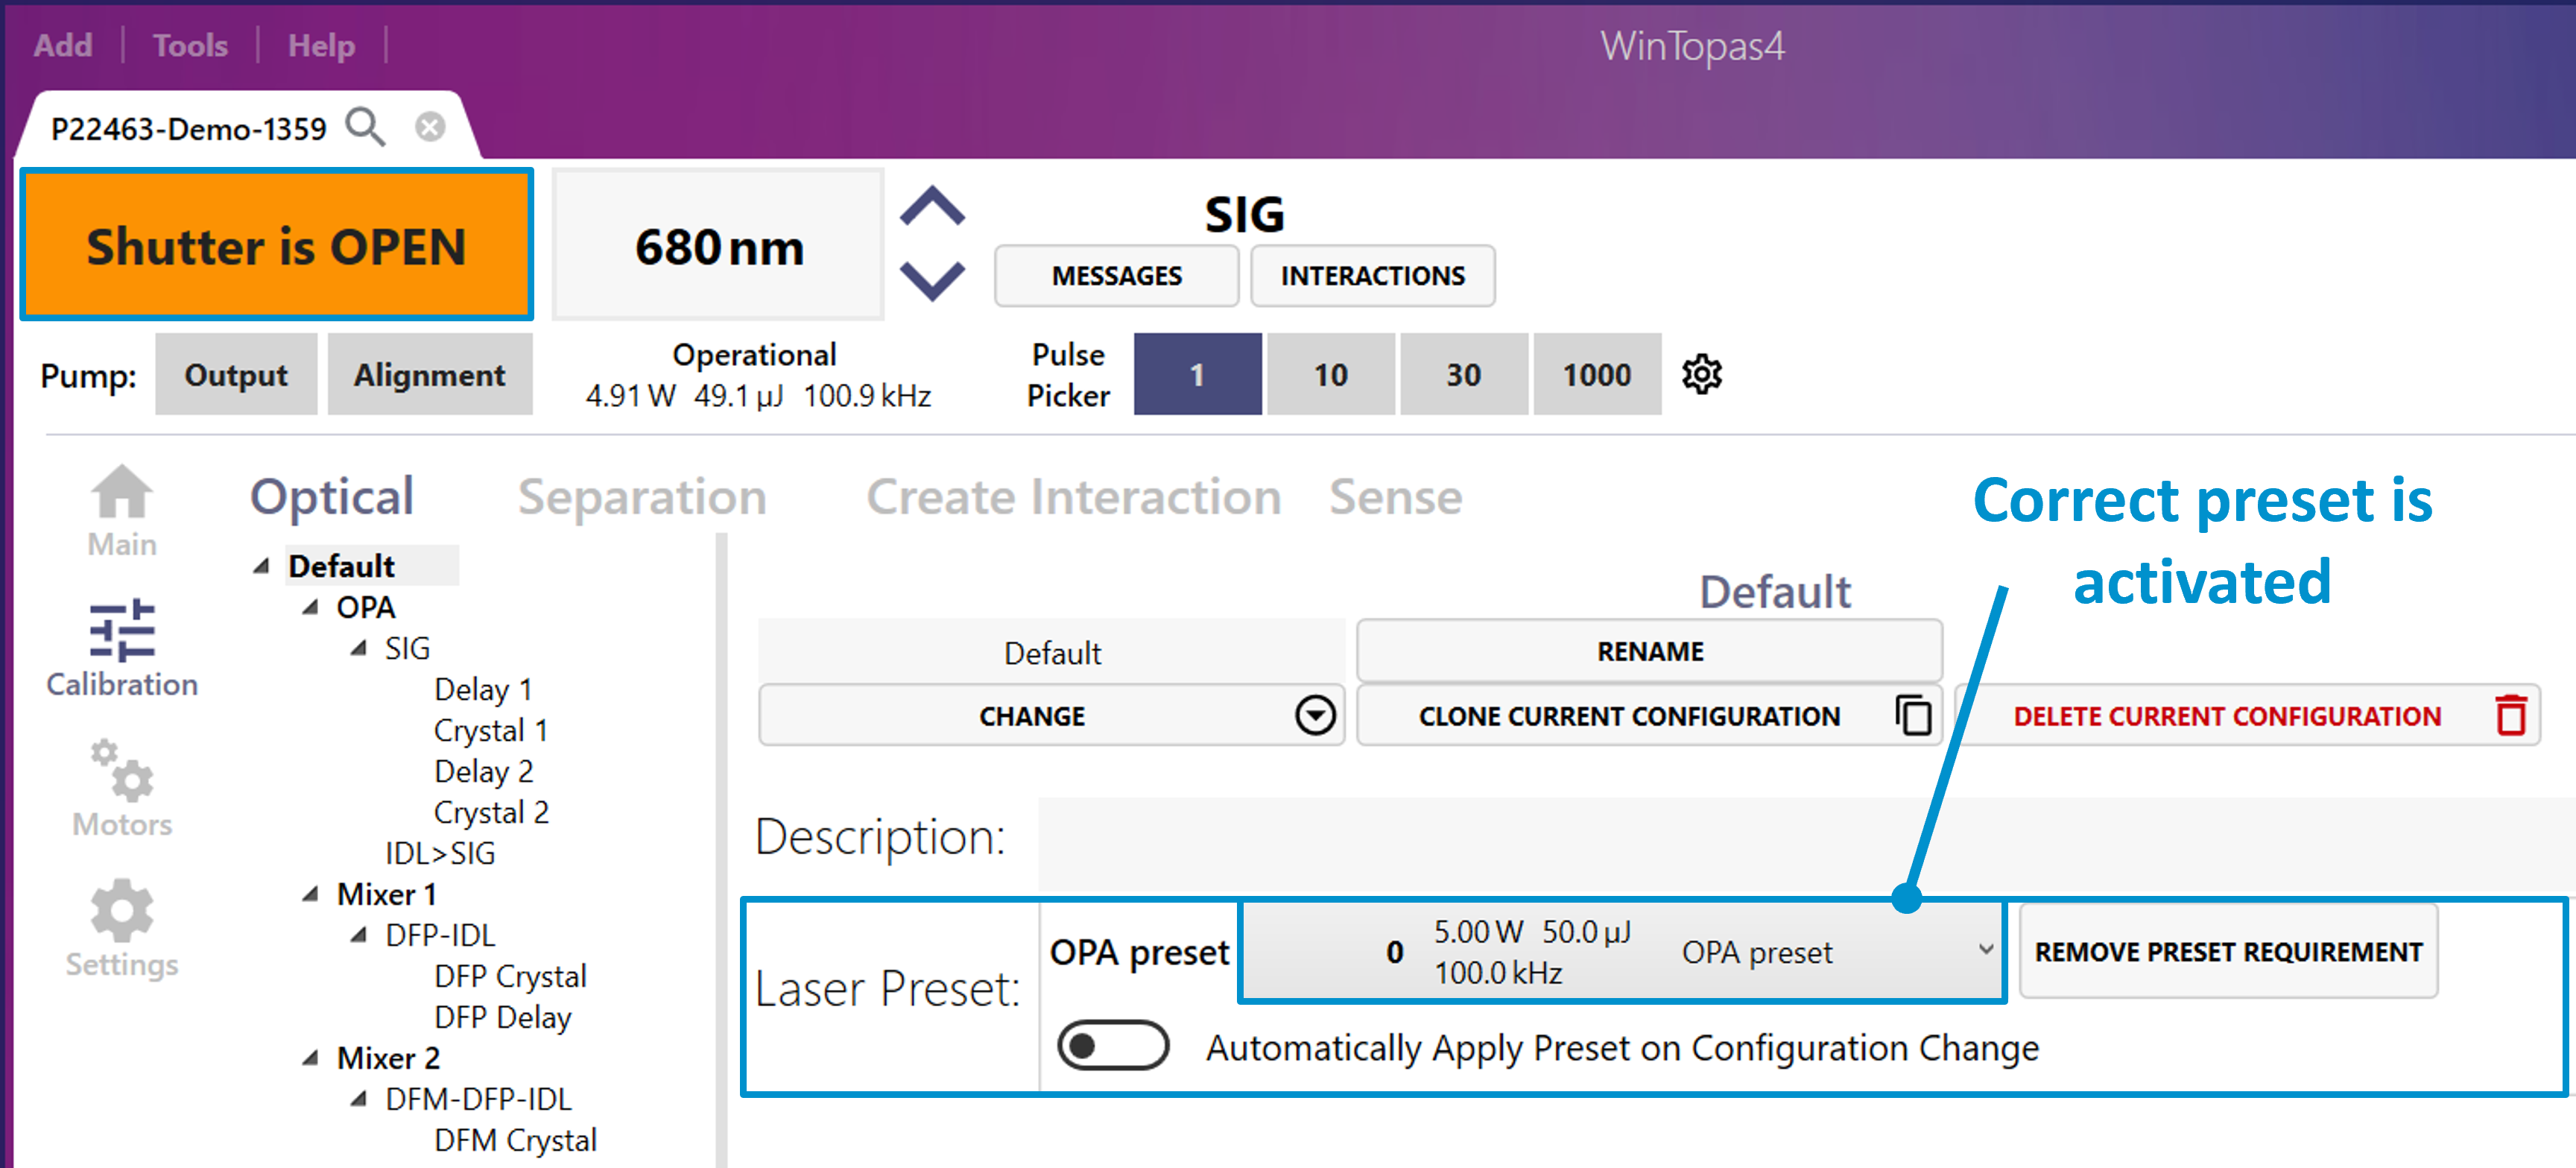
Figure 62. Opened shutter with correct pump laser preset being activated.
By enabling “Safe switching shutter” (see Figure 63) function laser output will be temporarily closed when the mechanical shutter of the OPA is in motion. This feature is usually set up at the factory and does not have to be changed.
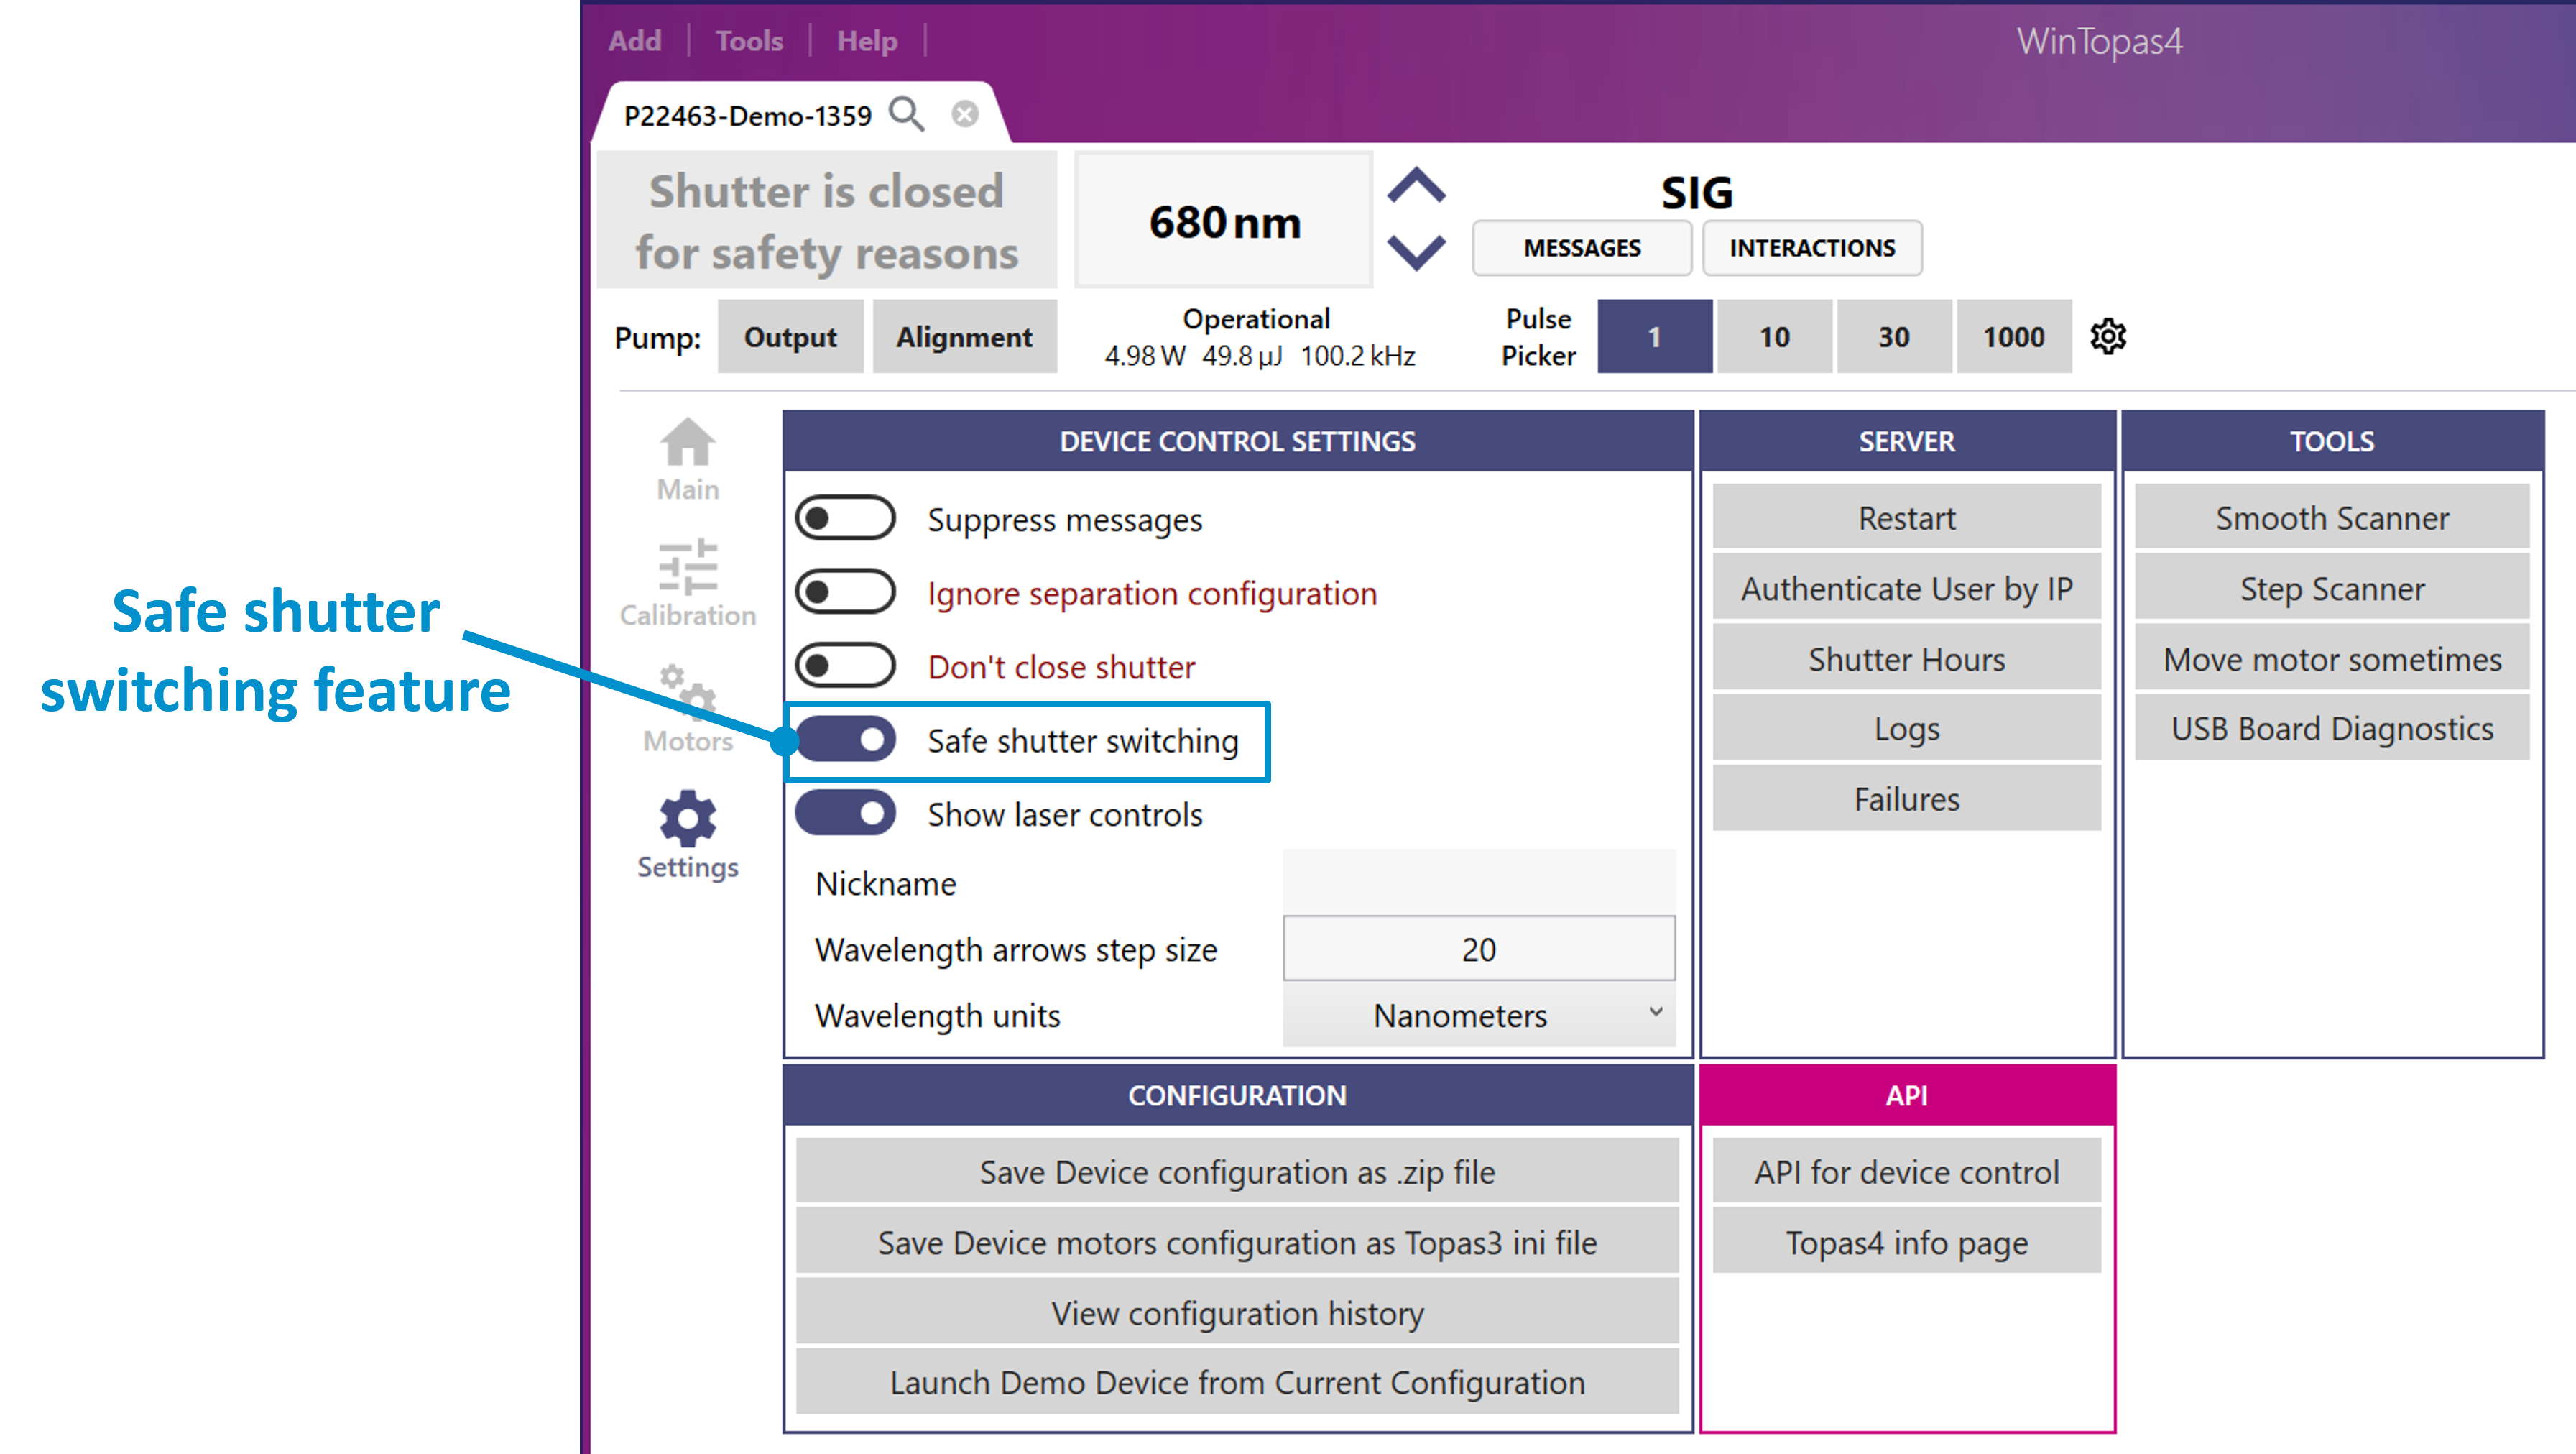
Figure 63. Safe shutter switching.
Saving motor positions
In WinTopas4 application after adjustments you can save motor positions into groups in the Main window under the “Saved Positions” tab (see Figure 64). This feature needs elevated access, therefore a password “1600” is required to be entered. To create a group, simply enter desired group name and click “Save current position” after adjusting the motors the way you need it. After these steps, the motor position is assigned to the group and can be enabled by “Go” button.
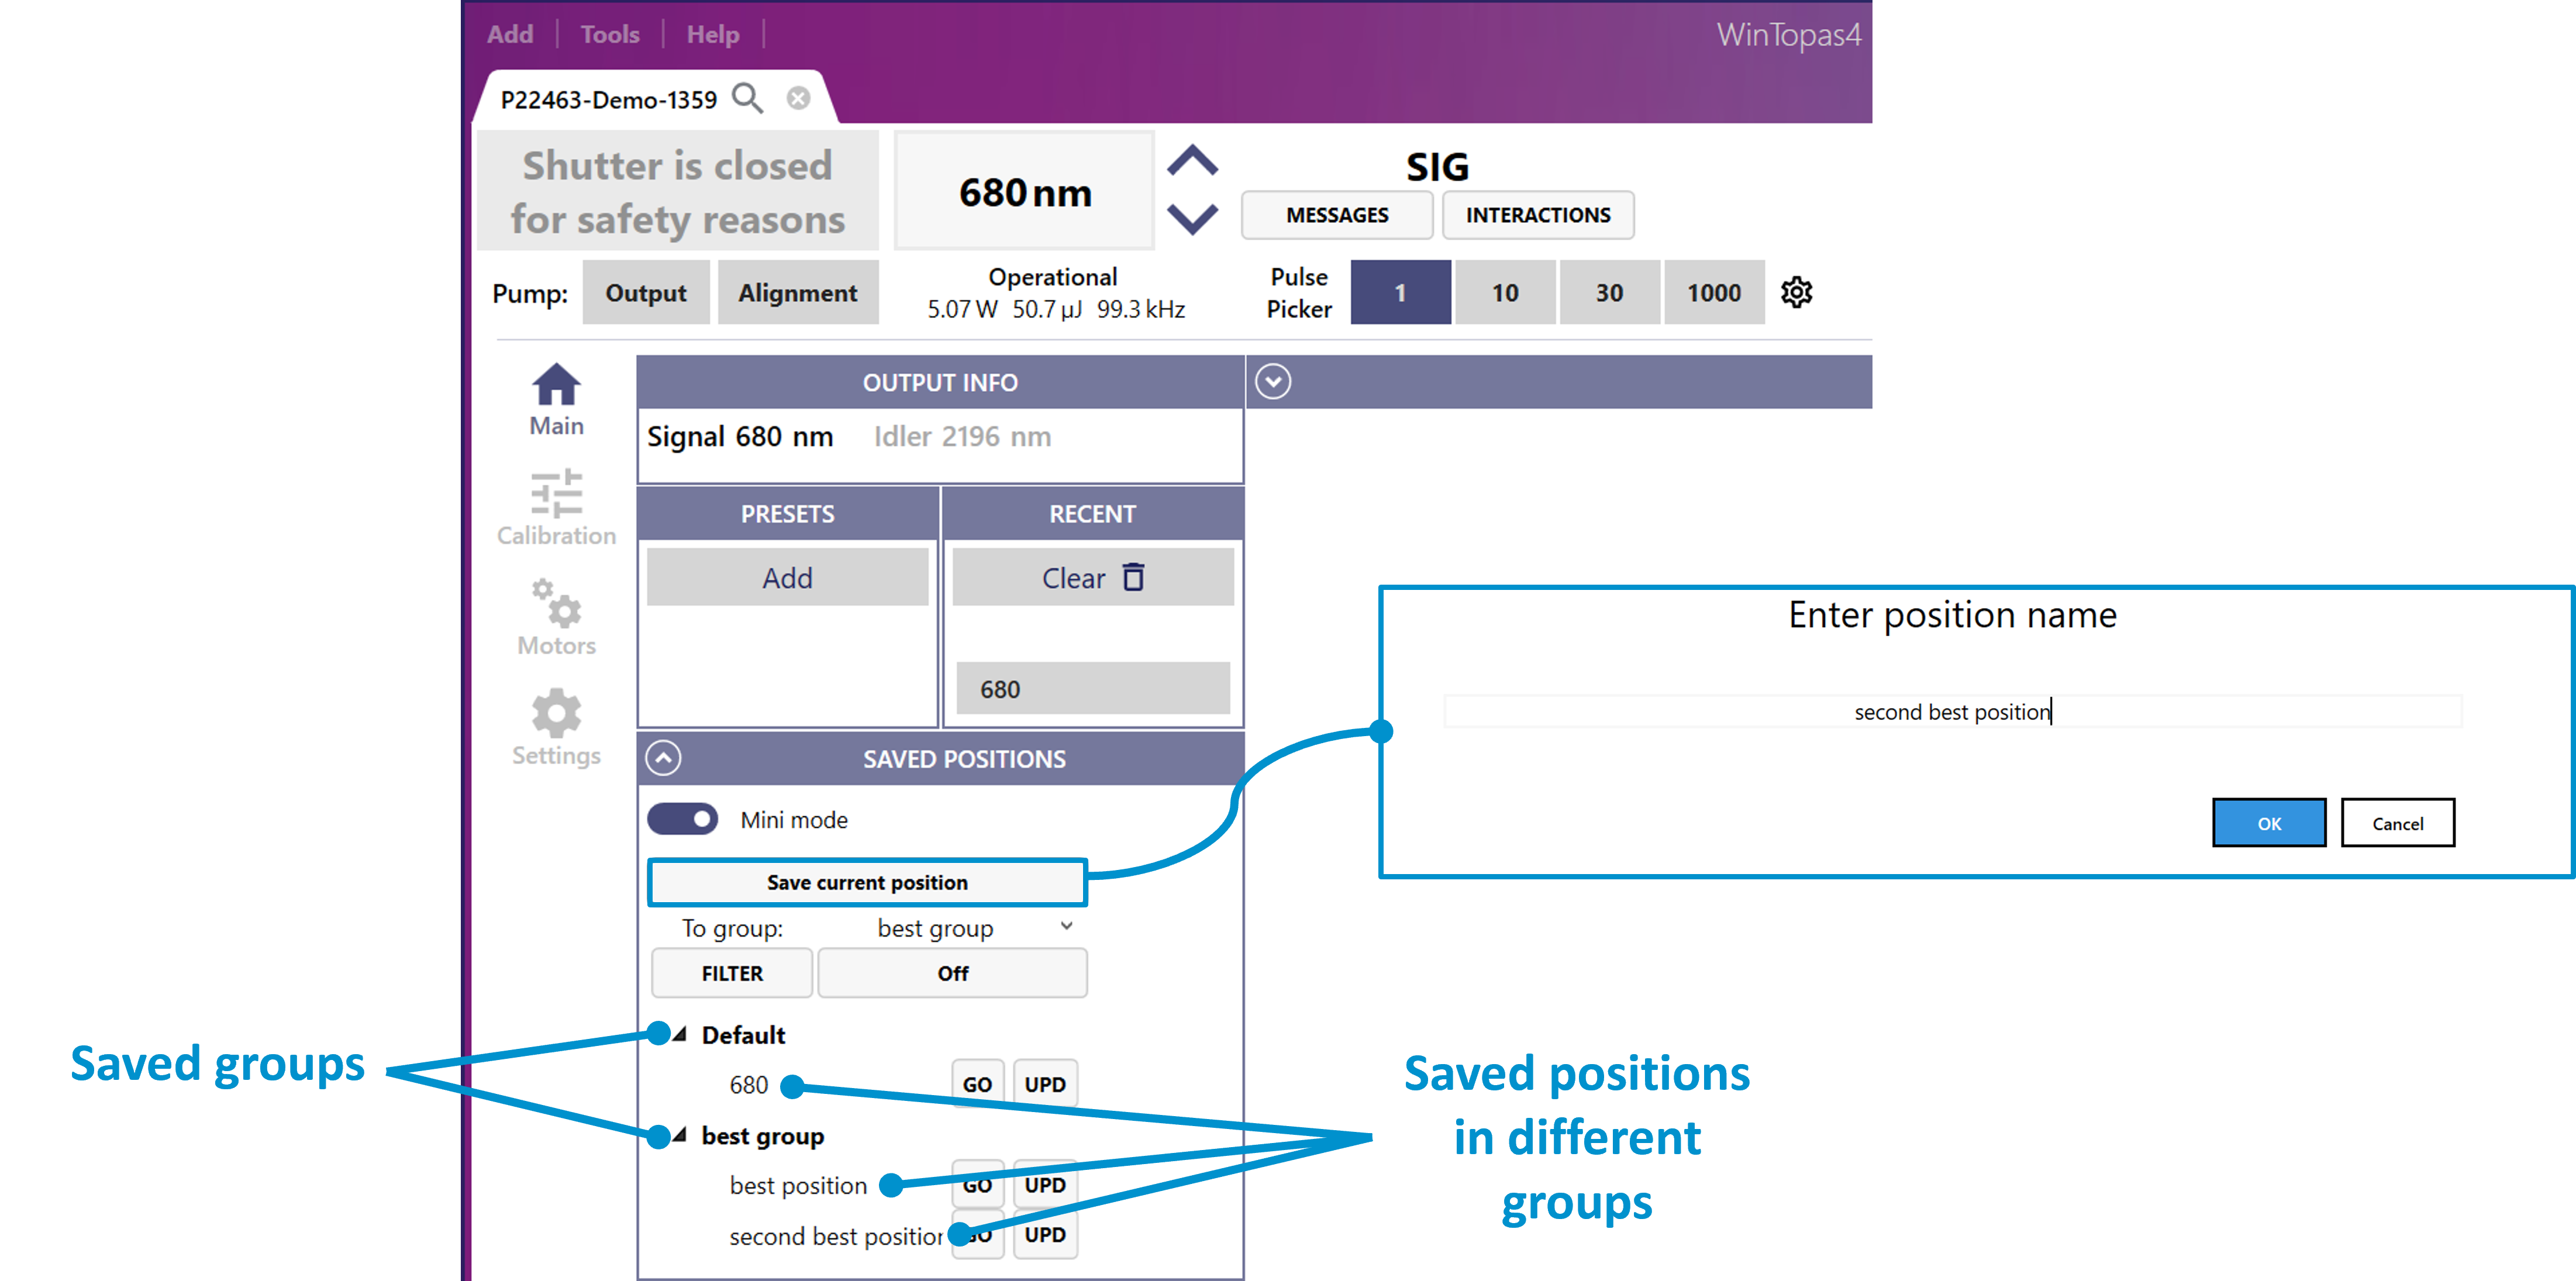
Figure 64. Grouping and saving motor positions.