Tuning
In this instruction we will cover calibration curve adjustment procedures. They are usually performed when the OPA requires some power or wavelength optimizations. To access the calibration menu elevated access must be granted first. After entering password “1600”, the calibration window will appear.
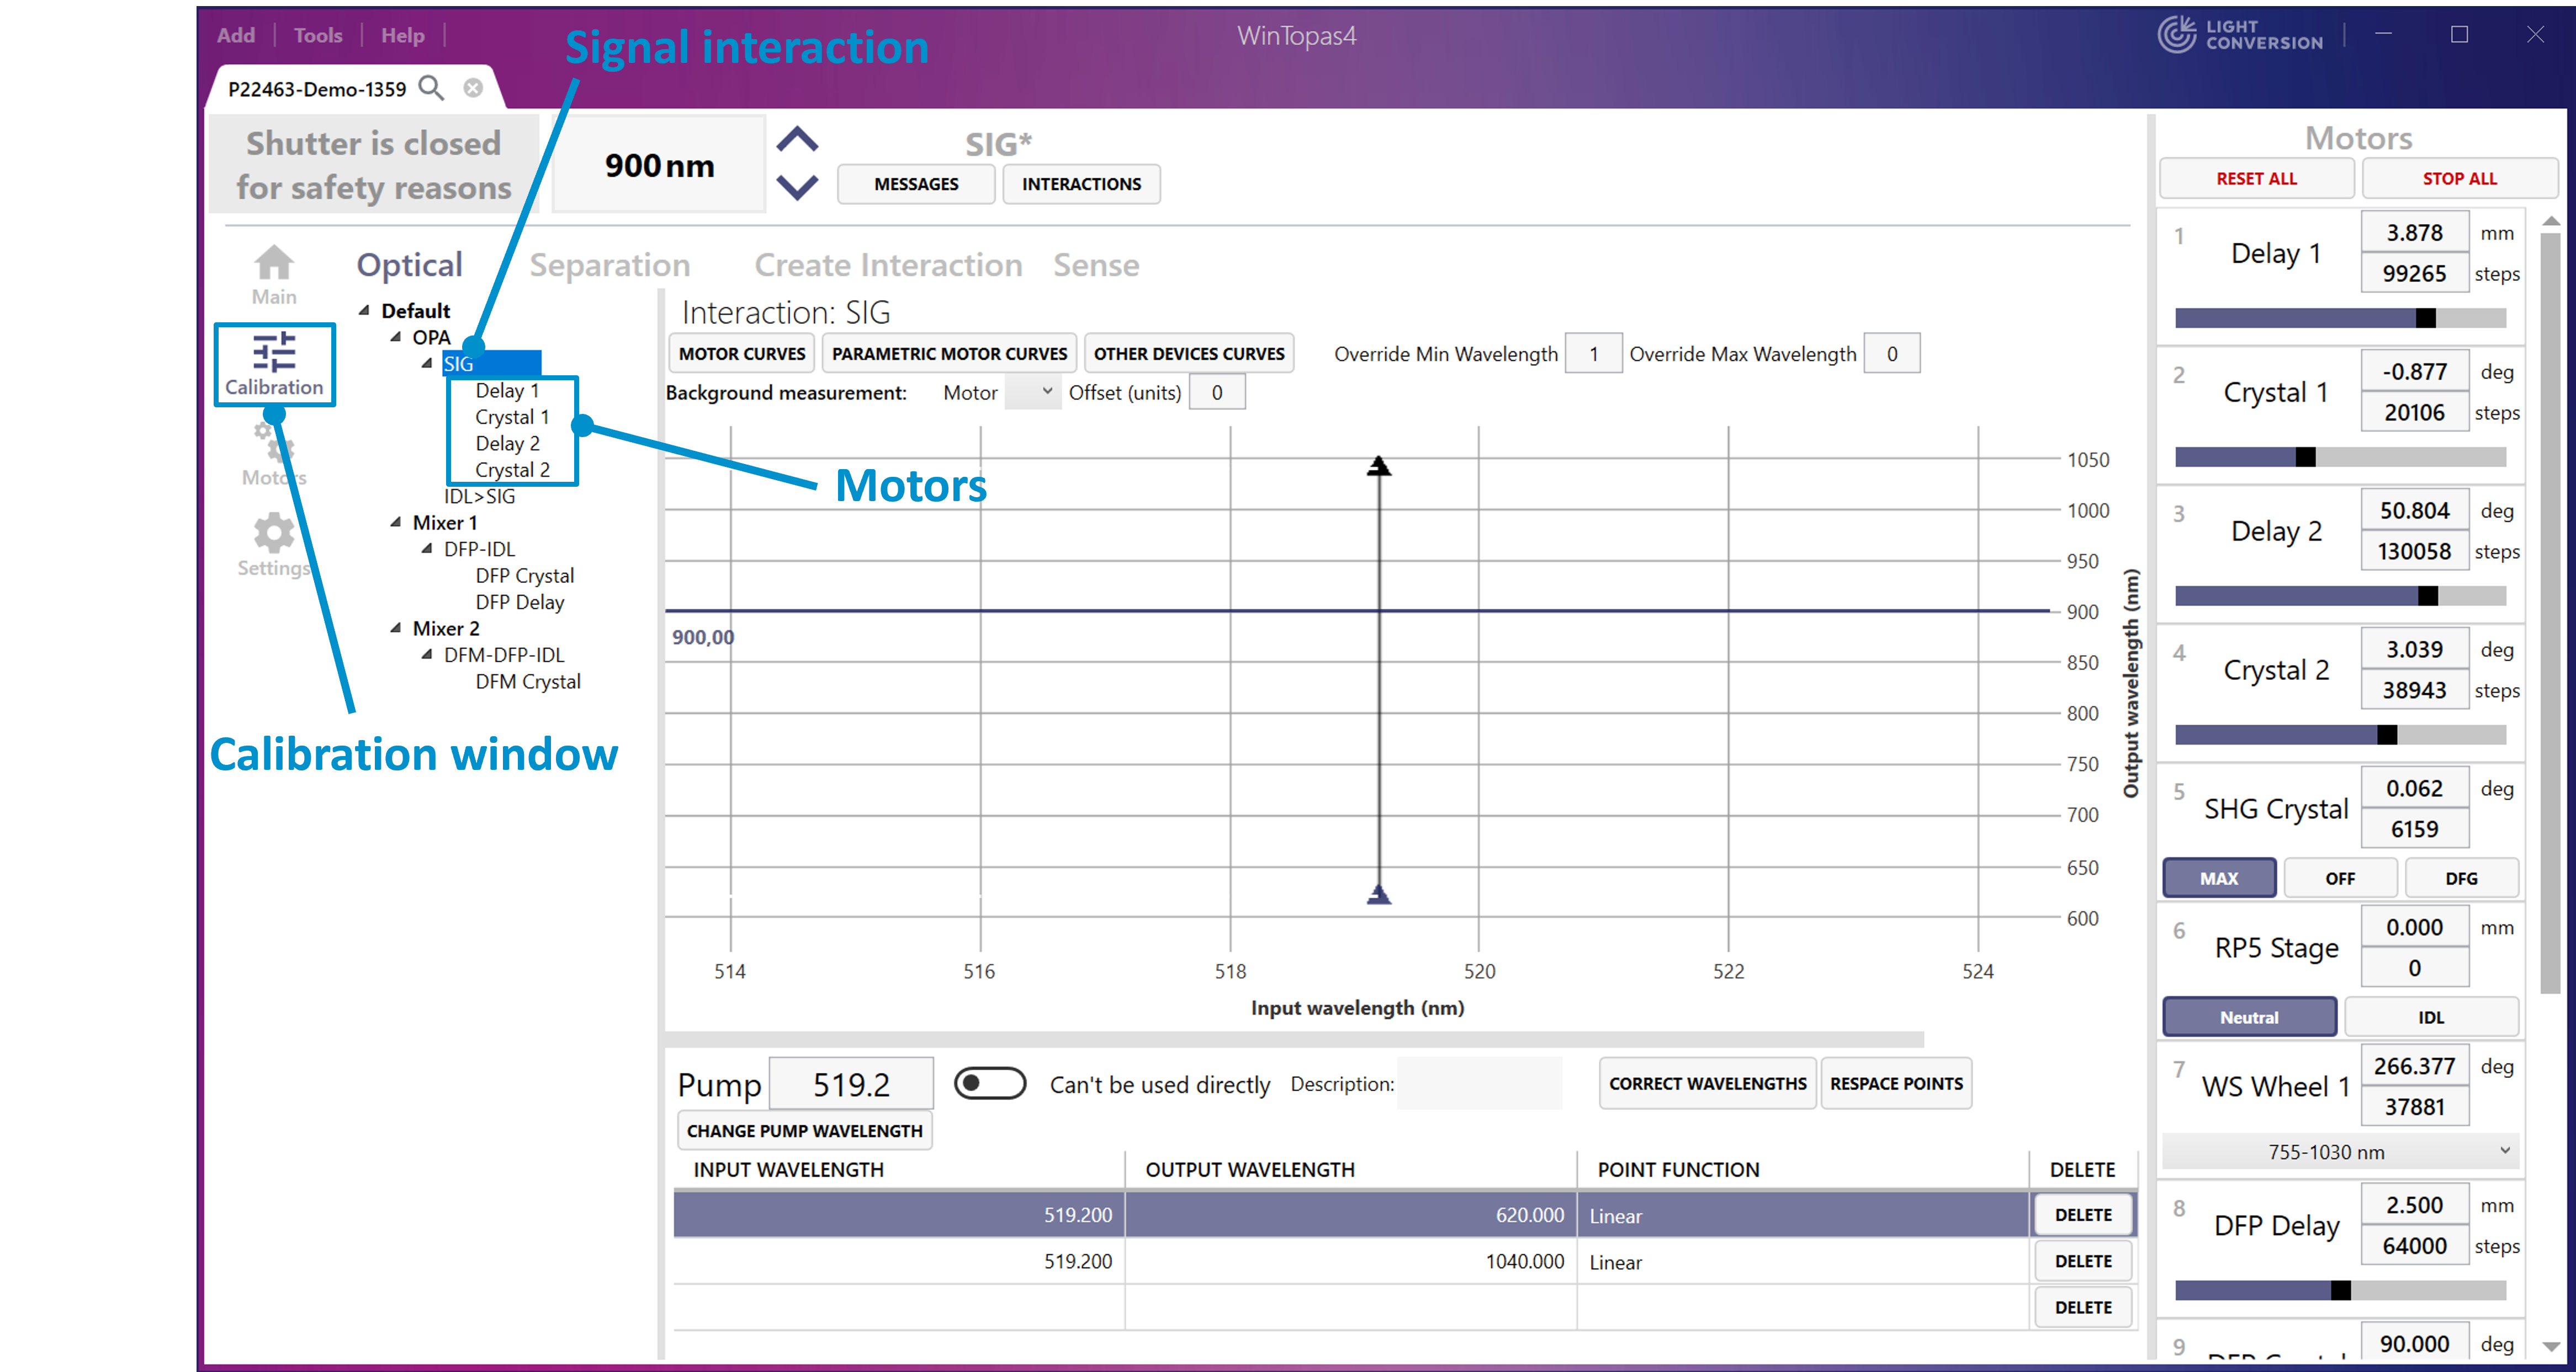
Figure 19. WinTopas4 Signal interaction tuning.
We will be tuning the Signal interaction (see Figure 19) which has 4 motors with their corresponding curves (see Figure 20). Each individual wavelength point in the curve can be modified either with a mouse, keyboard shortcuts or by editing the wavelength table. Tuning is performed by changing the motor position at a specific wavelength in the Motors control window (see Figure 21) while adjusting the crosshair of the calibration curve with the arrow keys on the keyboard. After adjustment, measure the OPAs output parameters and once the output parameters are as desired press “Enter” and the motor position on the curve will be overwritten as shown in Figure 22.
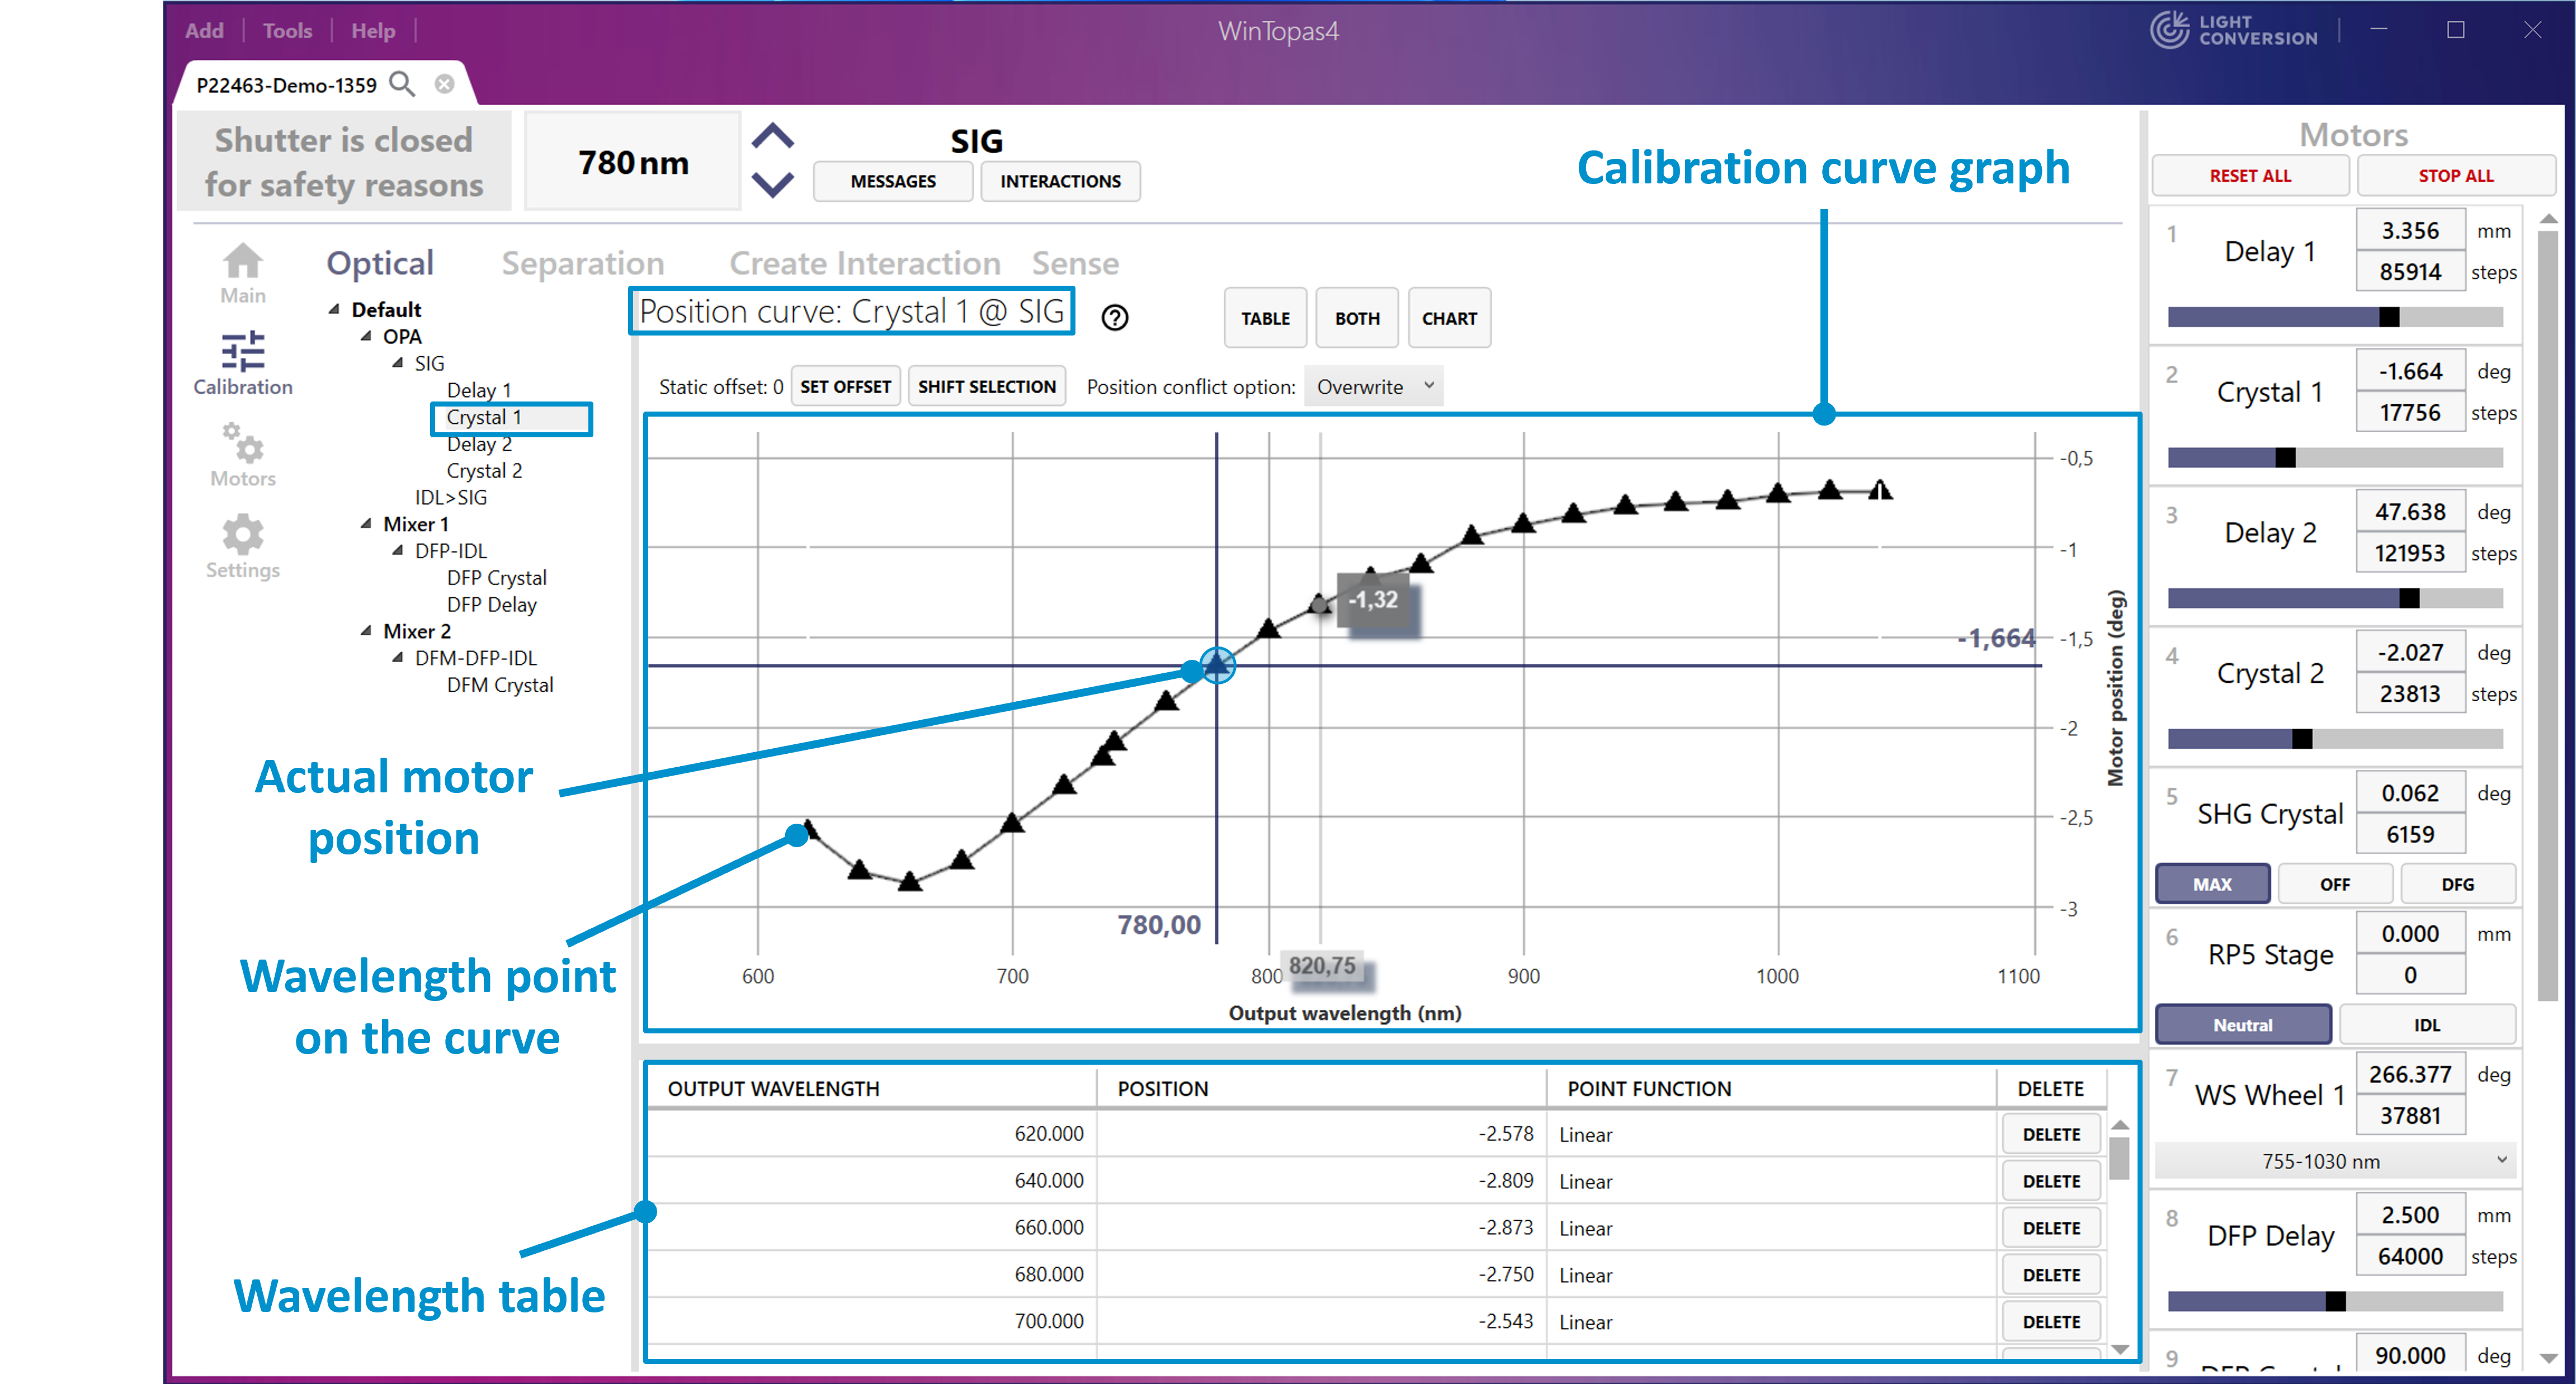
Figure 20. WinTopas4 Signal interaction motor “Crystal 1” calibration curve.
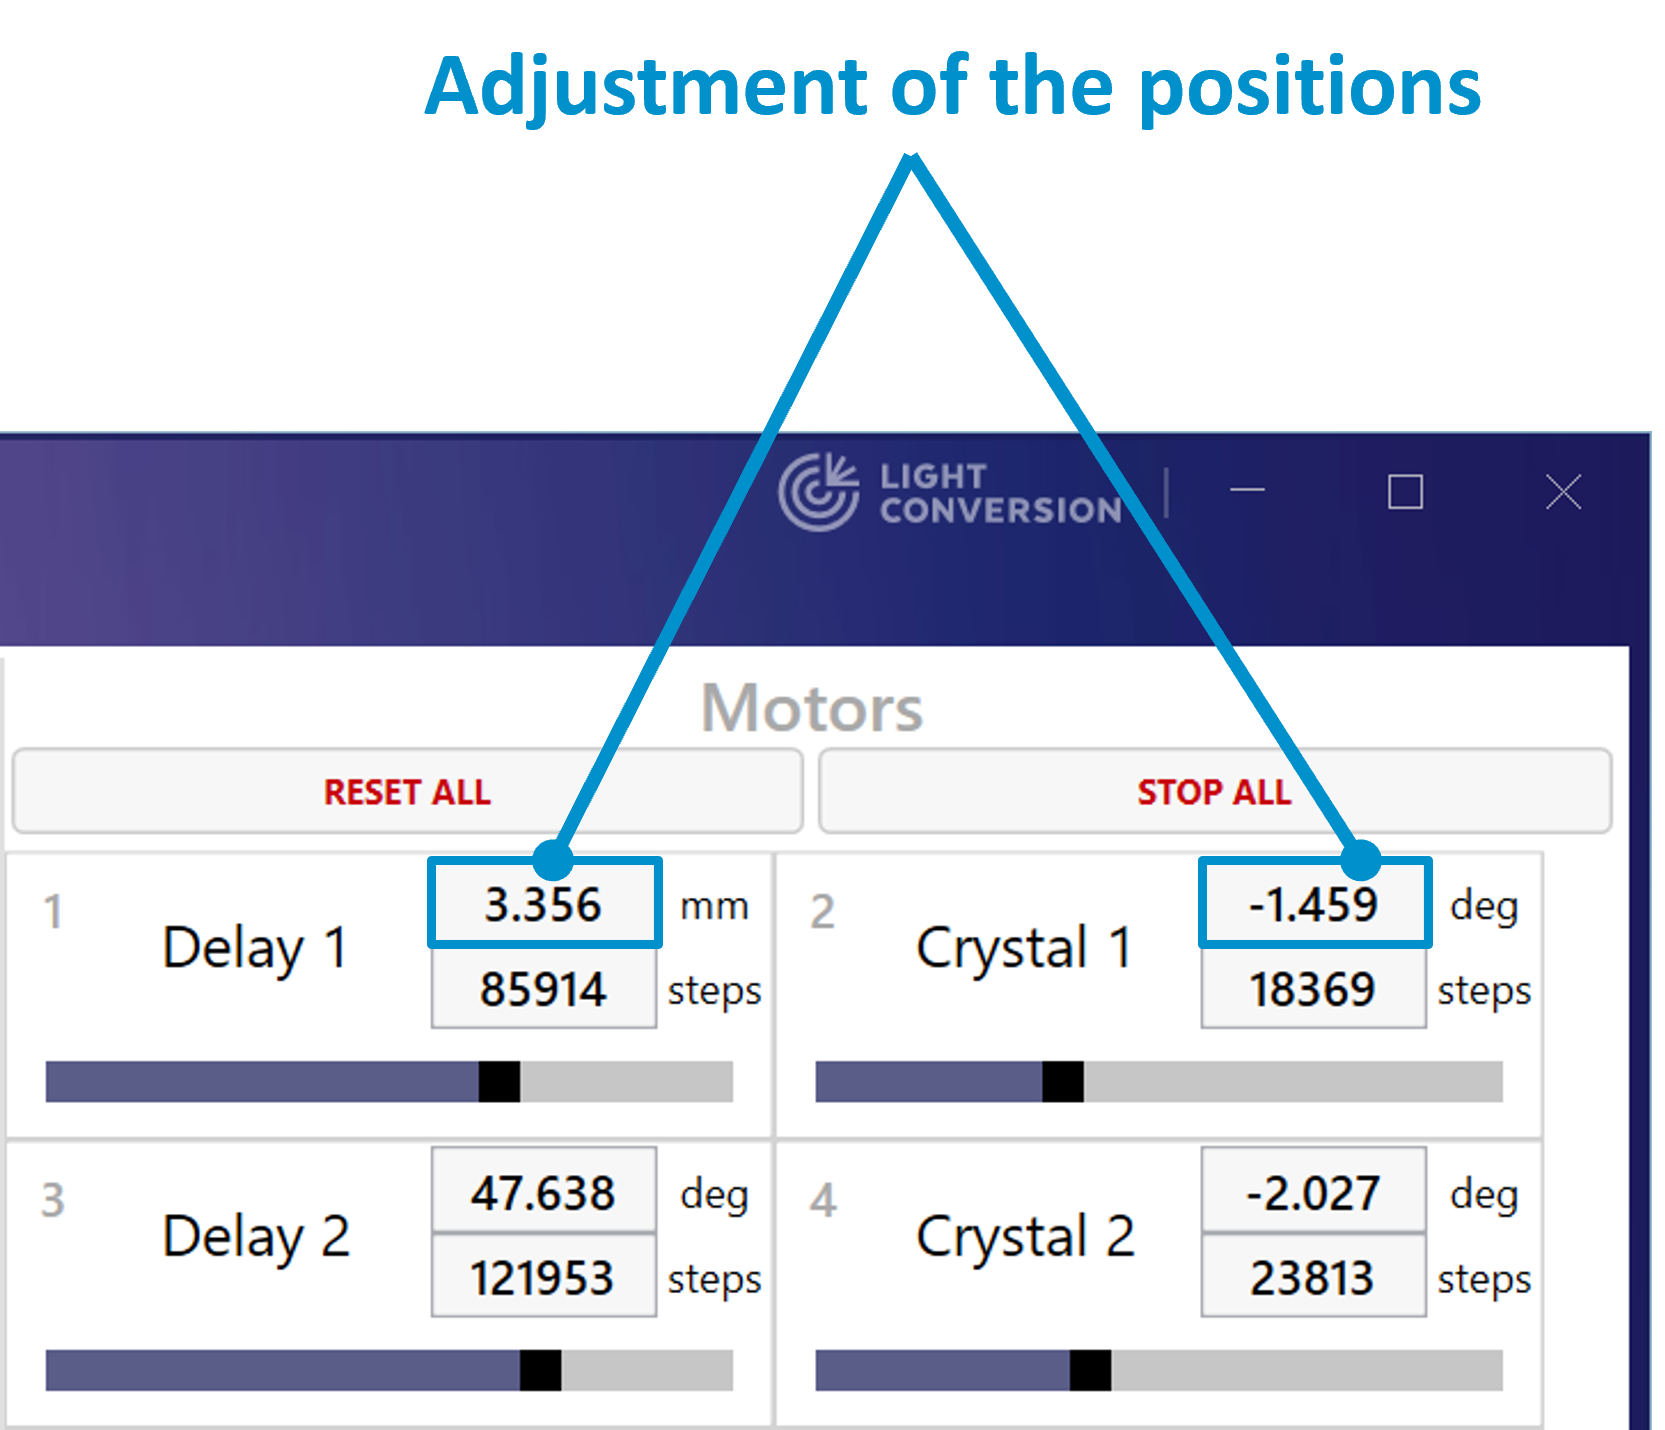
Figure 21. Adjusting motor positions in WinTopas4.
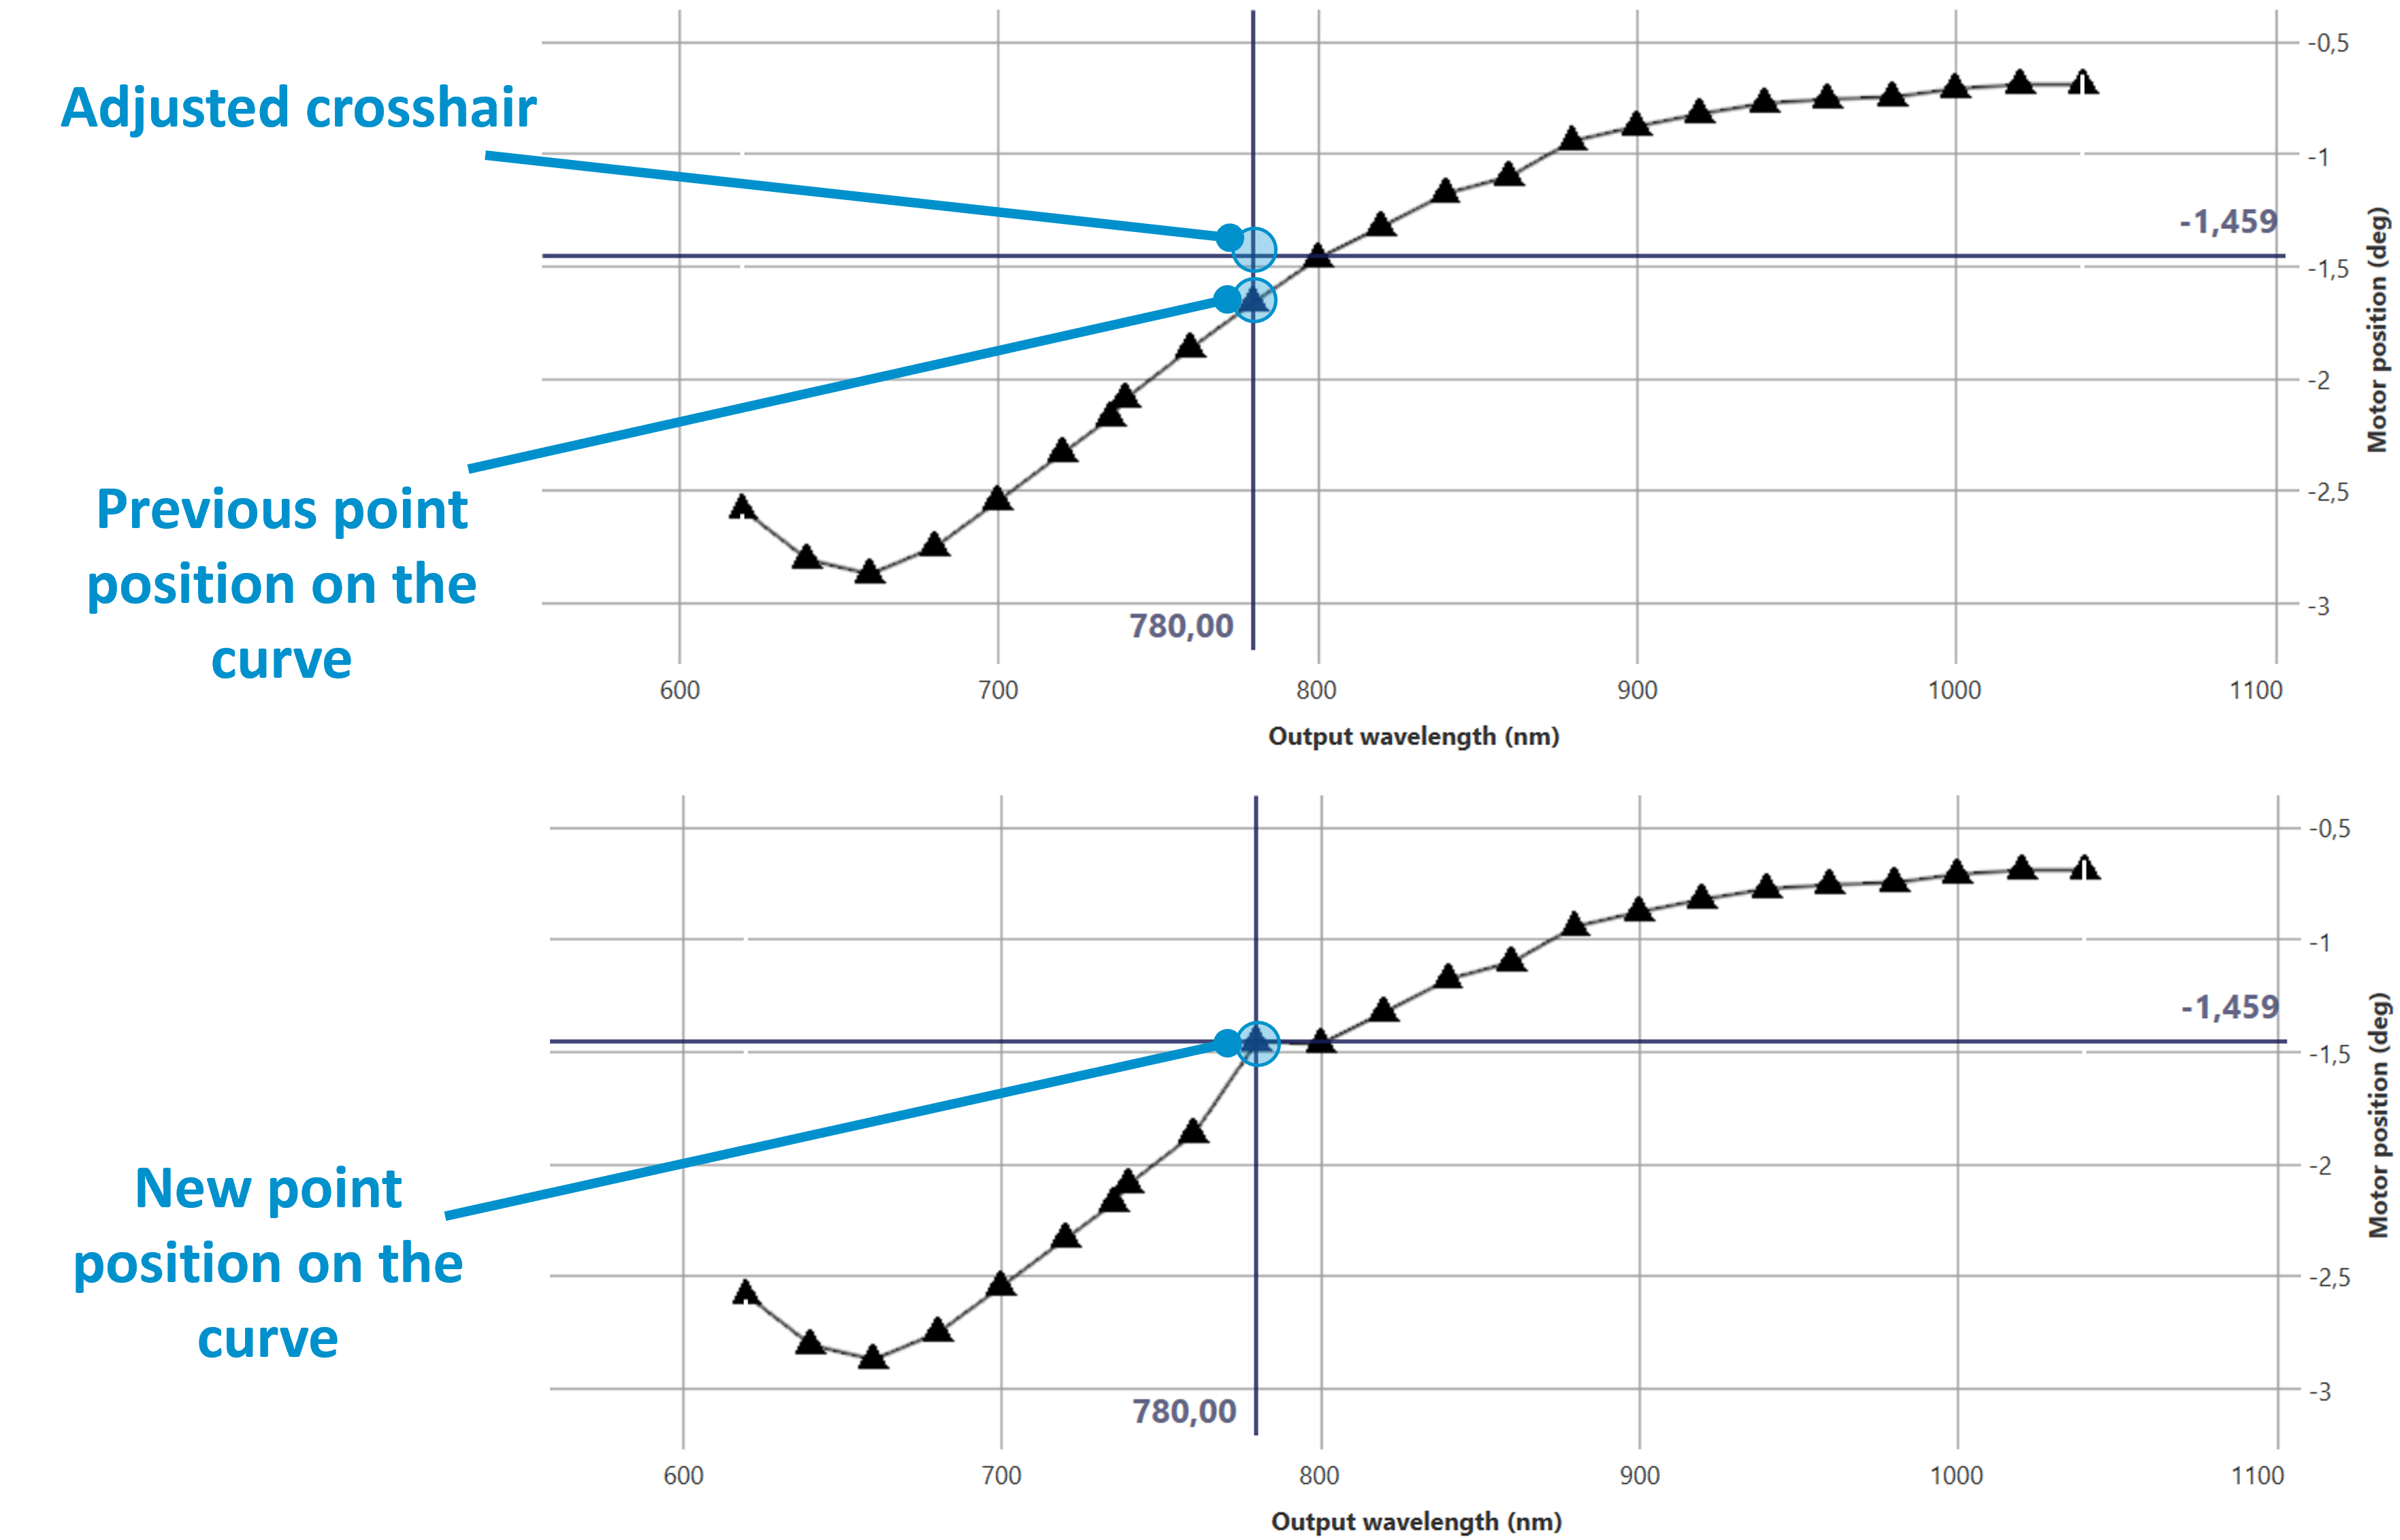
Figure 22. Adjustment of the motor position on the calibration curve in WinTopas4
Navigating between the motors can be done by clicking on the desired motor in the Motors control window. To simplify switching between the motors, motor selection shortcuts can be utilized. Each motor has an assigned number (see Figure 23) and can be quickly activated by holding the left “Alt” key and pressing its corresponding number on the keyboard.
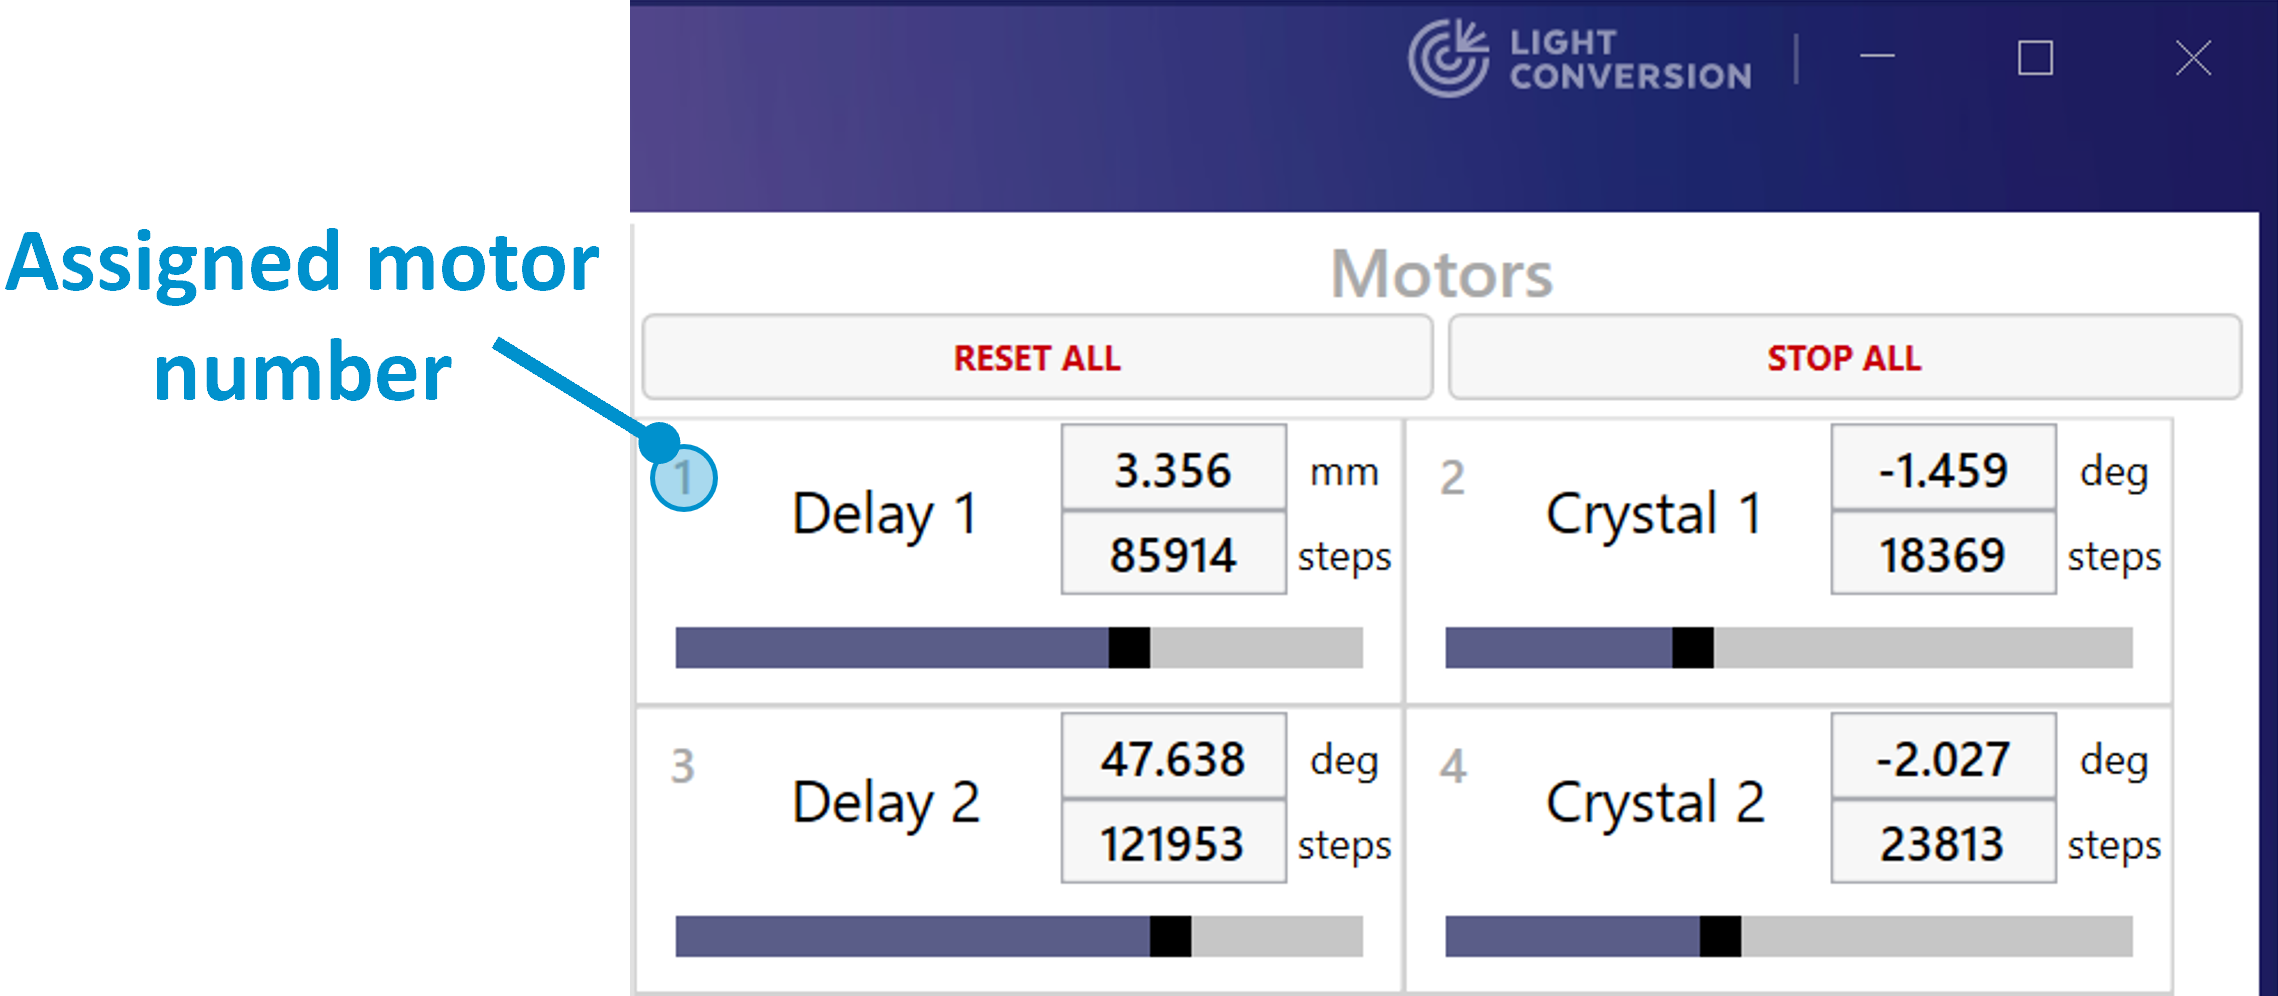
Figure 23. Assigned motor numbers in WinTopas4.
Usually, several motors need to be adjusted for each wavelength on the curve. If there is more than one motor that was moved during the adjustment “Alt + Enter” keyboard combination can be used. This keyboard shortcut will save all altered motor positions and automatically move to the next point on the curve. Perform these actions for the whole curve to finish the tuning. The list of shortcuts can be accessed by clicking the “Question mark” as shown in Figure 24.
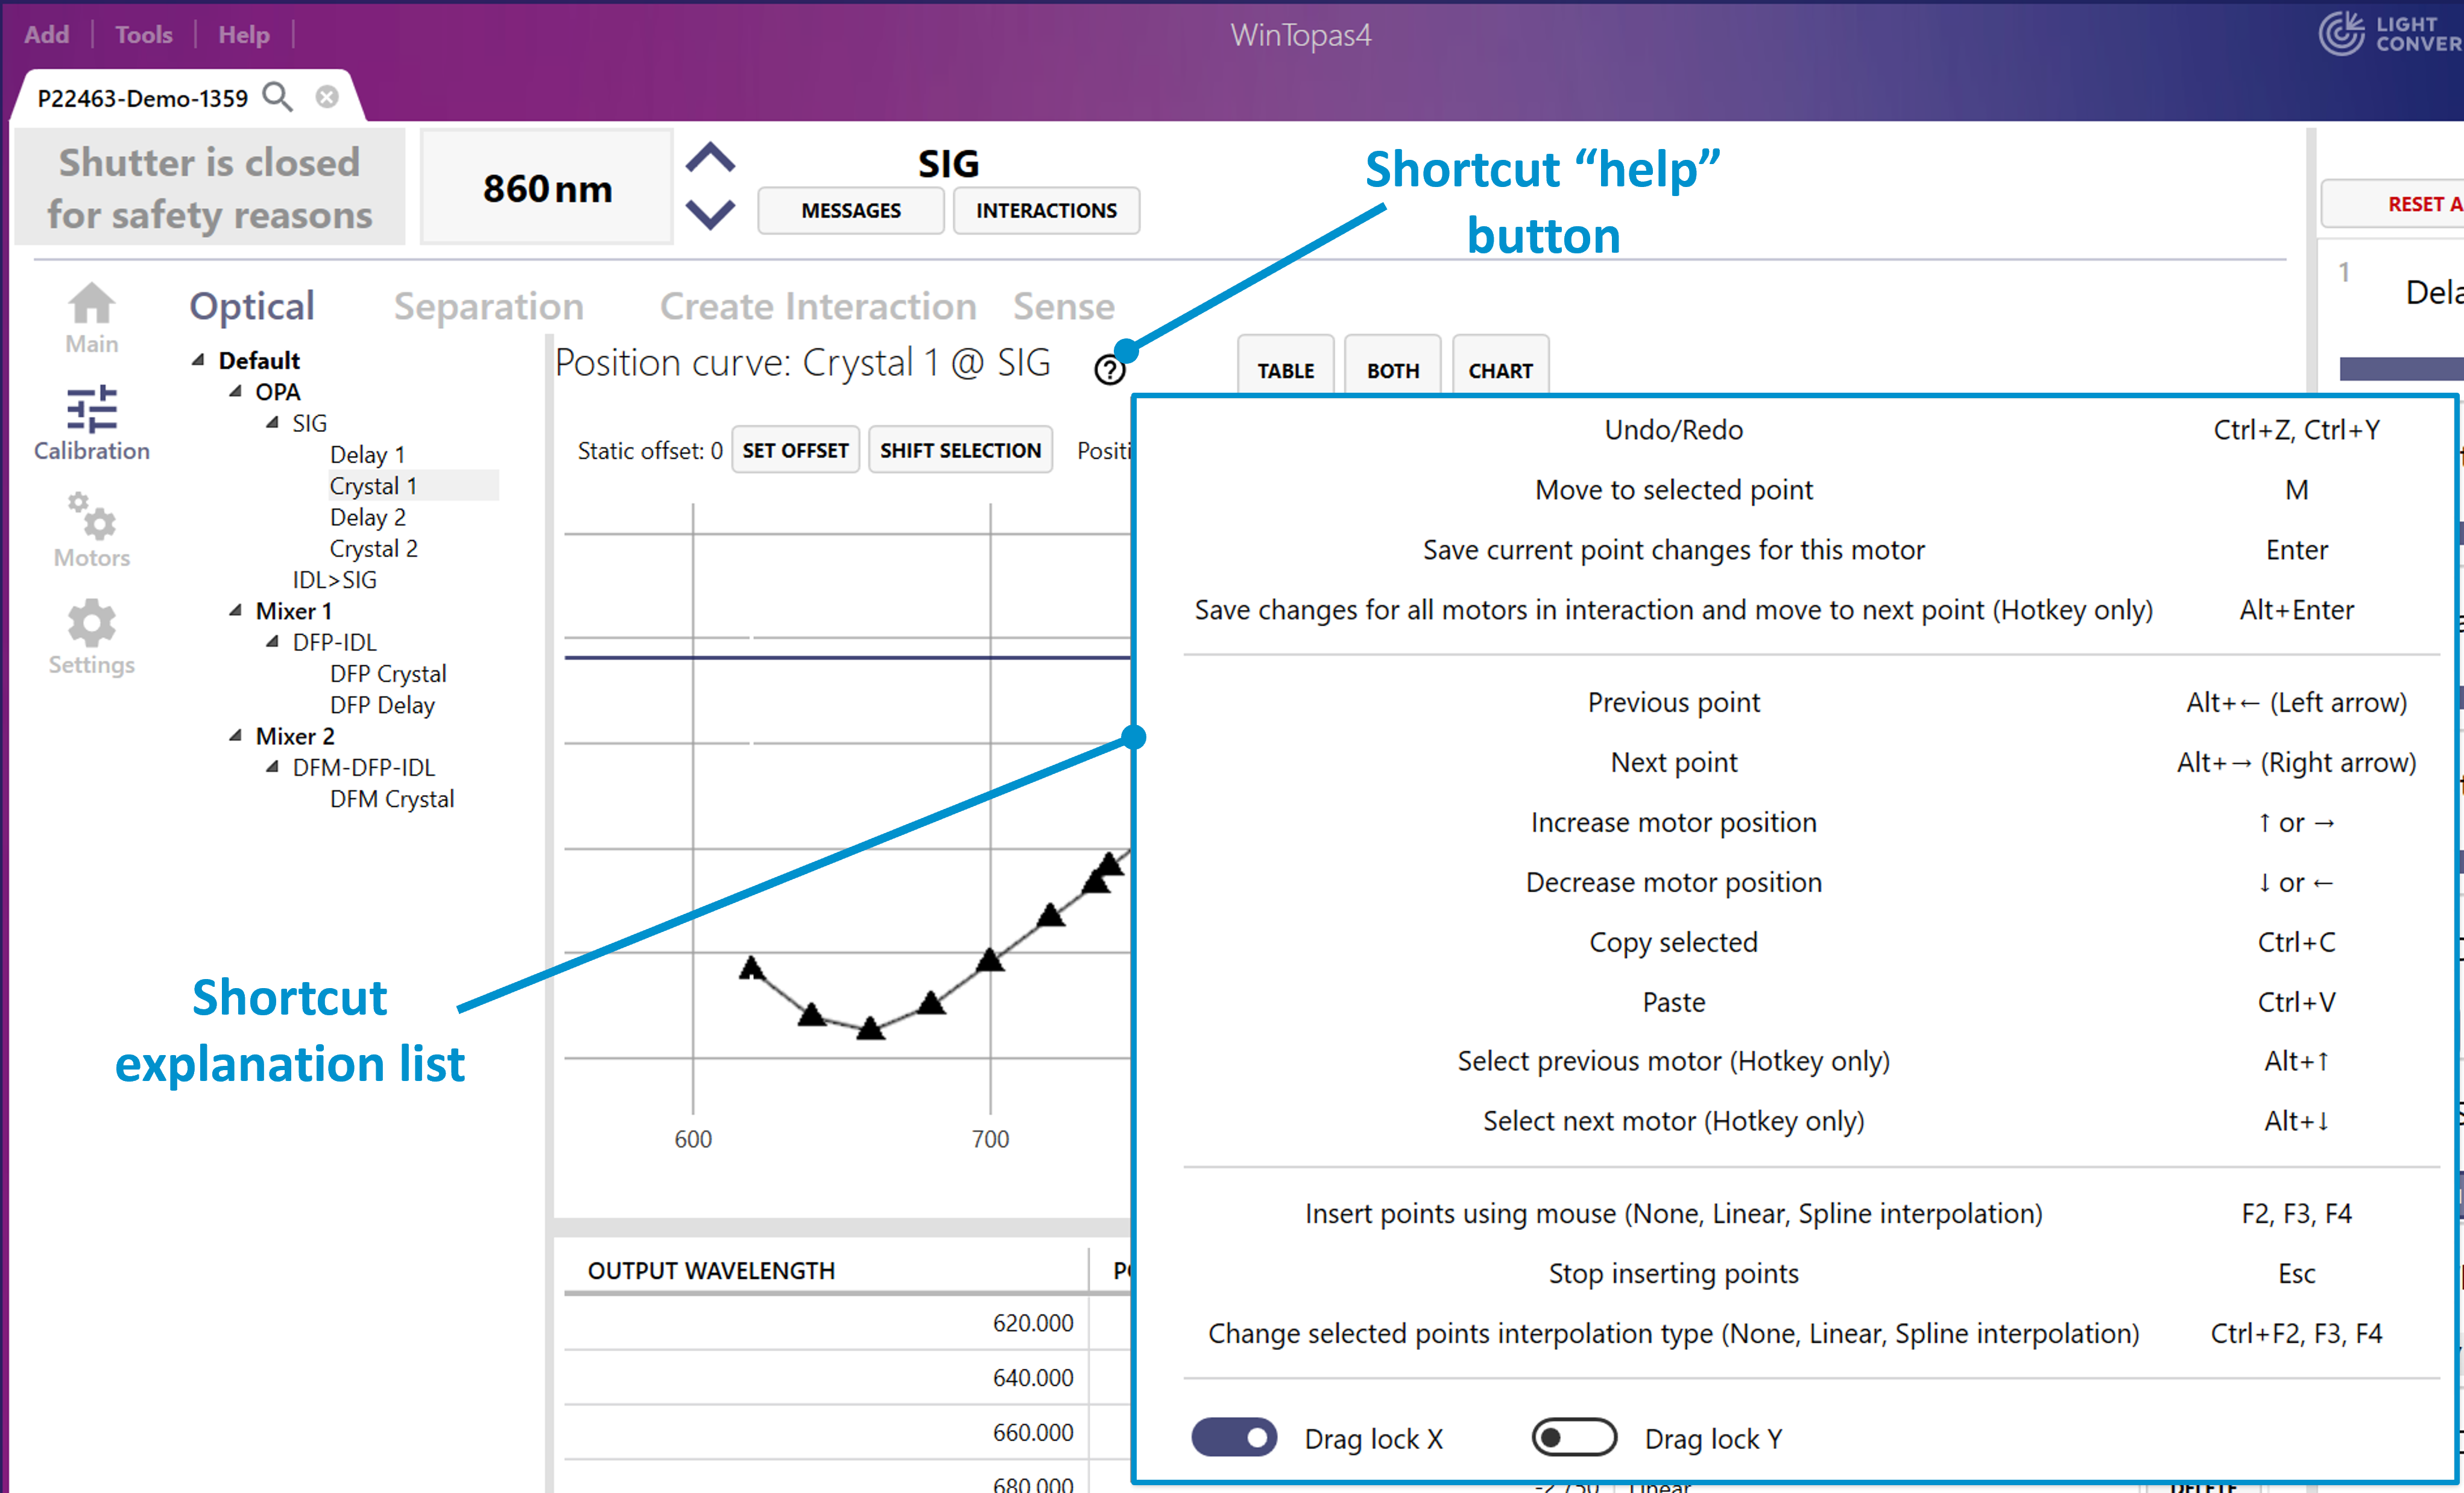
Figure 24. Shortcut list in WinTopas4.
If the whole curve needs to be shifted by some amount the “Offset” function can be used. Select any point on the curve and adjust the motor position. Clicking the “Offset” button will add the offset to all the points in the curve (see Figure 25). Afterwards, the actual calibration data can be shifted by pressing “Shift curve to make offset zero” button and the offset becomes zero as shown in Figure 26.
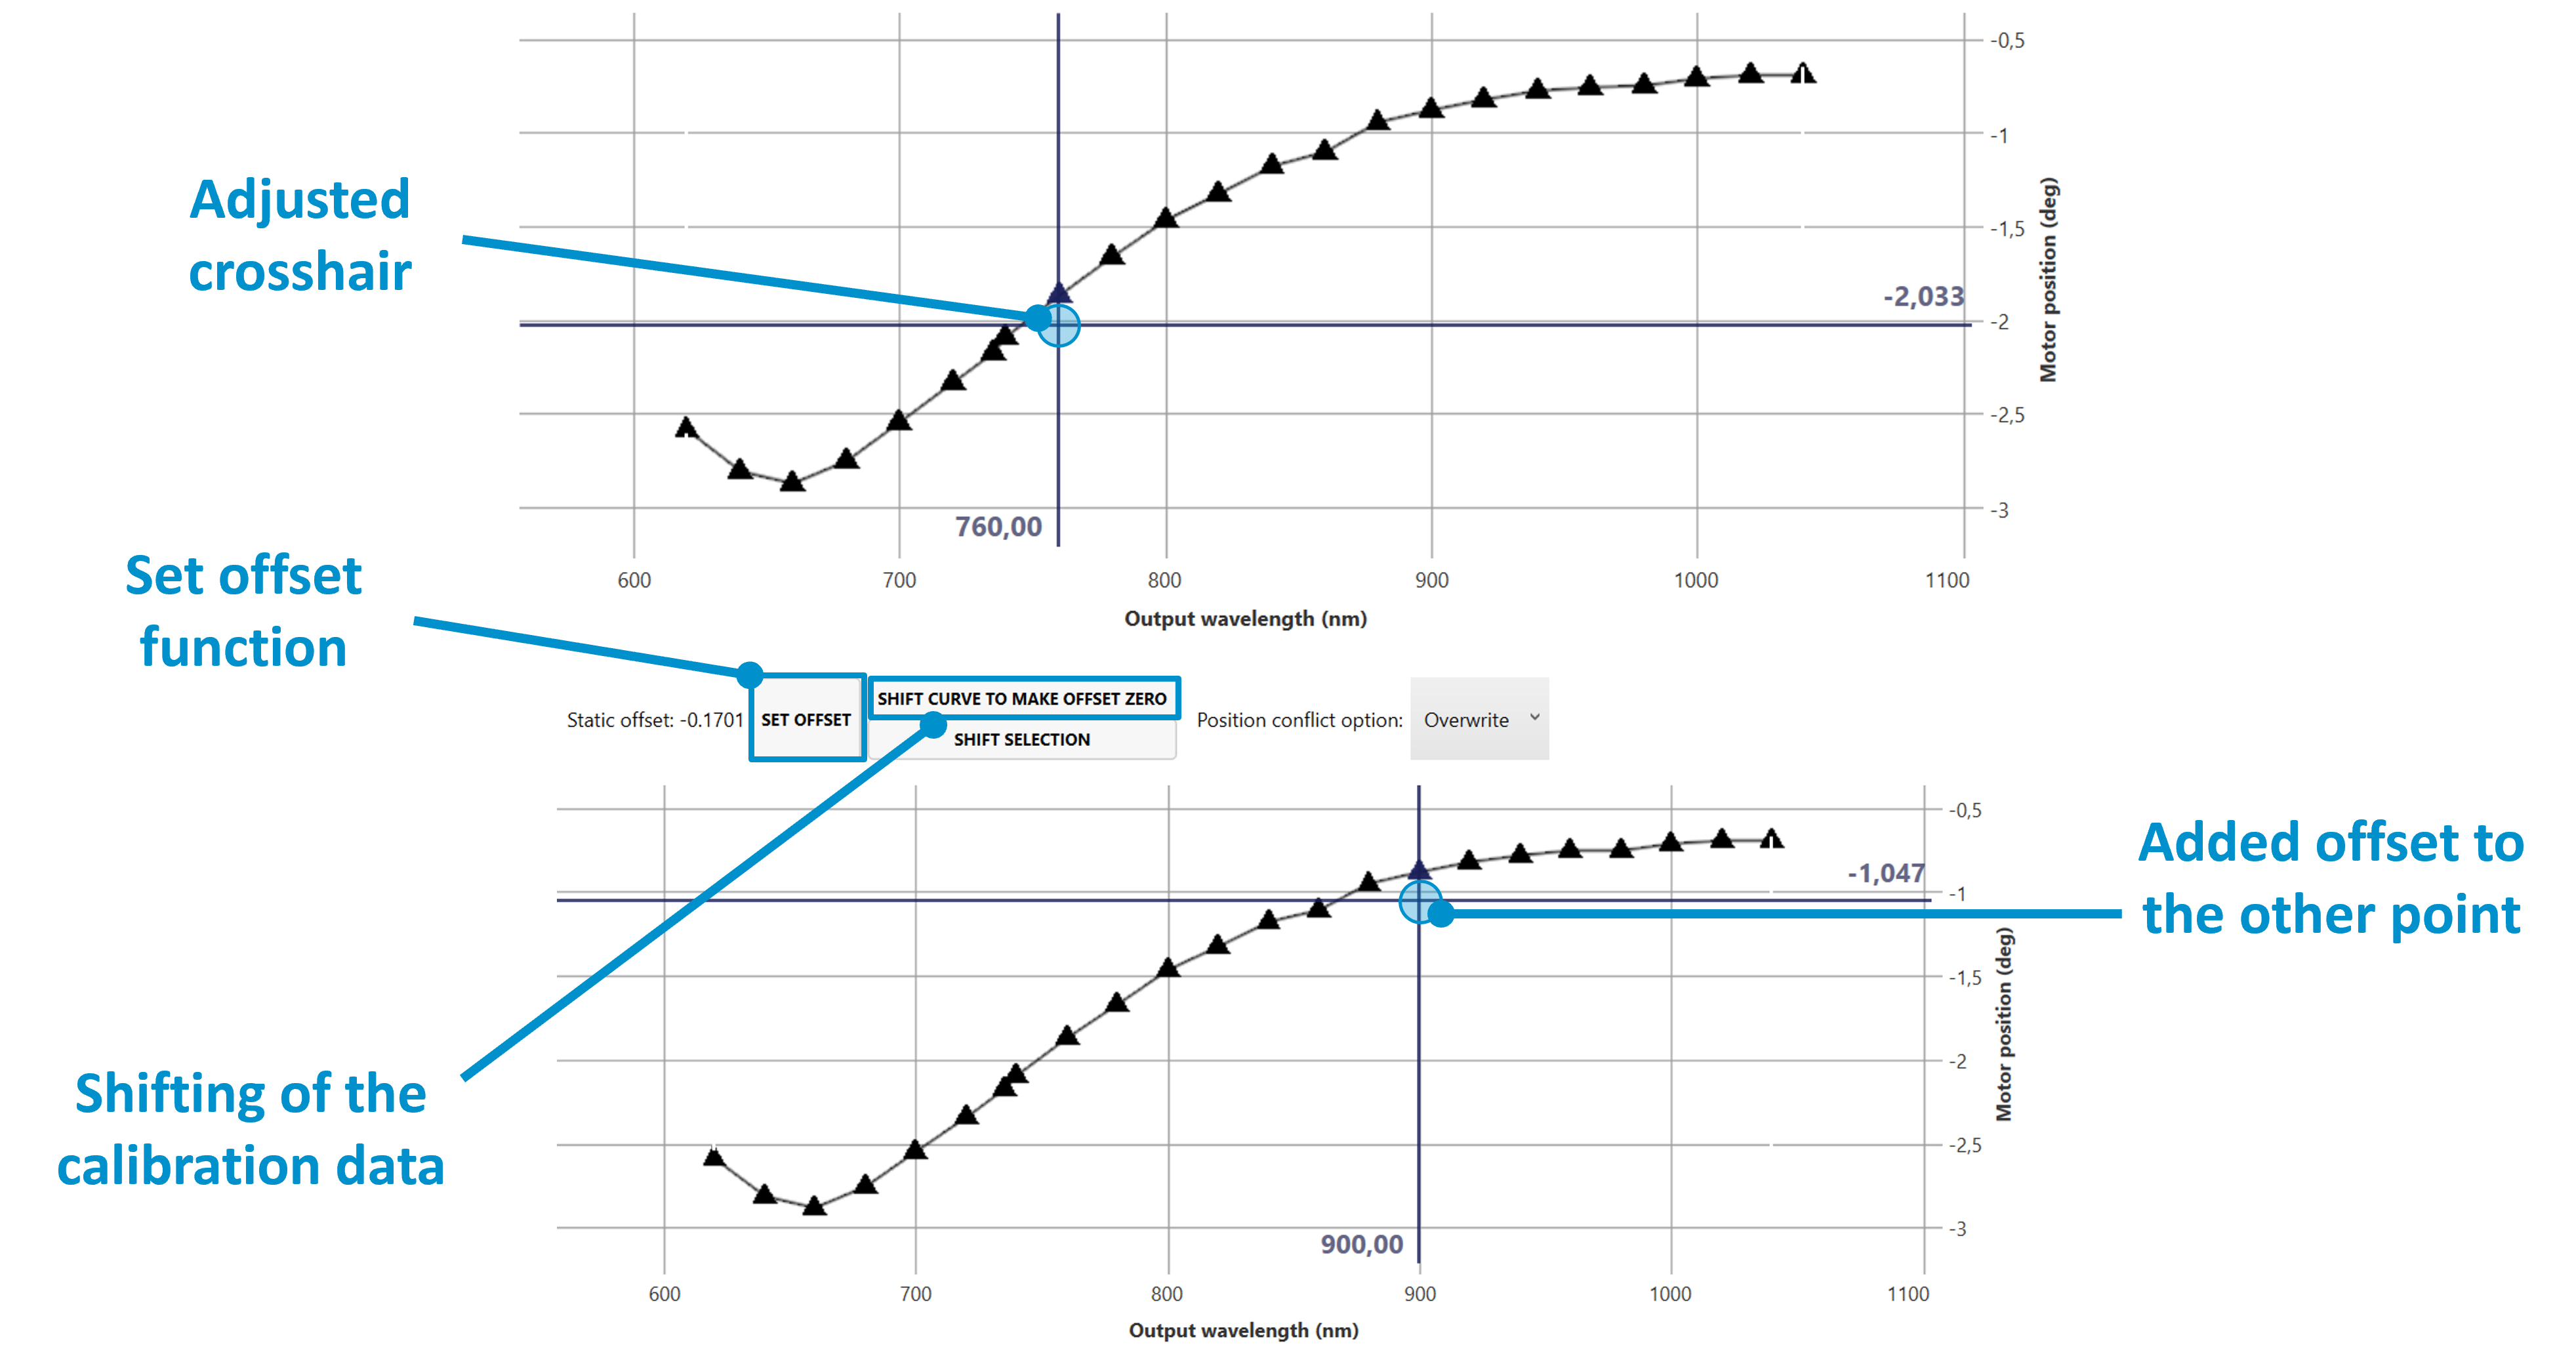
Figure 25. Offset function on wavelength points in WinTopas4.
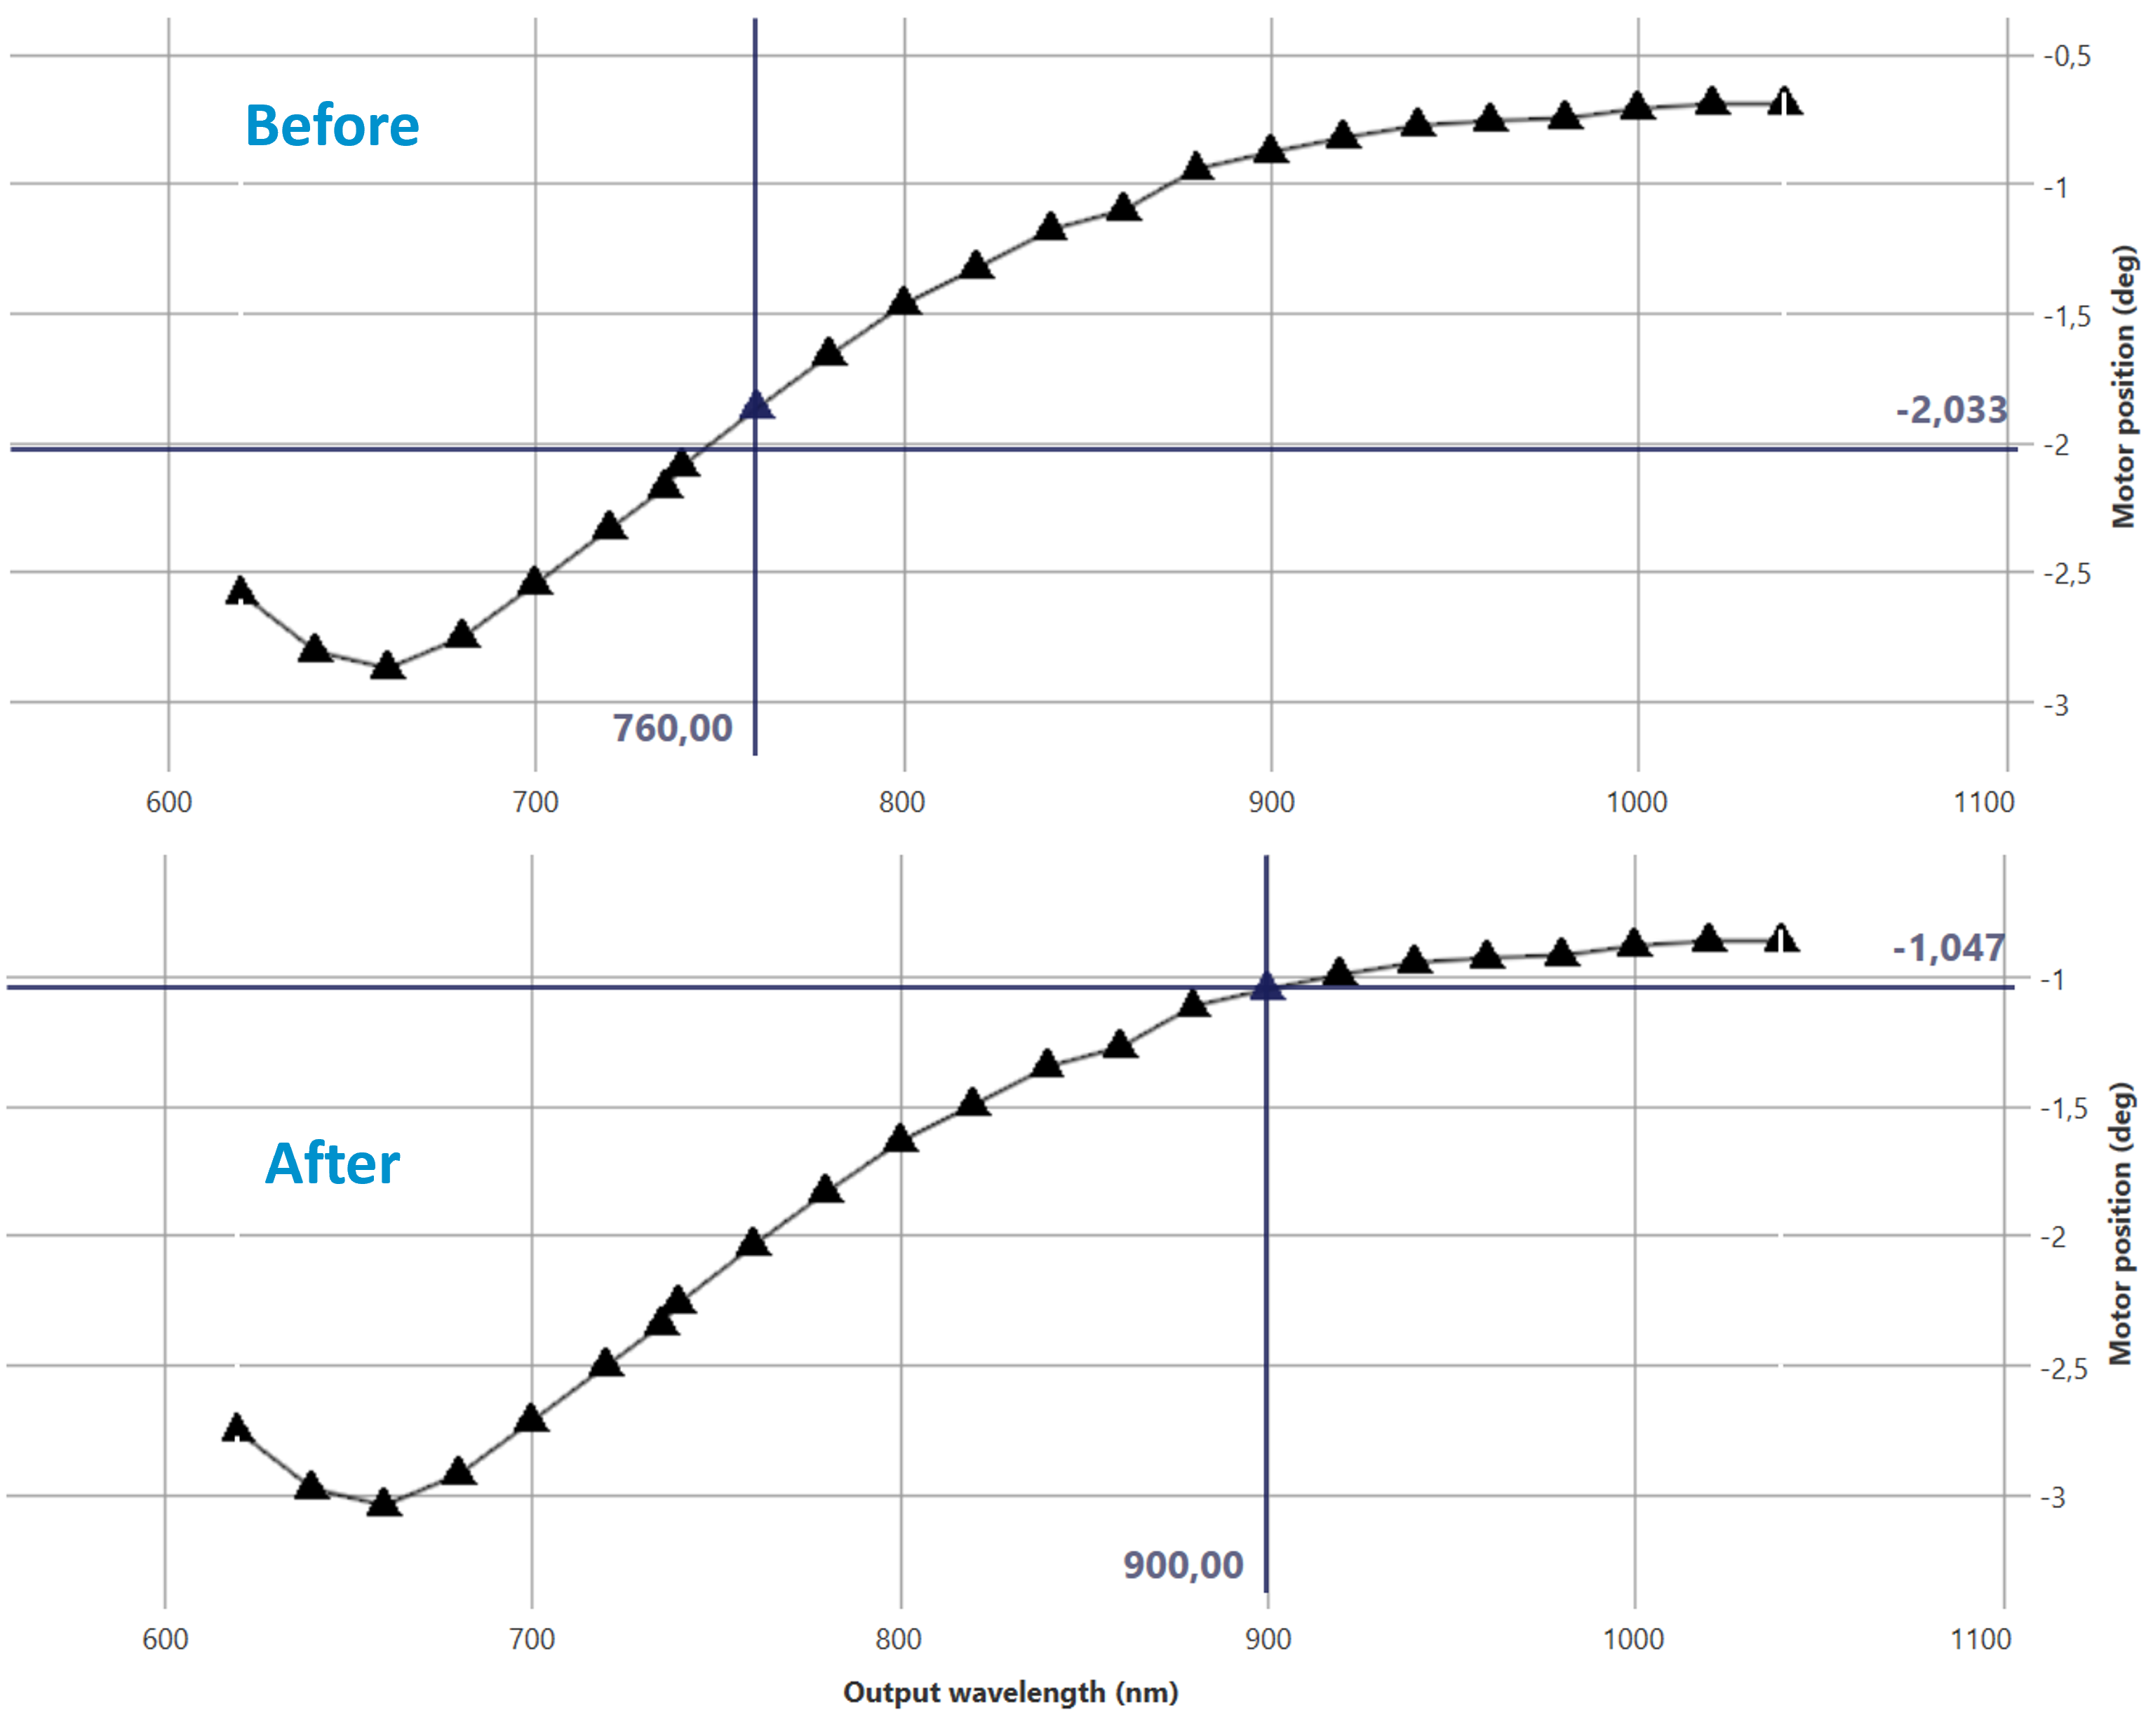
Figure 26. Shifted calibration curve in WinTopas4.